The 4T65E is GM’s workhorse front-wheel-drive automatic. It went into nearly every transverse-engine GM platform from 1997 through the mid-2010s: Impala, Grand Prix, Monte Carlo, LeSabre, Park Avenue, Bonneville, Aztek, Rendezvous, Allure, Lacrosse, and more. If you work on GM vehicles and you do not see 4T65E units regularly, you are probably not doing much GM work.
It is a reasonably durable unit when maintained, but it has well-known weak spots. The failure patterns are consistent enough that an experienced tech can often predict what is wrong before the pan comes off. This post covers the three failures I see most often, plus the input shaft seal issue that causes external leaks and gets misidentified as something more serious.
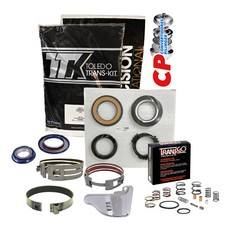
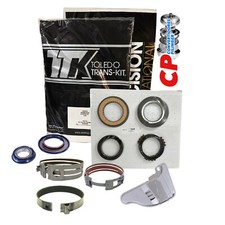
Failure 1: 3-2 Band Burnout
What the 3-2 Band Does
The 3-2 band in the 4T65E is a friction band that applies during engine braking when downshifting from third to second gear. It also plays a role in holding second gear under certain load conditions. When this band burns, the symptom is a missing or slipping 2nd gear, or a harsh clunk during 3-2 downshifts. In severe cases, the unit will not engage second at all and will drop from third directly to first.
Why It Burns
Two root causes: degraded fluid and a worn or misadjusted band apply pin. The band apply pin on the 4T65E comes in multiple lengths, and if the wrong length pin is installed (or if the correct pin is worn down), the band does not apply with full force. Partial apply generates heat and accelerates wear. Deferred fluid changes compound the problem because degraded ATF reduces the friction coefficient of the band material.
Sonnax puts numbers on the geometry: typical servo pin stroke on these units is about 0.400 in., and their extended-length forward band servo pin is roughly 0.200 in. longer, which halves the band-to-drum clearance gap and speeds up apply. Their tech material ties the repeat broken or burnt forward band directly to two things together: an intermittent pressure-rise problem at the pressure control solenoid causing slip or chatter on takeoff, and the excessive clearance the OE pin leaves. Fixing only one of the two is why the band comes back. The extended pin kit is part 84571-01K, and it carries two sealing rings to stop leakage past the pin itself.
Diagnostic Steps
Scan for codes first. A slipping 2nd gear will often set a P0732 (Gear 2 Incorrect Ratio). Confirm the symptom by monitoring commanded versus actual gear in live data. If second gear is commanded and TCC slip shows high RPM with low vehicle speed, the band is not holding. Drop the pan and look at the fluid condition and pan contents. Dark fluid with band material (fibrous brown debris, not the metallic glitter from hard parts) confirms band burnout. Measure the band apply pin length against the specification for your application before reassembly.
Failure 2: Wave Plate Failure
Before the mechanical description, the number that actually matters. Wayne Colonna, writing in Transmission Digest, documents that clearance in the 4T65-E 2nd and 3rd clutch packs is routinely excessive, that GM publishes no clutch clearance specification for these packs, and that on some units the clearance exceeds 0.130 in. with no visible distress on the plates. All that oil has to fill the cylinder and squash the wave plate flat before the clutch holds anything. The bench rule he gives is 0.008-0.012 in. of clearance per friction, which puts the six-friction second clutch at 0.048-0.072 in. total, and one to three 0.090 in. steels (about 0.020 in. thicker than OE) will pull a loose pack back into that window.
That same article explains why the failure hides for months and then shows up as a code. The PCM's adaptive modifier raises line pressure to cover the slip first; only when that fails does it set anything. P1811 sets when a shift takes longer than 0.65 second and adapt cannot shorten it, twice in one drive cycle. P0730 sets when the PCM sees excessive slip in a gear for more than six seconds. Second-clutch slip shows up in second, third and fourth; third-clutch slip shows up only in third. Read the shift error, shift time and TAP cell parameters and the pressure compensation will point you at the loose pack.
What the Wave Plate Is
The wave plate (also called a waved snap ring or cushion plate) sits in the 2nd clutch pack on the 4T65E. Its job is to provide a slight cushion during clutch apply to reduce shift harshness. When the wave plate fatigues and flattens, the 2nd gear clutch apply becomes harsh and the shift quality degrades. When the wave plate fractures, it generates debris that contaminates the valve body and accelerates wear throughout the unit.
Symptoms
Harsh 1-2 shift that develops gradually. The shift starts to feel like a firm bump and progresses to a clunk. In some cases the shift is accompanied by a brief flare before 2nd gear catches. If the wave plate has fractured, you will find small metal fragments in the pan. These fragments are thin, crescent-shaped steel pieces — visually distinct from clutch material. If you find them in the pan, assume valve body contamination and plan to clean or replace the valve body during the rebuild.
Diagnostic Steps
Road test and note the specific shift that is harsh. On the 4T65E, wave plate issues almost always show up on the 1-2 shift. Connect a scanner and check for shift solenoid codes. A P0751 or P0752 (Shift Solenoid A Performance) can result from valve body contamination caused by wave plate debris. Drop the pan and inspect. If the wave plate has not fractured yet, the pan contents will look relatively clean but the filter may show early contamination. The fix is an upgrade to the revised wave plate or a wave plate delete kit during rebuild.
Failure 3: Input Shaft Seal Leak
Where the Leak Comes From
The 4T65E has a right-side axle that runs through the transaxle to a stub shaft. The seal where this shaft exits the case is a known failure point. When it leaks, fluid runs down the front subframe and pools under the vehicle near the passenger front tire. Customers frequently describe it as an oil leak, and some shops misdiagnose it as a power steering leak or engine oil leak because of the location.
How to Confirm It
Clean the suspected area and drive the vehicle for a day. Use a UV dye kit and a black light if the source is ambiguous. ATF shows bright yellow-green under UV light. If the drip is coming from the right side of the transaxle at the axle shaft exit point, it is the input shaft seal. This seal can be replaced without pulling the transaxle on most 4T65E applications. Remove the right axle shaft and drive the old seal out. Press in the new seal to the correct depth — check the service manual for the exact specification.
While You Are In There
The right axle shaft has a snap ring that retains it in the differential side gear. Inspect the snap ring and the axle shaft splines when the shaft is out. If the splines show wear or the snap ring is deformed, replace both. A loose axle shaft in the differential can cause a clunk on acceleration that gets misdiagnosed as a CV joint or motor mount problem.
Failure 4: TCC Shudder and Apply-Valve Bore Wear
Why the Converter Clutch Slips
Sonnax's description of the mechanism is specific: continuous oscillation of the converter apply valve in the cast-aluminum bore wears the bore, worst at the TCC signal valve spool nearest the solenoid, and the valve body casting and oil flow side-load that valve hard enough to accelerate the wear. Once the bore leaks TCC signal oil, the valve cannot stroke to the lockup position. The complaint list that goes with it: no lockup, code P0741, falls out of lockup when hot, converter shudder and high TCC slip RPM.
The most misdiagnosed 4T65E complaint is torque converter clutch shudder or slip that gets blamed on the converter when the real fault is in the valve body. The TCC regulated apply valve rides in a cast-aluminum bore, and the constant oscillation of the valve plus heavy side loading wears that bore oval — especially at the signal-valve spool closest to the solenoid. Once the bore wears, TCC signal and regulated apply oil leak past the valve, apply pressure drops, and the clutch slips instead of locking. Per Sonnax, that wear pattern is what sets code P0741 (TCC system stuck off / performance) and drags occasional ratio codes along with it.
The Overpressure Side of the Same Problem
The flip side is just as damaging. The 4T65E converter piston is designed to work around 135 psi of apply pressure, but the factory apply-pressure relief does not crack until roughly 175 psi and can let pressure climb past 225 psi during max-adapt or code conditions. That overpressure cooks converters. Sonnax addresses both ends with the TCC regulated apply valve kit (84754-34K) for the worn bore and a recalibrated TCC apply relief valve (84757-01K) set to crack at the design 135 psi.
Bob Warnke of Sonnax lays out the pressure chain behind this in “Troubleshooting the 4T65-E: A Matter of Interpretation”: line pressure from the pressure regulator valve feeds the AFL valve, which limits the maximum pressure reaching the pressure control (EPC) solenoid, and line pressure also runs through the TCC regulator valve to apply the converter piston. His point is that incorrect operation of any of those valves can raise both line and apply pressure. The symptom list he gives is worth keeping on the bench: harsh TCC apply, stall on engagement, coastdown shudder, noise, and no movement from a plugged filter. That is why I check the regulator, boost and AFL circuits before I blame the converter.
Diagnostic Steps
Before condemning a converter for shudder: pull codes and look for P0741, then watch TCC slip RPM in live data during a light-throttle cruise in fourth. Steady slip of more than about 20-30 RPM with the clutch commanded on points at apply pressure loss, not necessarily a bad converter. Inspect the TCC apply valve bore for wear and check the separator-plate orifices for contamination before you order a torque converter. A fresh converter bolted behind a worn apply-valve bore shudders again within weeks.
Fluid Requirements and Service Intervals
The 4T65E takes Dexron VI in all applications. Dexron VI is backward-compatible and is GM’s only approved service fluid for units originally filled with Dexron III (GM Dexron-VI spec). Mobil’s DEXRON-VI product data says the same thing from the fluid side: it meets GM’s DEXRON-VI specification, carries warranty protection for 2006 and newer GM vehicles, and is intended for older GM vehicles wherever DEXRON is specified. GM’s factory spec is a drain and fill at 50,000 miles under normal conditions and 25,000 miles under severe duty (frequent towing, short trips, extreme temperatures). In practice, most of the units that come into my shop have never had a fluid service. The fluid is black, the filter is packed, and the valve body passages are partially restricted. Do not skip the filter — the 4T65E filter is internal and accessible only by dropping the pan.
One note specific to the 4T65E-HD variant used in the Bonneville GXP and other higher-output applications: this unit has a larger torque capacity and slightly different calibration, but the fluid type and service intervals are the same as the standard 4T65E. If the vehicle has a supercharged engine, assume it has been driven harder and inspect the 3-2 band and wave plate more closely at service time.
Sources
- Sonnax — TCC Regulated Apply Valve Kit 84754-34K. Apply-valve bore wear, TCC slip, and code P0741 on GM 4T65-E units. sonnax.com/parts/2561-tcc-regulated-apply-valve-kit
- Sonnax — TCC Apply Relief Valve 84757-01K. Converter piston design pressure (135 psi) versus OE relief crack pressure (175–225 psi) and converter failure from overpressure. sonnax.com/parts/2589-tcc-relief-valve
- Sonnax — TCC Apply Valve Kit 84754-43K (related 4T65-E converter-clutch apply-circuit repair). sonnax.com/parts/2567-tcc-apply-valve-kit
- ExxonMobil — Mobil DEXRON-VI ATF product page. Backs the fluid call: meets or exceeds GM’s DEXRON-VI specification, provides warranty protection for 2006-and-newer GM vehicles, and improves performance in older GM vehicles wherever DEXRON is specified. mobil.com — Mobil DEXRON-VI ATF
- Wayne Colonna (ATSG), “The 4T65-E: Slip-Sliding Away,” Transmission Digest. Backs the excessive 2nd and 3rd clutch pack clearance (over 0.130 in. on some units), the absence of a published GM clearance spec, the 0.008-0.012 in. per friction rule, the 0.090 in. corrective steel, and the P1811 (0.65 second shift, twice in a drive cycle) and P0730 (slip over six seconds) set conditions. transmissiondigest.com/the-4t65-e-slip-sliding-away
- Sonnax — “Stop 4T60-E, 4T65-E Case Wear, Band Slippage & Breakage With a Longer Servo Pin.” Backs the roughly 0.400 in. typical servo pin stroke, the approximately 0.200 in. longer Sonnax pin, the pressure-control-solenoid slip-on-takeoff contribution to band burnout, and the two sealing rings on the replacement pin. sonnax.com — longer servo pin
- Sonnax — Extended Length Forward Band Servo Pin Kit 84571-01K (GM 4T60-E, 4T65-E). Backs the part number and application for the forward band servo pin correction. sonnax.com/parts/4513-extended-length-forward-band-servo-pin-kit
- Sonnax, Bob Warnke, “Troubleshooting the 4T65-E: A Matter of Interpretation.” Backs the pressure regulator to AFL valve to EPC solenoid chain, the TCC regulator valve feeding converter apply, incorrect valve operation raising both line and apply pressure, and the symptom list (harsh TCC apply, stall on engagement, coastdown shudder, noise, no movement from a plugged filter). sonnax.com — Troubleshooting the 4T65-E