The 68RFE is the six-speed automatic behind the 6.7 Cummins diesel in RAM 2500 and 3500 trucks. It is a strong unit by light-duty standards, but it is also a transmission that was designed to handle a specific torque range and gets pushed well beyond that by owners who add power to the Cummins without reinforcing the transmission. Even in stock form, it has documented weak points that show up at predictable mileages if maintenance is not followed. Understanding those weak points is the difference between a repair and a rebuild.
For more on Dodge and RAM transmissions, visit our Dodge transmission hub and RAM transmission hub.
Weak Point 1: The Underdrive Clutch
What It Does
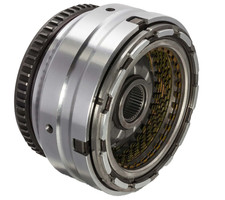
The underdrive clutch in the 68RFE handles first and second gear. It is the most torque-loaded clutch pack in the unit because it operates under maximum engine torque output during acceleration from a stop. On diesel trucks, that torque can be substantial even in stock form. The clutch pack is not undersized by design, but it operates at the edge of its capacity in heavy use -- towing, repeated hard launches, aggressive driving with a diesel's torque curve.
Symptoms
Underdrive clutch wear shows up first as slip in first gear under load. The driver notices that the truck launches weakly under heavy throttle, with the RPM rising more than expected before the truck accelerates. The 2-1 downshift under deceleration may also feel soft. P0730 (Incorrect Gear Ratio) is the code most commonly associated with underdrive clutch slip, though it can also appear without a code in early-stage wear.
Diagnostic Steps
Pull codes and check for P0730. Monitor slip RPM in first gear under load with a scanner -- the Autel MS906BT can display the input versus output speed ratio in real time, which is the most direct way to confirm underdrive slip. Also check fluid condition. Degraded ATF+4 reduces the friction coefficient of the clutch packs and accelerates wear. If the fluid is dark and over-mileage, a fluid service is the starting point even if you suspect clutch wear.
When It Fails Completely
Advanced underdrive clutch failure means no engagement in 1st or 2nd gear. The truck starts in what feels like 3rd gear. This requires an internal repair. The unit comes out, and the underdrive drum and clutch pack need inspection. Depending on the severity of wear, the drum may be scorable and require replacement rather than just a new clutch pack.
Weak Point 2: The Accumulator Spring
What It Does
The accumulator in the 68RFE dampens the pressure rise during clutch apply, smoothing the shift feel. The accumulator spring controls how quickly pressure builds during the apply event. When the spring weakens -- which happens over time and heat cycles -- pressure builds faster than designed. The result is a harsh 1-2 shift. The spring does not break; it loses tension. You will not see it in the pan and there is no code for it. The only symptom is the shift quality change.
Symptoms
Harsh, firm, or clunky 1-2 upshift. Customers describe it as a "thud" when the truck hits 2nd gear. The symptom is often present from cold and may or may not improve as the fluid warms. It is not load-dependent the way clutch pack slip is -- even at light throttle, the 1-2 shift is noticeably firmer than it was when the truck was newer.
Diagnostic Steps
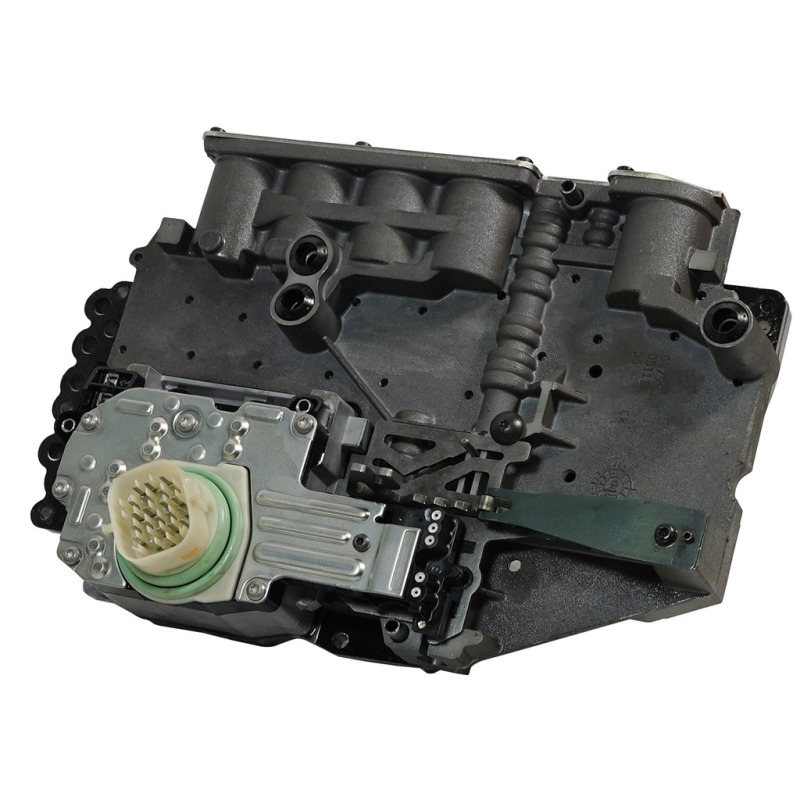
Rule out fluid condition first. Fresh ATF+4 has appropriate viscosity and friction properties. If the fluid has been in the truck for 60,000+ miles, a fluid service will change the shift feel slightly regardless. If the 1-2 shift is still harsh after a fluid service with fresh ATF+4, the accumulator spring is a likely cause. This is a valve body service -- the spring is accessible without pulling the transmission in most configurations.
Weak Point 3: The Overdrive Clutch Pack (The One That Usually Goes First)
Why It Is So Fragile
If you only read one section here, make it this one. Sonnax's teardown write-up on 68RFE overdrive failure, published in Transmission Digest, calls the overdrive clutches the most common failure point of the unit, with significant weak points even at stock power levels. The numbers explain why: the OD clutches are single sided and the steel core is only.034 in. thick. For comparison, the OE steels in the direct clutch pack of a 4L80-E are.080 in. That lack of mass means very little tolerance to heat and poor heat dissipation. Once the clutches heat past a certain point they distort, which decreases clearance, keeps them from releasing fully, and burns them.
The clutch pack is the visible symptom, not the whole cause. The same article identifies the OE overdrive housing as a contributor, because the top of the housing is not strengthened or supported and flexes under apply, opening clearances beyond spec. Sonnax draws the direct parallel to the 4L60-E input drums that had the same problem. Aftermarket housings that hold a taller pack with thicker steels and stop the flex are the fix most builders land on.
The Leak Behind the Burn: Solenoid Switch Valve Plugs
Before you blame the clutches, check the solenoid switch valve area. Caleb Perham's RFE troubleshooting piece in Transmission Digest puts the bore plug first on the list of things to check when overdrive clutches come back burned. There are three plugs in that location and two of them are in motion depending on the gear. On the 1-2 the switch valve strokes to feed the 2C clutch circuit, on the 2-3 the bore plug strokes against the switch valve, and on the 3-4 the plug strokes back the other way to feed the overdrive circuit and hold the switch valve. That constant cycling wears the casting and produces crossleaks into and out of the OD circuit, and the resulting pressure loss lowers clutch holding force until the pack slips and cooks. Vacuum test the bore and the plugs; if wear is severe, ream and fit oversized valves rather than reassembling and hoping.
The Stator Dribbler and Clutch Clearance
Perham's other two areas are worth the bench time. The overdrive dribbler valve in the stator sets the timing of the clutches coming on: a restricted dribbler delays overdrive apply and makes the clutches drag, while a leaking dribbler holds too much pressure in the circuit and keeps them slightly applied so they drag anyway. Test it with air pressure and confirm flow travels from the pump to the drum, not the other way. The dribbler is meant to be a controlled leak that pre-charges the circuit, so keep that in mind when setting clearance. On clearance itself: too tight shortens fill time, applies faster and can bind up; too loose lengthens fill time and drags the clutches until they overheat. Set it to spec, and run a fast learn after any repair so the unit recalibrates.
Note for 2019-and-Later Trucks
Do not assume a 2019+ core is interchangeable with what you rebuilt last year. Per Jim Dial's Sonnax identification guide, the 2019 68RFE for 2500-series trucks with the 6.7L took hydraulic control changes across the pump, valve body and solenoid pack: the TCC accumulator retainer, spring and piston were eliminated, the torque converter regulator valve changed dimensionally and picked up a bore plug and wire retainer, a lower valve body section was added to the channel plate housing a new reverse accumulator and a new TCC control solenoid, and the solenoid pack connector changed from gray to blue. Functionally, the added TCC solenoid means the low/reverse solenoid now only controls low/reverse clutch apply, where earlier versions had it handling TCC apply as well. The pressure regulator lineup was not changed and the solenoid switch valve stayed the same.
Fluid Maintenance: 30,000 Miles on Diesel Trucks
The 68RFE behind a diesel engine sees different operating conditions than the same transmission behind a gasoline engine would. The Cummins diesel produces peak torque at low RPM, which means the transmission is loaded heavily at low speeds during every acceleration event. The torque also spikes during engine braking events on downhill grades with a loaded trailer. These are high-stress conditions for the clutch packs.
I recommend fluid service every 30,000 miles on diesel-equipped 68RFE trucks. That is more conservative than what RAM publishes, and it is justified by the torque loads these units see. The pan drop at each service gives you a chance to inspect what is accumulating in the pan. A diesel truck that tows regularly with properly maintained ATF+4 at 30,000-mile intervals will outlast one following the manufacturer's service interval by a significant margin.
When you drop the pan: look at the filter condition, look at what is on the magnet, and assess the fluid color and smell. Clean magnetic material with dark but not burnt-smelling fluid is normal wear. Black fluid with a burnt odor and clutch material in the pan is a warning that the clutch packs are wearing faster than expected.
Line Pressure Testing
The 68RFE has accessible pressure test ports. Line pressure testing is a critical diagnostic step before any internal work. Low line pressure at high throttle demand -- below specification during a wide-open-throttle snap test -- indicates pump wear or a pressure regulator valve issue in the valve body. A unit with low line pressure will slip clutch packs under load not because the clutches are worn, but because they are not receiving adequate apply pressure. Rebuilding the clutch packs in a unit with a line pressure problem produces a short-lived repair.
One caveat specific to the RFE family: do not try to raise pressure the way you would on an older unit. Per Sonnax, RFE units run a full-range pressure transducer and a real-time adaptive closed-loop pressure control system, so installing a stronger pressure regulator spring or a larger boost valve will not accomplish anything — the control module simply adapts and returns pressure to OE spec. Raising pressure on an RFE requires an electrical booster. Sonnax also notes the practical limit that comes with that: their RFE-LB1 kit produces roughly a 10 psi increase at lower pressure ranges and roughly 25 psi at higher ranges, and a P0868 low pressure code can set when the pressure control solenoid duty cycle tries to exceed its 5% operational low limit.
Verify the sensor before you trust it. Sonnax's overdrive failure write-up points out that low line pressure can go unnoticed behind a failed line pressure sensor, and that scan tool pressure data is only as good as the sensor reporting it. OE line pressure adapter tool No. 8259 installs into the case in place of the line pressure sensor, and the sensor plus a mechanical gauge then mount to the tool — that is how you verify main line pressure and the sensor's accuracy at the same time. On the high side, excess pressure can push through clearance in the solenoid switch valve bore and partially apply the overdrive clutches or keep them from releasing, a condition that usually sets P0871.
How to test: with the vehicle on a lift and the drivetrain safely supported, connect a pressure gauge to the main line pressure test port (typically on the driver's side of the case near the valve body area). Bring the engine to operating temperature. Record line pressure at idle in Drive, at a 1,500 RPM stall in Drive, and at the top of each gear range. Compare to specification. Low pressure across all ranges points to the pump. Low pressure in specific ranges points to the solenoid for that circuit.
Solenoid Pack: Replace vs. Rebuild
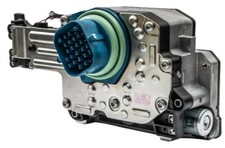
The 68RFE solenoid pack is a serviceable unit. Individual solenoids can be replaced without replacing the entire pack if diagnostics identify a specific failed solenoid. The pack replacement makes more sense when multiple solenoids are suspect, when the pack is at high mileage on a diesel truck with heavy use history, or when the cost of individual solenoid diagnosis and replacement approaches the cost of the pack.
Before replacing anything: use bidirectional solenoid tests with the Autel MS906BT or equivalent. Each solenoid in the pack can be commanded to activate individually. A solenoid that tests in-spec on resistance but does not respond to a bidirectional activation command is failing internally. One that responds to activation but shows an out-of-spec resistance is showing coil wear. These two failure modes have the same symptom on a road test but require different repair decisions.
If your 68RFE is past the point of solenoid swaps and fluid services and you are looking at a full teardown, we have a separate article that walks through the entire rebuild process -- clutch pack options, valve body choices, torque converter selection, and break-in procedure. See our complete 68RFE rebuild guide.
Building a 68RFE this week?
Overdrive drums and clutch packs, solenoid packs, valve body components, filters and fluid, plus the tools to set clearance properly — all in one place, shipped from the USA.
Shop 68RFE parts →Sources
- Transmission Digest — "68RFE Overdrive Clutch Failure," by Sonnax, August 3, 2020. Backs the overdrive clutches as the most common 68RFE failure point, the.034 in. single-sided steel core versus.080 in. in a 4L80-E direct pack, the unsupported OE overdrive housing flex, the solenoid switch valve plug crossleak mechanism, OE line pressure adapter tool No. 8259 for verifying the pressure sensor, and P0871 as the code associated with high line pressure partially applying the OD clutches. transmissiondigest.com
- Transmission Digest — "Troubleshooting RFE overdrive clutch failure: Three key areas to check," Caleb Perham, July 24, 2023. Backs the three-plug solenoid switch valve wear pattern and how the plugs stroke on the 1-2, 2-3 and 3-4, the stator overdrive dribbler valve as a controlled leak that sets apply timing, the air test direction from pump to drum, the effects of clutch clearance set too tight or too loose, and the fast learn after repair. transmissiondigest.com
- Sonnax — "Achieving a Progressive Pressure Boost in RFEs: Chrysler 45RFE, 545RFE, 65RFE, 66RFE & 68RFE," April 5, 2016. Backs the full-range pressure transducer and real-time adaptive closed-loop pressure control that makes stronger regulator springs and larger boost valves ineffective on an RFE, the approximately 10 psi and 25 psi increases from the RFE-LB1 kit at low and high pressure ranges, and the P0868 code set when pressure control solenoid duty cycle reaches its 5% operational low limit. sonnax.com
- Sonnax — "Chrysler 68RFE '19-Later Changes & Identification," Jim Dial, December 29, 2022. Backs the 2019 hydraulic control changes to the pump, valve body and solenoid pack: elimination of the TCC accumulator retainer, spring and piston, the dimensionally changed torque converter regulator valve with bore plug and wire retainer, the added lower valve body section with a new reverse accumulator and TCC control solenoid, the gray-to-blue solenoid connector change, the reassignment of low/reverse solenoid duties, and the unchanged pressure regulator lineup and solenoid switch valve. sonnax.com