The truck comes in with the light on and a complaint that it feels like it falls on its face somewhere in the middle of the box. You pull codes and get P0733 — Gear Ratio Error in 3rd. Then you run the factory 3rd Gear Clutch Test, it passes clean, and now you are staring at a code the scan tool says is not there. The code is right and the test is right. They are just not testing the same clutch.
More coverage in our Dodge transmission hub and RAM transmission hub.
What the Controller Is Actually Measuring
The 68RFE runs two speed sensors, and both are the same part — they interchange, and a new one reads 535 ohms at room temperature per ATSG. The input sensor picks up 60 teeth off the input clutch hub; the output sensor picks up 30 teeth off the park gear. Divide input rpm by output rpm and you have the ratio the unit is actually delivering, and the controller already knows what it commanded.
Per the ATSG clutch application chart, the 68RFE produces 3.23:1 in first, 1.83:1 in second, 1.41:1 in third, 1.00:1 in fourth, 0.81:1 in fifth, 0.62:1 in sixth and 4.44:1 in reverse. Note where direct gear lives: fourth is 1:1 on this unit, not third. Third is still a reduction gear at 1.41:1, which trips up techs coming off a four-speed.
The factory set condition is short. The code sets if the ratio of input rpm to output rpm does not match the current gear ratio, monitored continuously with the ignition on and engine running, after the transmission achieves the correct gear ratio, and it can take up to five minutes of problem identification before the MIL lights. The 45RFE/545RFE version of the chart uses the identical set condition and delay, which is how you know this is RFE-family control logic rather than a 68RFE quirk.
That last clause matters more than it looks. Ratio codes set only once the unit has first made the correct ratio and then lost it, so a transmission with no third gear at all may set no ratio code because it never got there. P0733 is a slip code, not a no-third-gear code.
The Speed Sensor Ground Trap
One more line from the same theory of operation is worth memorizing. If the common speed sensor ground circuit is lost, both sensor inputs read the signal from the input speed sensor at idle in neutral. Because the input sensor sees 60 teeth and the output sensor sees 30, the result is an apparent 1:2 speed ratio and P1794 may set at a stop. A lost shared ground manufactures ratio nonsense out of two perfectly good sensors.
What Actually Holds Third Gear
Third gear on a 68RFE is a two-clutch job like every other gear in this unit — ATSG describes it as applying different combinations of two clutch packs at a time. Third applies the underdrive (UD) clutch and the 4C clutch.
Yes, the 4C clutch. The RFE family named its holding clutches after the gears they served in the original 45RFE, and the 68RFE reused that hardware with a different shift schedule. So the clutch stamped "4C" in every parts catalog is the one holding your third gear. Get that backwards and you order the wrong friction module.
The factory pressure switch chart settles it. The TCM watches five switches — Low/Rev, 2nd Clutch, 4th Clutch, Underdrive and Overdrive — and per ATSG they close at 23 psi and open at 11 psi. Here is what the controller expects to see in the drive gears:
- First: L/R closed*, Underdrive closed. Everything else open. (*L/R is closed only with output speed below 150 rpm in Drive and Manual 2.)
- Second: 2nd Clutch closed, Underdrive closed.
- Third: 4th Clutch closed, Underdrive closed.
- Fourth: Underdrive closed, Overdrive closed — both input clutches, which is what makes fourth direct.
- Fifth: 4th Clutch closed, Overdrive closed.
Read the third and fifth rows together and you get a free diagnostic. The 4C clutch is applied in third and in fifth. A marginal 4C pack will slip in whichever of those two loads it first, so a truck carrying P0733 and P0735 together is pointing at the 4C, not at the underdrive side. P0733 alone leaves the UD clutch and the shared line pressure supply just as likely.
The Trap: The 3rd Gear Clutch Test Cannot Find the 4C Clutch
This is the single most important note in the factory P0733 chart, and it sits in small type in the middle of a step:
"If the 4C clutch is faulty, the overrunning clutch will hold and the slip test will pass. The 3rd Gear Clutch Test will not detect a faulty 4C clutch. However, it will detect a faulty UD clutch."
With the vehicle held still on the brake, the overrunning clutch carries the reaction load. A completely burned 4C pack sits there doing nothing while the sprag holds, input speed stays at zero, and the test reports a pass. Nothing is broken about the test — the scan tool routine named after third gear is functionally an underdrive clutch test wearing a third-gear label.
So a passed 3rd Gear Clutch Test tells you exactly one thing: the underdrive clutch is holding. It does not clear the 4C, and the factory chart does not treat it as if it does. A pass routes you to intermittent checks and then to a road test, and the road test is what catches the 4C.
Working the Factory Chart in Order
- Pull every stored code before you touch anything. If any transmission solenoid, line pressure, speed sensor or loss-of-prime DTCs are present, those get worked first. If P0944 (loss of prime) is stored, it goes to the front of the line ahead of everything, including P0733.
- Read and record all Event Data. The chart tells you to record every bit of it for later reference within the same procedure. If the fault is not present now, that snapshot is your entire diagnosis. No Event Data for P0733 sends you straight to the current-code check.
- Check input rpm in Event Data. If it read zero when the code set, the sensor lied, not the clutch. Go work the input speed sensor and its wiring as if P0716 were current.
- Check line pressure in Event Data. The threshold is a hard number: more than 10 psi below desired line pressure, the same branch point in the 45RFE/545RFE P0733 chart, which sends you to the primary filter and seal and then the main regulator valve. If yes, you are in the low-pressure branch and no clutch comes apart yet.
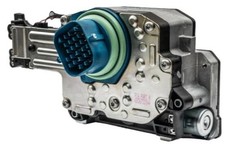
- Low pressure branch. Ignition off. Drop the pan and inspect for excessive debris, then remove and inspect the primary oil filter, making sure the filter and its seal are not cracked or split. If the pan is dirty or that filter is cracked or plugged, that is your repair. If the filter is clean, pull the oil pump and check the main regulator valve for sticking in the bore, scoring and damage. If nothing is found there, the chart replaces the solenoid/TRS assembly.
- Run the 3rd Gear Clutch Test. Follow the scan tool prompts and bring throttle angle (TPS Degree) to 30 degrees for no more than a few seconds. The chart carries a caution not to overheat the transmission — do not sit in it. Input speed must stay at zero. If it climbs, the UD clutch is slipping and you are going in.
- If it passed, check for intermittents, then road test. Verify shifter adjustment, then inspect speed sensor wiring and connectors and wiggle test with Transmission Simulator, Miller tool 8333. Clean? Erase codes and drive it in reverse and every forward gear, looking for obvious slippage.
For the wiggle test, the chart carries a warning, not a note: remove the ignition switch feed fuse from the TIPM first. Leaving it in allows the vehicle to be started in gear, and the manual language on that is possible serious or fatal injury. Also worth asking the customer directly: gear ratio DTCs can set under extreme temperature conditions, so find out whether it only happens dead cold or after an hour of towing.
Failed the Test: The UD Clutch Branch
Input speed climbed during the clutch test, so the underdrive clutch is slipping. Pan comes off, check for excessive debris, valve body comes off, and you air check the UD clutch hydraulic circuit in the case.
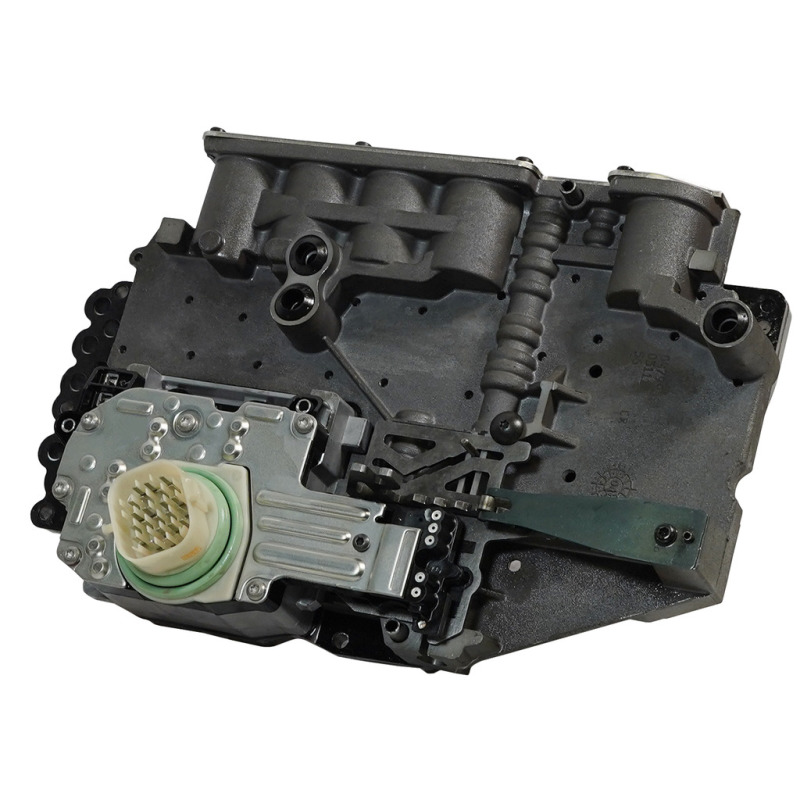
Know what normal sounds like before you condemn anything. The UD clutch passage contains a small bleed orifice, so a small amount of air leakage is normal. You are hunting excessive leakage, not silence. If you find it, work through the UD piston seals, the dribbler assembly, the reaction shaft support seal rings, the flatness of the pump valve body and pump housing faces, and the main regulator valve for sticking. If the circuit holds air, move to the UD bleed orifice, accumulator piston, and accumulator piston seal in the main valve body.
That dribbler deserves a closer look. Per Sonnax's TASC Force writeup in Transmission Digest, the dribbler valve in the stator is a designed controlled leak that pre-charges the clutch circuit and sets the timing of the clutches coming on. A restricted dribbler delays apply and drags the clutches on the way in; a leaking dribbler keeps them slightly applied so they drag on the way out. Either way you get heat, and heat is what kills these packs. Test it with air at the dribbler and listen at the corresponding passage — flow should travel pump to drum, not the reverse.
And read this note before you close it up: if the UD clutch has failed but no obvious cause is found — no cut piston seal, no broken seal ring, no stuck regulator valve — the chart says replace the transmission solenoid/TRS assembly in addition to the internal repair. An unexplained burned clutch means the apply was wrong, and new frictions behind the same solenoid pack buys you the job back on your dime.
Passed the Test but Slips on the Road: The 4C Branch
This is the branch the trap sends you to. Pan off, debris check, valve body off, and air check the 4C clutch hydraulic circuit. Same rule applies: the 4C passage also contains a small bleed orifice, so a small amount of leakage is normal.
The chart asks a three-part question here that is easy to skim past: excessive debris, improperly assembled 4C clutch, and/or excessive air leakage. That middle item is what catches previously rebuilt units. The 4C stack on a 68RFE is three steel plates at .101" and three friction plates at .087", with a .197" backing plate and a selective snap ring to set clearance. Correct 4C clutch clearance is 0.770–1.390 mm (.030"–.055"). Set it loose and fill time goes long and the pack drags on apply. Set it tight and it applies too fast and binds. Neither survives long behind a Cummins.
The underdrive pack next to it runs 1.02–1.72 mm (.040"–.068"), and its backing plate is not selective on the 68RFE — so if UD clearance comes out wrong, the plate itself is wrong, not the snap ring.
If the 4C circuit holds air, the leak is upstream. Check the 4C accumulator piston for cracks or a cut seal, check for a cut or missing No. 5 check ball in the main valve body, and check the solenoid switch valve and its plugs for sticking in the bore or excessive wear.
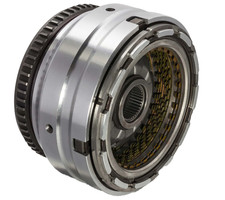
BorgWarner 68RFE Friction Clutch Module Kit
When the road test shows slip in third and the 4C or UD pack comes out burned, the frictions are done. Complete friction module for 2007-up 68RFE builds — the UD and 4C stacks together, so you are not chasing individual plates.
See the 68RFE friction clutch kit →Need accumulator pistons, seals, thrust bearing kits, solenoid blocks or a full overhaul kit instead? Browse the whole 68RFE parts collection.
Why the Solenoid Switch Valve Is a Third-Gear Problem
That last item on the 4C list — the solenoid switch valve and its plugs — is not a long shot on a high-mileage unit. It is the most likely thing you will find, and the reason is mechanical.
Per Sonnax, there are three plugs in the solenoid switch valve bore, and two of them are in motion depending on which gear you are in. Sonnax lays out the sequence: on the 1-2 shift the switch valve strokes to feed the 2C clutch circuit; on the 2-3 shift the bore plug strokes up against the switch valve; on the 3-4 the bore plug strokes back the other way to feed the overdrive circuit and hold the switch valve.
So your 2-3 shift is one of the events that cycles that plug, and the bore plug area sees the heaviest wear in the entire lineup. Sonnax's position is blunt: it is not a matter of if you will see a problem here, it is when. Worn bores crossleak into and out of the circuits that plug is switching, and a crossleak reads at the controller as a clutch that will not hold its ratio.
Vacuum test the bore. It is quick, repeatable, and it gives you the location and severity of a leak instead of a guess. Sonnax publishes a free RFE vacuum testing guide showing exactly where to test. If wear is severe, ream the bore and fit oversized valves rather than hoping a new plug seals against a worn casting.
Verify the Pressure Sensor, Not Just Its Reading
The entire low-pressure branch of the chart hinges on a number the scan tool reports, which means it hinges on a sensor. Sonnax makes the point that low line pressure can go completely unnoticed behind a failed line pressure sensor. The OE answer is line pressure adapter tool No. 8259: it installs into the case in place of the sensor, then the sensor and a mechanical gauge both mount to the tool. Now you are reading actual hydraulic pressure and the sensor's reported value side by side, which verifies main line pressure and the sensor in one shot. Pressure that runs too high matters too — Sonnax notes it can push through excessive SSV bore clearance and partially apply clutches or keep them from releasing, which is the usual source of P0871.
Do Not Skip the Geartrain Check
If the 4C circuit is tight and the accumulator and check ball are good, the chart still does not send you to a teardown. It checks the geartrain for broken splines through the windows in the bottom of the case, with the unit still in the truck.
Hold the output shaft by putting the manual lever in Park. Apply the 4C clutch with 30 to 40 psi shop air at the apply port in the center bulkhead. Now try to rotate the input annulus gear and drive shell — the drum that encloses the two rearmost gearsets. Because of the overrunning clutch it should turn one direction only. If the drive shell rotates, you have a broken connection, and the chart names the three places to look: the reverse annulus gear spline to the input carrier, the reverse sun gear spline to the reaction carrier hub, and the reaction sun gear weld to the 4C clutch hub.
That last one is specific to this code's clutch. A cracked weld at the 4C hub produces a textbook ratio error with clutch packs that look brand new on the bench.
2024 Trucks: Run the VIN Before You Quote Anything
If it is a 2024, stop and check the build date. Stellantis TSB 21-012-25 REV. B (February 21, 2025) covers 2024 RAM 2500 and RAM 3500 pickups built on or after June 14, 2024 and on or before September 4, 2024 with the 6.7L Cummins (sales code ETL) and the 68RFE (sales code DG7). The cause is rear selective thrust bearing cracking, and P0733-00 is on the DTC list along with P0729, P0731, P0732, P0734, P0735, P0716, P0218, P0841, P0868, P0871, P0876 and P0944.
The bulletin repair is transmission replacement, because a cracking thrust bearing contaminates the whole unit. Running the VIN takes two minutes and can turn a customer-pay teardown into a warranty transmission.
On older trucks there is a software angle too. FCA TSB 18-061-20 (August 7, 2020, superseding 18-066-19) is a PCM flash for 2018 RAM 2500/3500 with the 6.7L Cummins, and its DTC list includes P0868 (line pressure low) and P0870 (OD hydraulic pressure test). If you are chasing a pressure-related ratio complaint on a 2018, confirm the module is at the latest calibration before you start pulling parts.
Scope the Sensor Before You Pull the Unit
Worth keeping in your back pocket. Transmission Digest ran a case where a vehicle repeatedly "lost third gear" once hot, with no codes stored. The shop replaced the speed sensor and pigtail, load-tested the harness, heat-gunned the module, and finally replaced the PCM — none of it fixed the complaint. Only when they put a scope directly on the output speed sensor circuit and drove it hot did the OSS signal go open at the exact moment the shift failed. Different transmission, same lesson, and it maps onto step 7 of the 68RFE chart: scan data is the controller's interpretation of a sensor, not the sensor. A scope on the raw signal during a hot road test beats another hour of wiggle testing in the bay.
Matching the Fix to the Finding
- Clutch test failed, input speed rose: UD clutch. Air check the UD circuit, then piston seals, dribbler assembly, reaction shaft support seal rings, pump face flatness, main regulator valve.
- Test passed but slips in third on the road: the 4C side. Pan, debris check, air check the 4C circuit, verify the pack was assembled right at .030"–.055".
- P0733 and P0735 stored together: 4C clutch and its circuit — it is the only clutch shared by third and fifth.
- 4C circuit holds air: 4C accumulator piston and seal, No. 5 check ball, solenoid switch valve and plugs. Vacuum test the bore.
- Line pressure more than 10 psi below desired: fluid level, pan debris, primary filter and seal, or a sticking main regulator valve. Verify the sensor with tool 8259 before you trust the number. No clutch work yet.
- Input rpm zero in Event Data: input speed sensor and wiring. Code set in Park, Reverse or Neutral: replace the powertrain control module. Neither is a teardown.
- UD or 4C pressure switch open with line pressure matching desired: air check both circuits; if they are good, replace the solenoid/TRS assembly.
- Drive shell rotates on the 4C air check: broken reverse gearset splines or a cracked reaction sun gear weld at the 4C hub. Not a clutch.
- 2024 truck built 06/14/24 to 09/04/24: run the VIN against TSB 21-012-25 REV. B first.
After any internal repair, run the Quick Learn so the controller re-adapts pressure and shift timing, then complete the 68RFE Transmission Verification Test before the truck leaves — the factory chart ends every single branch with it. Refill with Mopar ATF+4, the fluid ATSG specifies for this unit, and set the final level at operating temperature. Our 68RFE fluid type and capacity guide has the service and dry-fill numbers.
Need parts for this job?
4C and underdrive friction modules, bonded pistons, accumulator kits, seal kits, thrust bearing kits, solenoid blocks, speed sensors and ATF+4 — what a P0733 repair actually consumes, shipped fast from the USA.
Shop 68RFE parts →FAQ
What does P0733 mean on a 68RFE?
P0733 is Gear Ratio Error in 3rd. The transmission control module divides input shaft speed by output shaft speed and compares the result against the 1.41:1 third gear ratio the 68RFE is supposed to be producing. If the measured ratio does not match while 3rd is commanded, the code sets. The factory set condition notes it can take up to five minutes of problem identification before the MIL comes on, and that ratio codes only set after the unit first achieves the correct ratio, so P0733 is a slip code rather than a no-third-gear code.
Which clutches hold third gear in a 68RFE?
Third gear applies the underdrive (UD) clutch and the 4C clutch together. That surprises people because the clutch is called 4C, but the RFE family names its holding clutches after the gear they served in the original 45RFE, not the gear they serve in the 68RFE. The factory pressure switch chart confirms it: in third, the Underdrive and 4th Clutch pressure switches read closed and everything else reads open.
Why does the 3rd Gear Clutch Test pass when the 4C clutch is burned?
Because the overrunning clutch carries the reaction load while the vehicle is held still. The factory chart says it outright: if the 4C clutch is faulty, the overrunning clutch will hold and the slip test will pass. The 3rd Gear Clutch Test will not detect a faulty 4C clutch, only a faulty UD clutch. A passed test rules out the underdrive clutch and sends you to a road test, it does not clear the 4C.
Why do P0733 and P0735 often set together on a 68RFE?
Because the 4C clutch is applied in both third and fifth. Per the factory pressure switch chart, third is the underdrive clutch plus 4C and fifth is the overdrive clutch plus 4C. A 4C pack that is marginal will slip in whichever of those two gears loads it first, so a truck with both codes stored is pointing hard at the 4C clutch and its hydraulic circuit rather than at the underdrive side.
My 2024 Ram set P0733. Is that a known factory problem?
It can be. Stellantis TSB 21-012-25 REV. B, dated February 21, 2025, covers 2024 Ram 2500 and 3500 pickups built on or after June 14, 2024 and on or before September 4, 2024 with the 6.7L Cummins and the 68RFE. The cause is rear selective thrust bearing cracking, and P0733-00 is on the listed DTCs along with P0729, P0731, P0732, P0734, P0735, P0868 and P0944. The bulletin repair is transmission replacement, so run the VIN before you quote a rebuild.
Sources
- FCA/Chrysler 45RFE/545RFE service information, P0733 GEAR RATIO ERROR IN 3RD diagnostic chart (2007 Jeep Commander workshop manual, Section 21). The RFE family shares this control logic with the 68RFE, but note the 45RFE applies UD and OD in third, so only the shared logic is cited here. Backs the set condition (input-to-output rpm ratio not matching the current gear ratio, monitored continuously in gear), the five-minute problem-identification delay before the MIL, the 60-tooth input clutch hub and 30-tooth park gear counts, the lost-common-ground 1:2 apparent ratio and P1794, addressing solenoid, line pressure, speed sensor and loss-of-prime DTCs first with P0944 before anything else, the zero input rpm branch, the more-than-10 psi below desired line pressure branch with the primary filter and main regulator valve checks, and the note that the overrunning clutch can mask a failed holding clutch during the 3rd gear clutch test. jeep.automotive-manuals.com
- FCA/Mopar 68RFE service information, P0733 GEAR RATIO ERROR IN 3RD diagnostic chart (2009 RAM 3500 HD Truck 4WD, L6-6.7L diesel, Section 21). The 68RFE-specific version of the same chart. Backs the RAM-specific steps not in the 45RFE chart: the 3rd Gear Clutch Test not detecting a faulty 4C clutch, the 30 degree TPS test procedure, the normal bleed-orifice leakage in the UD and 4C circuits, the No. 5 check ball, the 30 to 40 psi 4C air check for reverse gearset splines and the reaction sun gear weld to the 4C clutch hub, Miller tool 8333 and the TIPM ignition feed fuse warning. Available through Stellantis service information (techauthority.com); the public mirror previously linked here is offline.
- ATSG (Automatic Transmission Service Group), Dodge RAM 68RFE technical service information. Backs the published gear ratios (3.23, 1.83, 1.41, 1.00, 0.81, 0.62 and 4.44 reverse), the description of drive range as reduction 1st through 3rd with direct 4th and overdrive 5th and 6th, the two-clutch-packs-at-a-time operation, the 68RFE pressure switch chart showing the Underdrive and 4th Clutch switches closed in third, the 23 psi close / 11 psi open switch thresholds, the 150 rpm L/R condition, the 535 ohm speed sensor resistance and the 60-tooth / 30-tooth pickup arrangement, the clutch clearance specifications (4C .030"-.055", UD .040"-.068", OD .030"-.063", 2C .039"-.065", L/R .046"-.082", reverse .023"-.058") with the non-selective UD and 2C backing plates, the 4C plate thicknesses (.101" steels, .087" frictions, .197" backing plate), and Mopar ATF+4 as the specified fluid. atsg.biz
- Stellantis / FCA US Technical Service Bulletin 21-012-25 REV. B, Rear Selective Thrust Washer Failure, February 21, 2025 (via NHTSA). Backs the affected vehicles (2024 RAM 2500 and 3500 built June 14, 2024 through September 4, 2024, sales codes ETL and DG7), rear selective thrust bearing cracking as the cause, and P0733-00 appearing on the bulletin's DTC list alongside P0729, P0731, P0732, P0734, P0735, P0716, P0218, P0841, P0868, P0871, P0876 and P0944. static.nhtsa.gov
- FCA US Technical Service Bulletin 18-061-20, Flash: Powertrain Control Module (PCM) Updates, August 7, 2020 (via NHTSA). Backs the 2018 RAM 2500/3500 6.7L Cummins PCM reflash, its inclusion of P0868 (line pressure low, 68RFE) and P0870 (OD hydraulic pressure test) in the covered DTC list, and that it supersedes bulletin 18-066-19 dated September 5, 2019. static.nhtsa.gov
- Sonnax, 68RFE Overdrive Clutch Failure: What to Check First When Troubleshooting OD Issues, Jason Larochelle (TASC Force), August 18, 2020. Backs the solenoid switch valve plugs wearing the casting and crossleaking into and out of clutch circuits, vacuum testing the bore as the diagnostic method with reaming and oversized valves as the repair, the .034" single-sided OE clutch steel thickness versus .080" in a 4L80-E direct pack, low line pressure hiding behind a failed line pressure sensor, OE line pressure adapter tool No. 8259, and high line pressure pushing through excessive SSV bore clearance to partially apply clutches and trigger P0871. sonnax.com
- Transmission Digest, Troubleshooting RFE overdrive clutch failure: Three key areas to check, Caleb Perham (Sonnax TASC Force), July 24, 2023. Backs the three plugs in the solenoid switch valve bore with two in motion depending on gear, the shift-by-shift stroke sequence including the bore plug stroking against the switch valve on the 2-3 shift, the bore plug area seeing the heaviest wear, the stator overdrive dribbler valve as a designed controlled leak that sets clutch apply timing (restricted causing delay and drag, leaking causing partial apply and drag), the pump-to-drum air test direction, and the clutch clearance too tight / too loose failure modes. transmissiondigest.com
- Transmission Digest, Transmission Slipping: Inconsistent Third Gear Issues, L J Porter, September 2, 2026. Backs the field case where a hot-only loss of the 2-3 shift produced no stored codes and survived a speed sensor, pigtail and PCM replacement, and was found only by scoping the output speed sensor circuit during a hot road test, where the signal went open at the exact moment of the failed shift. transmissiondigest.com
Shop 68RFE clutch parts →
Related 68RFE guides
- 68RFE P0732: Gear 2 Incorrect Ratio - Causes, Diagnosis, and Fix
- 68RFE P0731: Gear 1 Incorrect Ratio - Causes, Diagnosis, and Fix
- 68RFE P0736: Reverse Incorrect Gear Ratio - Causes, Diagnosis, and Fix
- 68RFE P0871: Pressure Switch Rationality and What It Really Means
- 68RFE Valve Body Problems: Symptoms, How to Test, and Replacement