An 8L90 that comes apart clean is rare. Most of the ones on my bench arrive with aluminum in the pan, a burnt clutch that nobody can explain, or a comeback complaint after somebody already put a valve body in it. The frustrating part is that the same handful of things kill these units over and over, and three of them are parts a rebuilder can walk right past because they still look serviceable. A chain that measures fine with a tape. A pressure regulator lineup that isn't scored. A check ball that later units genuinely don't use.
This is the teardown checklist I work from, with the numbers that let you make a keep-or-replace call instead of a guess.
The short version: On every 8L90 rebuild, measure the pump chain over ten rivets (5.000 in. new, replace past roughly 5.075 in.), replace the pressure regulator lineup and the line pressure blow-off spring, vacuum test the clutch control bores with the S4 circuit at the top of the list, and confirm whether your core is a pre-October-2015 unit that still needs the #7 check ball. Those four checks cover most of what comes back.
Know Exactly Which 8L90 Is On Your Bench
The 8L90 (RPO N8X) is GM's own eight-speed rear-drive box, not a licensed ZF design. Per GM's published specification sheet, it uses four gear sets and five clutches to fit the same envelope as the 6L80/6L90 it replaced, carries a gearbox torque rating of 665 lb-ft (900 Nm), and weighs 218 lb dry. First gear is 4.56:1, eighth is 0.65:1, and reverse is 3.82:1 — a 7.0 overall spread. The converter is 258 mm with variable-force-solenoid ECCC lockup and a turbine damper, and the control system runs two on/off solenoids plus six variable force solenoids, one per clutch plus one for the TCC.
| Specification | Value | Source |
|---|---|---|
| RPO code | N8X | GM spec sheet |
| Max gearbox torque | 665 lb-ft (900 Nm) | GM spec sheet |
| Gear sets / clutches | 4 gear sets, 5 clutches | GM spec sheet |
| Ratios (1st / 8th / Rev) | 4.56 / 0.65 / 3.82 | GM spec sheet |
| Converter diameter | 258 mm | GM spec sheet |
| Dry weight | 218 lb (98.9 kg) | GM spec sheet |
| Max shift speed | 6,000 rpm | GM spec sheet |
| Fluid type | DEXRON HP | GM spec sheet / GM TechLink |
| Total fill (excluding cooler) | 10.3 L | GM spec sheet |
| Service fill, drain and refill | 7.0 L (7.4 qt) | GM TechLink 2025 capacity chart |
| Assembly plants | Toledo, OH and Silao, Mexico | GM spec sheet |
The fluid line is worth reading twice. GM's own 2025 capacity chart still lists DEXRON HP for the 8L90 in Express, Savana, Silverado and Sierra applications at 7.0 L / 7.4 quarts for a drain and refill, and it flags the fluid as "Not DEXRON III." DEXRON VI is not a substitute here either. This is a sealed unit with a thermal fill procedure, so the 10.3 L number is what you plan a dry fill around, not what you dump in at the fill plug.
The two build breakpoints that change what parts go back in
Two production changes matter more than the model year on the door jamb:
- October 2015: GM removed the #7 check ball from the solenoid valve control body and eliminated the Lube Override Enable Valve from the upper valve body. Earlier units still require that ball.
- 2019 model year: With the move from Active Fuel Management to Dynamic Fuel Management on the 5.3L and 6.2L V8s, GM changed the 8L90 torque converter (it now carries a centrifugal pendulum absorber), the S4 control solenoid, the valve body casting, and the S4 control valve itself.
Both are covered in detail below, because both produce failures that look like something else entirely.
Wear Point 1: The Pump Chain
The 8L90 uses an off-axis, chain-driven pump. That chain does not stretch in the metallurgical sense — it elongates from pin and bushing wear, which has the same practical effect. Transmission Digest documents cases where the elongation is bad enough that you can lift the chain right off the gears without unclipping the driven gear from the pump drive shaft. If you can do that, the chain is finished.
The problem is that GM has never published a wear specification for it, so most builders eyeball it and put it back. Here is a measurement you can actually defend:
- New chain: 1/2 in. from rivet center to rivet center. The 8L90 chain has 43 rivets, so a new one is about 21-1/2 in. long overall.
- The chain can't be separated to measure end to end, so lay it on the bench and measure a ten-rivet section: 5.000 in. new.
- Diamond Chain Company's roller-chain wear guidance calls for a 1.5% elongation limit on drives with fixed center distances and parallel chains — which describes this pump exactly. 1.5% of 5 in. is 0.075 in., so 5.075 in. over ten rivets is your practical replace-at number.
Two no-tool checks back that up. Push and pull a section of chain sideways and look at the link pins and bushings for play. Then hang the chain's weight on the drive gear and rotate slowly — an elongated chain kinks because the links no longer align with the gear teeth. A healthy chain with normal installed slack will push toward center roughly 2-1/2 in. on a tape measure and still show a clean 5 in. over ten rivets.
The economics make this easy: a new sprocket-and-chain set is GM part number 24280781, which Transmission Digest priced at $51. That is not a part to gamble on when the transmission is already apart.
Wear Point 2: The Pressure Regulator Lineup and Blow-Off Spring
This is the one that destroys hard parts. Line pressure on an 8L45/8L90 is supposed to peak around 315 psi. Sonnax has measured units in evaluation running above 415 psi, and documented the result: cracked worm tracks in the valve body casting, and drums coming apart. Once a valve body casting cracks between the pump suction and secondary line circuit, it is scrap. There is no repair.
The mechanism is leakage, not a bad pump. Wear at the pressure regulator bore lets the signal oil bleed off, so the regulator valve never strokes to its low-pressure position. Pressure runs away. Worse, the OE safeguard — the line pressure blow-off spring — has been found calibrated over 400 psi in some circumstances, meaning the part whose only job is to protect the casting lets the unit see pressures nothing inside it was designed for before it opens. And if the bore is worn enough, a shuttle valve without O-rings won't seal that leak no matter how good the valve looks.
Sonnax's recommendation for the bench is not conditional, and I follow it: replace the pressure regulator lineup and the line pressure blow-off spring on every single 8L45/8L90 valve body you build. A drop-in pressure regulator with an O-ringed shuttle valve plus a correctly calibrated pressure relief ball valve spring holds peak pressure in the 300–315 psi band, which is where the casting and the drums expect to live.
If you want the full pressure-side procedure — including why the scan tool number is a solenoid command and not a transducer reading — that is covered separately in our 8L90 line pressure testing write-up.
Wear Point 3: The S4 (2-3-4-6-8) Clutch Control Bore
The single most common burnt clutch on this unit is the 2-3-4-6-8 pack, and the reason is usually hydraulic rather than mechanical. Wear of the S4 clutch control valve and its aluminum bore lets clutch apply pressure leak past the spool, so the clutch never sees the apply force it was designed for. It slips, it burns, and a new clutch pack in a worn bore burns again.
Sonnax's fix is a lengthened valve spool that seals against an unworn section of bore, a scarf-cut seal at the signal apply end, and annular grooves that center the valve to reduce future side-load wear. The oversized version (kit 154740-26K) requires reconditioning the bore with a self-aligning reaming fixture; the drop-in version does not.
Read the year before you order. The 2019 DFM change altered the S4 solenoid, the casting and the control valve. The older Sonnax S2/S3/S4/TCC kit 154740-11K contains a .443 in. diameter valve that cannot be used in the 2019-and-later S4 location — install it there and you create shift complaints. That valve assembly also appears inside some Zip Kits, so the warning follows the kit.
Three ways to identify which design you have, per Sonnax:
- External: the new-design solenoid canister carries a triangle marking, visible without disassembling the valve body.
- Valve profile: the previous-design S4 control valve has two diameters; the new design has only one.
- Circuit: the late valve is plumbed the same way, but the diameter change plus the new solenoid gives better control of the 1-2 upshift, particularly when DFM is active.
Wear Point 4: The #7 Check Ball Trap
This one has burned down finished rebuilds, and it is purely a parts-catalog problem.
Beginning in October 2015, GM deleted the #7 check ball from the solenoid valve control body at the same time it eliminated the Lube Override Enable Valve from the upper body. The valve bore and its feed channels were cast shut. Critically, the spacer plate was not changed in that area.
On an earlier unit, that #7 shuttle ball seats against the Lube Override passage in Park, Reverse, Neutral and Drive. With the ball in place, Regulated Lube fluid holds the Lube Flow Regulator Valve in its regulating position. Leave the ball out of an early unit — an easy oversight once you're used to building late ones — and Regulated Lube pressure drops into the Lube Override circuit and exhausts at the Lube Override Enable valve. You lose lube pressure to the gear train, and that is a catastrophic-failure path, not a shift-quality complaint.
Transmission Digest documented a shop that caught it only because trans temperature climbed fast on the road test. Cooler return flow checked good at the line, which sent them back into the valve body, where they found the missing ball. The overheat is what saved that unit.
Practical rule: before the valve body goes together, confirm the build date on the case tag and whether the Lube Override Enable Valve bore in the upper body is open or cast shut. Open bore means the #7 ball goes in.
Bench Checks Worth the Time
Vacuum testing, with real numbers
Vacuum testing is how you decide whether a bore is worn without guessing from a visual. You seal a circuit containing one or two valve spools and pull air through the spool-to-bore clearance; the measurement comes back in inches of mercury, and vacuum loss is directly proportional to wear. Sonnax's reference points: a perfect vacuum is 29.9 in-Hg (it changes with elevation), an extremely good circuit reads 22 to 23 in-Hg, and a severely worn bore can read as low as 8 in-Hg. No circuit pulls a perfect vacuum, because design clearance always exists.
Sonnax deliberately does not publish one universal pass/fail number — they recommend each shop record results, build an average per bore, and set its own minimum standard against its warranty exposure. That is the right approach on the 8L90, where the clutch control and pressure regulator bores are the ones that pay for themselves.
Wet air test the drums
Before anything goes back in the case, wet air test each clutch circuit. On this unit that also catches cracks in the welded areas of the clutch drums, which will not show up on a dry visual and will absolutely show up as a repeat burnt clutch three weeks later.
Do not remove the plug on a new valve body
New OE valve bodies carry a plug bolted into a casting hole that the original unit does not have. It looks like a test port. It is not. Remove it and you leave a large leak that dumps line pressure, and the unit will not move.
Upgrades That Are Actually Worth It
- Pressure regulator lineup and blow-off spring, every build. The cheapest insurance against a cracked casting or a shattered drum.
- Oversized or drop-in S4 clutch control valve, matched to build year. Fixes the leak that burns the 2-3-4-6-8 pack.
- New pump chain and sprockets when the ten-rivet measurement is anywhere near 5.075 in. $51 versus a teardown.
- Correct fluid, correct fill. DEXRON HP only, 7.0 L for a service refill, thermal fill procedure for level. If the unit is in for a shudder complaint rather than a rebuild, start with our 8L90 shudder and harsh shift write-up before you pull it.
- Cooler flow. Anything that tows deserves better heat rejection than stock; lube and cooler flow are already the failure path when the #7 ball is missing, so give the unit margin.
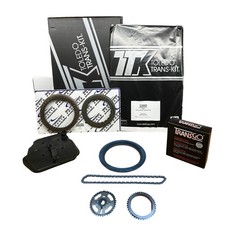
8L90 / 8L90E Master Rebuild Kit with Raybestos GPZ Frictions
Full overhaul kit with GPZ friction plates, steels, gaskets and seals for the GM 8L90 — the base for a build that also gets the valve body work above.
See the rebuild kit →Before You Button It Up
Two administrative steps finish an 8L90 and both get skipped. If the valve body was replaced, the TCM needs the part unique number off the new valve body. If the transmission was replaced, it needs the transmission unique number off the case. Those values tell the controller the actual solenoid flow rates it is working with, and every adaptive baseline is derived from them. Then run the adaptive relearn. Skipping either one produces shift complaints the adapts cannot correct on their own, and it will come back as your problem.
Build one of these the way the wear pattern tells you to — chain measured, regulator lineup replaced, clutch control bores vacuum tested, check ball verified against the build date — and the 8L90 is a durable unit. Build it the way you'd build a 6L80 and it will teach you the difference at your own expense.
Sources
- GM Powered Solutions — "8L90 Hydra-Matic Eight Speed RWD Automatic Transmission: Features & Specifications" (OEM specification sheet). Backs the RPO code N8X, 665 lb-ft (900 Nm) maximum gearbox torque, four gear sets and five clutches, the 4.56 / 0.65 / 3.82 ratios and 7.0 overall spread, 258 mm converter with VFS ECCC and turbine damper, two on/off plus six variable force solenoids, 6,000 rpm maximum shift speed, 218 lb (98.9 kg) dry weight, DEXRON High Performance ATF, 10.3 L total fill excluding cooler volume, and the Toledo, OH and Silao, Mexico assembly sites. poweredsolutions.gm.com
- GM TechLink — "2025 Transmission Capacities & Fluids" chart (05-2025 A). Backs the 8L90 (N8X) service drain-and-refill capacity of 7.0 L / 7.4 quarts, the DEXRON HP fluid requirement across Express, Savana, Silverado 1500 and Sierra 1500 applications, and GM's own "Not DEXRON III" note on the chart. gm-techlink.com
- Transmission Digest — "The Transmission Tech's Guide to the 8L90 Pump Chain," Technically Speaking column. Backs pin-and-bushing elongation rather than true stretch, chain lifting off the gears without unclipping the driven gear, GM publishing no wear specification, the 1/2 in. rivet-to-rivet pitch, 43 total rivets and 21-1/2 in. overall length, the 5.000 in. ten-rivet measurement and 5.075 in. (1.5%) limit derived from Diamond Chain Company roller-chain wear guidance, the push-pull and rotational kink checks, the 2-1/2 in. slack observation on a good chain, and sprocket-and-chain set GM part number 24280781 at $51. transmissiondigest.com
- Sonnax — "Watch Out for High Pressure in GM 8L45, 8L90 Valve Bodies," Chris Leach, Sonnax TASC Force. Backs the ~315 psi normal peak line pressure, the 415+ psi measured on failing units, cracked worm tracks in the valve body casting and catastrophic drum failure from runaway pressure, the worn pressure regulator valve lineup plus mis-calibrated blow-off spring (over 400 psi in some circumstances) as root cause, the point that a shuttle valve without O-rings may not seal a worn bore, the 300–315 psi target band, and the recommendation to replace the PR lineup and blow-off spring on every rebuild. sonnax.com
- Transmission Digest — "GM 8L90 #7 Check-ball: The overheat that saved the day," Technically Speaking column. Backs the October 2015 removal of the #7 check ball and the Lube Override Enable Valve, the valve bore and feed channels being cast shut with no spacer plate change, the ball seating against the Lube Override passage in Park, Reverse, Neutral and Drive, Regulated Lube holding the Lube Flow Regulator Valve in its regulating position, and the loss of lube pressure and catastrophic-failure risk when the ball is omitted from an early unit — including the rapid temperature rise on road test that caught it. transmissiondigest.com
- Sonnax — "GM 8L90 Model Year 2019 S4/23468 Control Valve Changes." Backs the 2019 move from Active Fuel Management to Dynamic Fuel Management on the 5.3L and 6.2L V8s, the resulting changes to the torque converter (centrifugal pendulum absorber), control solenoid, valve body casting and S4 control valve, the.443 in. diameter valve in kit 154740-11K that cannot be used in the 2019-and-later S4 location without causing shift complaints, the triangle marking on the new-design solenoid canister, and the two-diameter versus single-diameter valve profile identification. sonnax.com
- Sonnax — "Vacuum Testing for Leakage." Backs the vacuum test method (isolating a circuit and pulling air through spool-to-bore clearance), vacuum loss being directly proportional to wear, 29.9 in-Hg as a perfect vacuum varying with elevation, 22–23 in-Hg as an extremely good circuit reading, 8 in-Hg as a severely worn bore, and the recommendation that each shop establish its own pass/fail standard from recorded averages rather than a universal spec. sonnax.com