The Turbo 350 is a three-speed with two clutch packs, two bands, a roller clutch and no computer, which is why people still run them behind small blocks fifty years later. It is also why a sloppy rebuild survives the test drive and dies at 8,000 miles. Nothing in the unit covers for you: no adapt, no solenoid trimming line pressure up when a clutch clearance is loose, no code telling the next guy what happened. What you set on the bench is what the customer gets.
Here is what actually wears out and which upgrades earn their money. Specs come from the GM factory overhaul procedure, and the failure analysis from the people who manufacture the replacement hard parts.
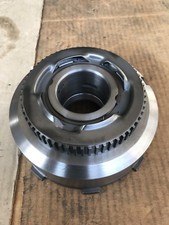
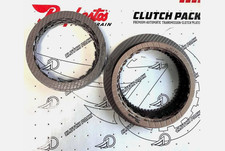
Step one: read the model code, then order plates
Get the model code off the unit before you order anything. The TH350 was built in a pile of variants (CA, CG, CJ, CL, CM, CP, CR, CT, CZ and more) and the clutch counts are not the same between them. Stacking whatever came in a generic kit is how you end up a plate short with a clearance nowhere near spec.
| Model code | Forward clutch | Direct clutch | Intermediate clutch |
|---|---|---|---|
| CA | 4 radial-grooved composition, 3 thin (.0775 in.) steel, 1 waved | 4 composition, 4 flat steel | 3 composition, 2 flat steel, 1 waved |
| CJ, CM, CP, CT, CZ | 5 radial-grooved composition, 4 thin (.0775 in.) steel, 1 waved | 5 composition, 5 flat steel (CZ: 6 and 6) | 3 composition, 2 flat steel, 1 waved (CZ: 3 and 3) |
| CG, CR | 5 radial-grooved composition, 4 thick (.0915 in.) steel, 1 waved | 5 composition, 5 flat steel | 3 composition, 2 flat steel, 1 waved |
| CL | 5 radial-grooved composition, 5 thick (.0915 in.) steel | 6 composition, 6 flat steel | 3 composition, 3 flat steel |
Two details in there trip people up. The forward pack uses thin.0775 in. steels on some codes and thick.0915 in. on others, and it starts with the waved plate (the one with the U notch) on every code that has one. Every direct clutch flat steel, on every model, is the thick.0915 in. type. And when GM gives no clearance figure, the Sonnax TASC Force rule of thumb is 0.008 to 0.010 in. per friction, so a six-friction pack lands at 0.048 to 0.060 in. Measure it, do not eyeball it.
Wear point 1: the intermediate overrun clutch outer race
This is the failure that defines the unit. The intermediate overrun clutch outer race takes the shock of every 1-2 apply and every torque reversal, and Sonnax calls race failure a chronic problem with TH350 transmissions. The mechanism is specific: high torque loads fracture the race at two stress risers, the radial lube holes that contact the rollers, and the sharp inside corners at the base of the outer splines.
Once it cracks you get metal in the pan, an intermediate clutch that cannot hold, and a 1-2 slip that reads like a pressure problem until you split the case. A used OE race is a coin flip and a generic new one is not much better; Sonnax notes that despite many attempts at improved versions, most aftermarket races were never significantly tougher than used OE parts.
The upgrade is heavy duty race 35723HD-02 (OE 6261021). It offsets the lube holes so a roller never travels directly over one and spaces them so only one roller is ever near a hole, reworks the splines, and uses a case-hardened steel alloy instead of the brittle through-hardened approach. Sonnax rates it at twice the torque capacity of any OE or other aftermarket race, and it drops in, which takes the expensive sprag conversion off the table. Check what you are holding first: most codes use a roller clutch, but CL and CZ use a sprag assembly. The outer race installs with a clockwise turning motion.
Check the cage, not just the race
A roller clutch that holds on the bench can still be worn out. The cage carrying the springs and rollers wears, and worn cages show up as harsh forward engagement and a 2-1 downshift that hits like getting rear-ended. The test takes thirty seconds: install the cage in the housing without the inner race, rotate it, and compare how far it travels against a new cage. If it wanders noticeably farther it is finished, no matter how the rollers look.
ATP SMS-9 TH350 Master Repair Kit Plus (1969-1986 GM)
Frictions, steels, bands, gaskets, seals and sealing rings for the 1969-1986 TH350 in one box, so you are not chasing a back-ordered waved plate at 4 on a Friday afternoon. Confirm your model code against the plate counts above before you stack the packs.
See the master kit →Wear point 2: the 1-2 accumulator bore in the case
This one scraps cases. The 1-2 accumulator piston oscillates in its aluminum case bore during normal operation, and over enough cycles the bore wears and scores. Sonnax lists the consequences in order: worn accumulator bores lead to low line pressure, delayed engagements and 1-2 slip, and that slip is what burns the intermediate clutch. The sentence that matters to a shop owner is the next one, that once the bore is damaged the case must be thrown away.
So feel every accumulator bore at teardown and check the piston and pin for wear, because wear equals leaks in that circuit. The repair is sleeve kit 35719-01K, a drop-in aluminum sleeve with a new piston and PTFE seals that saves the case. Billet cover kit 35988-01K replaces the stamped OE cover with a dual O-ring design that will not fall out of position, which matters if you run the accumulator without a spring for a firmer 1-2. Either way, hit the aluminum bore with a Scotch-Brite pad to knock the glaze off before a rubber-sealed piston goes in.
Wear point 3: the intermediate servo bore
Same story, different bore, and this one is sneakier because it costs you pressure in ranges you would not associate with a servo. The intermediate servo bore scores from repeated cycling, and the spring side of that piston has line pressure present in Reverse, Neutral and Drive. Excess leakage past the piston therefore shows up as low line pressure and delayed engagements, not just a weak 2nd, and during forward speeds the same oil loss hurts shift quality and shortens clutch life. The road-test giveaway is no engine braking in manual 2nd. Sleeve kit 35709-01K salvages the case with an aluminum sleeve and a PTFE-sealed replacement piston, with no case machining.
Inspecting a servo bore honestly takes a trick, because a rubber-molded piston makes a worn bore feel tight. Grind the rubber off a junk piston far enough back that it cannot contact the bore, then use that as a gauge to feel the real play between pin and bore. Keep it in the toolbox; you will use it on every unit after this one.
Wear point 4: the direct clutch check ball rule that eats units
This one builds a comeback out of a clean rebuild, and it is pure parts-mixing. GM built these with a direct clutch piston that has no check ball, because the housing carries the ball instead. The service replacement piston is the opposite: it contains a check ball, and CL and CZ service pistons carry two.
The factory caution is absolute and worth taping to the bench: either the direct clutch housing or the piston must contain a check ball. Put a no-ball production piston into a replacement housing that also has none, and the direct clutch cannot bleed centrifugal pressure. It drags when it should release, cooks the frictions, and you get a unit that shifted perfectly on the lift and came back burnt.
Two more traps in the same assembly. The forward and direct pistons look almost identical and both were built in aluminum and stamped steel, so mark which is which at teardown. And the 14 production direct clutch release springs are not serviced individually: if one is collapsed or distorted, GM says discard all of them and install the set of 16 service springs. Air-check the housing for free check ball operation before it goes in the case.
Wear point 5: bushings, and why some of them are seals
The TH350 is hard on bushings, and the reasoning is what people skip: bushings with lube grooves route oil, but bushings without grooves are sealing pressure. Treat a grooveless bushing as a seal and its wear limit gets tighter than "it still feels okay." The pump bushing (Sonnax 34034T-01, steel-backed bimetal, 0.615 in. wide, 1.873 in. shaft diameter, 2.001 in. housing bore) sets how the input rides, and a worn one lets the drum orbit and chew the sealing rings behind it. On the extension housing, press the bushing flush to.010 in. below the oil seal counterbore, then stake it with the marks landing in the lubrication grooves. Stake the bearing surface instead and you have built a high spot on the part that carries the yoke.
Band adjustment is a parts selection, not a screw
There is no band adjusting screw on this transmission. The rear band is set by choosing one of six selective apply pins, and GM says it directly: selecting the proper pin is equivalent to adjusting the band. Skip the check and you have built a unit with an unknown band clearance.
On all models except CL, bolt gauge J-21370-5 and J-21370-6 to the case, make sure the gauge pin does not bind in the servo pin hole, apply 25 ft. lbs. to the lever, and read it:
- Both steps of J-21370-5 below the gauge surface: long pin, three rings.
- Gauge surface between the steps: medium pin, two rings.
- Both steps above the gauge surface: short pin, one ring.
Model CL uses J-21370-9 with J-21370-6, lever pivot pin to the rear: screws finger tight, check the pin for freeness, torque the screws to 15 ft. lbs., recheck for bind, then 25 ft. lbs. on the lever and read the flat on J-21370-9 against the machined flat around the hole on J-21370-6.
Converter and endplay
Do not reuse a converter off a unit that made metal without checking it. Leak test with tool J-21369 installed, 80 psi of air applied, converter submerged in water. Then check end clearance with the J-21371-8 collet bottomed in the hub and its cap nut at 5 ft. lbs., J-21371-3 at 3 ft. lbs., and a dial indicator zeroed on the cap nut. End clearance must be less than.050 in. At.050 in. or more the converter gets replaced, not flushed and reinstalled. Set unit endplay while you are at it; it is cheaper to shim on the bench than to explain a whine on delivery.
Factory torque specs
| Fastener | Torque |
|---|---|
| Pump cover to pump body | 17 ft. lbs. |
| Pump assembly to case | 18-1/2 ft. lbs. |
| Valve body and support plate | 130 in. lbs. |
| Oil pan to case | 130 in. lbs. |
| Oil suction screen | 40 in. lbs. |
| Modulator retainer to case | 130 in. lbs. |
| Parking lock bracket | 29 ft. lbs. |
| Extension to case | 25 ft. lbs. (20-25 per the overhaul step) |
| Inner selector lever to shaft | 25 ft. lbs. |
| Detent valve actuating bracket | 52 in. lbs. |
| Detent cable to transmission | 75 in. lbs. |
| Converter to flywheel bolts | 35 ft. lbs. |
| Transmission case to engine | 35 ft. lbs. |
Note how many of those are inch-pounds. The valve body and the pan both land at 130 in. lbs., under 11 ft. lbs. Pulling on a 3/8 ratchet until it feels right is how support plates get warped and cross-leaks get built into a fresh valve body.
Need parts for this job?
Master rebuild kits, hard parts, bushing driver sets, pump alignment bands, modulators and shift shaft seal tools for the Turbo 350, all in one place.
Shop TH350 parts →Assembly discipline that keeps units from coming back
- Soak frictions and bands in ATF for 15 minutes. Soaked material dissipates heat during initial operation instead of glazing on the first apply.
- Air check at every step, not once at the end. A leaking circuit found with the pump still off is a five-minute fix; found after the converter is in, it is a teardown.
- Mark the six case check balls so they go back in the same cored passages. With the unit in the vehicle, watch the detent solenoid on removal, since it is what holds the spacer plate, gasket and check balls up.
- Four oil seal rings on the center support. Keep Teflon ring slit ends in the same relation as cut and seat them before mating parts slide over.
- Check every flat surface for warp (case, valve body, pump halves, governor), bore-fit the sealing rings, and confirm the pressure plates are flat.
- Clean with cleaning fluid, dry with air, not rags. The factory is blunt: wiping cloths should not be used to dry parts, and no seal-damaging solvent goes near the frictions.
Fill, break-in and service interval
A pan drop and strainer service takes approximately 2-1/2 U.S. quarts to bring the level back to the mark; a rebuild with a drained converter takes considerably more, so fill, run the ranges, and re-check hot and running. GM's interval is a pan drain and strainer cleaning every 30,000 miles, dropping to 15,000 for heavy city traffic in hot weather, commercial use, prolonged idling or towing. GM directs draining right after operation and warns fluid temperature can exceed 350 degrees F, so respect what comes out of the pan.
Before the unit leaves, put a mechanical gauge on it and confirm the hydraulics against the factory numbers instead of a road-test impression. The procedure and the GM pressure chart are in our TH350 line pressure testing guide, and a low reading right after a rebuild usually points back to something on this page. If you want assembly lube separate from the kit, a jug of transmission assembly gel is worth keeping on the bench for thrust washers that have to stay put while the case goes vertical.
The short version
Order plates to the model code. Replace the intermediate overrun clutch outer race with the heavy duty 35723HD-02 and test the roller cage while you are there. Feel the 1-2 accumulator and intermediate servo bores before you buy soft parts, because those two decide whether the case is worth rebuilding at all. Verify a check ball exists in either the direct clutch housing or its piston. Select the band apply pin with the gauge instead of guessing. Torque the valve body and pan to 130 in. lbs. with an inch-pound wrench. None of it is exotic, and all of it separates a unit you never hear about again from one that comes back on the hook.
Sources
- General Motors — 1976 Chevrolet Light Truck Service and Overhaul Supplement, ST-330-76, Section 7A (Turbo Hydra-Matic 350). Backs the forward, direct and intermediate clutch plate counts and thicknesses by model code (CA, CG, CJ, CL, CM, CP, CR, CT, CZ), the rule that all direct clutch flat steels are the thick.0915 in. type, the caution that either the direct clutch housing or the piston must contain a check ball (CL and CZ service pistons carry two), the 14 production release springs and the instruction to replace all of them with the 16 service springs, the warning that forward and direct pistons look almost identical, the rear band apply pin selection procedure with tools J-21370-5, J-21370-6 and J-21370-9 at 15 and 25 ft. lbs. and the one/two/three ring pin identification, the converter 80 psi leak test and the less-than-.050 in. end clearance limit with tools J-21369, J-21371-3 and J-21371-8, the extension bushing install flush to.010 in. below the seal counterbore with stake marks in the lubrication grooves, the six case check balls and center support oil seal ring instructions, the cleaning caution against rags and seal-damaging solvents, the intermediate outer race clockwise installation, the CL/CZ sprag versus roller clutch distinction, the complete TH350 torque specification table, the approximately 2-1/2 quart pan refill, the 30,000 and 15,000 mile service intervals, and the warning that fluid temperature can exceed 350 degrees F. Factory manual scan (PDF)
- Sonnax — Heavy Duty Intermediate Overrun Clutch Outer Race 35723HD-02 (GM TH350, TH350C). Backs the statement that race failure is a chronic problem with TH350 transmissions, the two fracture points (radial lube holes contacting the rollers and the sharp inside corners at the base of the outer splines), the finding that most aftermarket races were never significantly tougher than used OE parts, the offset and spaced lube hole design so rollers never travel directly over a hole and only one roller is ever near one, the case-hardened steel alloy versus brittle hardened aftermarket races, the twice-OE torque capacity claim, the OE part number 6261021, and that it is a direct replacement reducing the need for sprag conversions. sonnax.com
- Sonnax — 1-2 Accumulator Sleeve Kit 35719-01K (GM TH350, TH350C). Backs the cause of 1-2 accumulator bore wear (scoring from repeated oscillation during normal operation), the resulting delayed engagements, low line pressure and 1-2 slip leading to intermediate clutch failure, the statement that once the bore is damaged the case must be thrown away, and the drop-in sleeve, piston and PTFE seal contents that salvage the case. sonnax.com
- Sonnax — Intermediate Servo Sleeve Kit 35709-01K (GM TH350, TH350C). Backs the intermediate servo bore scoring from repeated cycling, the fact that the spring side of the piston has line pressure present in Reverse, Neutral and Drive, the resulting low line pressure and delayed engagements, the effect of oil loss on shift quality and clutch life during forward speeds, the no-engine-braking-in-manual-2nd symptom, and the aluminum sleeve plus PTFE-sealed replacement piston that installs with no case machining. sonnax.com
- Transmission Digest — "Tips for Quality Rebuilding," Jeff Parlee, Sonnax TASC Force (March 1, 2008). Backs the 0.008 to 0.010 in. per friction clutch clearance rule of thumb and the six-friction example of 0.048 to 0.060 in., the point that bushings without lube grooves are sealing oil pressure rather than lubricating, the instruction to set unit endplay to reduce bearing and gear-train noise, the 15-minute ATF soak for frictions and bands, air checking at every step of assembly, checking all flat surfaces (cases, valve bodies, pump halves, governors) for flatness and the cross-leak consequences, checking pressure plates for flatness, bore-fitting sealing rings, using a torque wrench so valve bodies are evenly torqued, the Scotch-Brite treatment for glazed aluminum accumulator bores with rubber-sealed pistons, checking accumulator pistons and pins because wear equals leaks, the air-bleed check ball inspection criteria, and the ground-down rubber piston trick for feeling true servo bore and pin wear. transmissiondigest.com
- Transmission Digest — "Troubleshooting One-Way Clutches," Sonnax TASC Force. Backs the roller clutch cage wear failure mode, the symptoms of harsh forward engagement and a violent 2-1 downshift traced to a worn cage, and the bench test of installing the cage in the housing without the inner race and comparing its rotation distance against a new cage. transmissiondigest.com