A 200-4R that marks the driveway is one of the most common reasons these old G-bodies, Monte Carlos and Grand Nationals land on a lift. The good news is that most 200-4R leaks come from a short list of places, and only one of them, the front pump seal, actually means pulling the transmission. The bad news is that a front seal leak is often a symptom of something else, and if you only replace the seal it will be back in a few thousand miles. This guide walks the case from the top down, tells you what each leak point looks like, and covers the fix that keeps it dry.
Confirm it is transmission fluid first
Before you price a front seal, make sure the fluid is ATF. Transmission Digest's Shift Pointers column documented a case where the leak came from between the engine and transmission, the fluid color was indistinguishable, and the shop's first assumption was a front seal. Checking the fluid levels showed the engine was losing oil, not the transmission, and once the transmission came out the front seal area was dry (Transmission Digest, "Where's that fluid leak coming from?"). On a carbureted small-block with a 200-4R behind it, a rear main seal or a weeping oil pan gasket drips in exactly the same spot.
- Check both levels cold, then hot. If the engine is down a quart and the transmission is on the full mark, you have your answer.
- Look at the drip on a white towel. Fresh DEXRON is red and thin. Old ATF goes brown but still smells sharp and slightly sweet. Engine oil is amber to black and smells like engine oil.
- Watch for milky fluid. If the transmission fluid itself looks pink and cloudy, you are looking at contamination, not a leak. More on that in the vent section.
- Clean it and dye it. Degrease the case, bell housing and crossmember, add UV dye to the transmission, drive it 20 to 30 miles to get it to temperature, then go back under with a black light. The highest point that glows is the source. Fluid always runs down and back, so the wet spot on the pan rail is almost never where it starts.
The 200-4R leak map, top to bottom
Here are the spots that leak on this unit, in the order you should look at them. Work from the top and front of the case down and back.
| Leak point | Where to look | What it looks like | Transmission out? |
|---|---|---|---|
| Vent / overfill | Top of the case | Fluid sprayed on the floor pan and top of the case, worse after hard driving | No |
| Cooler line fittings | Right side of the case, front | Wet fittings and lines, drips at the bell housing corner | No |
| TV cable seal | Left side of the case, above the pan rail | Wet cable housing where it enters the case | No |
| Manual shaft seal | Left side, at the outside shift lever | Wet around the shift lever | No (pan off) |
| Line pressure tap plug | Left side, just above the outside manual linkage | Weep at a small pipe plug | No |
| Electrical connector | Left side of the case | Wet connector body and harness | No |
| Pan gasket / filter | Pan rail | Wet all around the rail, often at the corners | No |
| Speedometer driven gear housing | Left side of the tailhousing | Wet housing, fluid on the cable | No |
| Extension housing seal | Rear, at the driveshaft yoke | Wet yoke, fluid slung on the exhaust and floor | No |
| Front pump seal / pump O-ring / pump bolts | Bottom of the bell housing | Drip from the inspection cover, fluid on the converter and flexplate | Yes |
Vent and overfill: the leak that is not a leak
A 200-4R that throws fluid out the vent is usually overfull or overheating, not broken. B&M's 200-4R troubleshooting chart lists overheating and foaming oil at the dipstick or breather under three causes: an oil cooler with insufficient capacity, a plugged cooler, and a high fluid level (B&M 35265 200-4R instructions). Set the level hot, on the hot mark, engine running in park on level ground. A cold check on a 200-4R reads low and invites an extra quart that comes back out the vent on the first highway run.
The vent also works in the other direction. ATRA's Gears Magazine described a case where a damaged rubber plug under the battery let water drain onto the transmission vent and into the unit (Gears, "Identifying ATF Contamination"). The article notes that clutches absorb water, that the moisture cannot be removed, and that contaminated clutches have to be replaced. If you find pink, milky fluid, test it with an antifreeze and water strip before you chase anything else. Water strip only means look for an outside path in, like the vent. Both strips reacting means coolant, and on most of these cars that points to the cooler inside the radiator tank.
Cooler lines and fittings
The cooler lines on a 200-4R run from the right front of the case to the radiator tank, and on a 40-year-old car they have been bent, clamped, rubbed and sometimes spliced with rubber hose. Check the case fittings, the radiator fittings, and every place the line touches the frame or the engine. Two things cause most cooler-side leaks:
- Rubber hose splices. If someone patched a line with fuel hose, replace it with transmission-rated hose or a new hard line. Do not reuse old clamps.
- Mixed thread types. Swapped units and aftermarket coolers often have AN adapters threaded into the case. The case ports are not pipe-thread NPT, and an NPT fitting cranked into them will weep forever. Use the correct adapter with its sealing washer or O-ring.
While you are there, check flow. A restricted cooler makes heat, and heat sends you back to the vent problem above.
Left side: TV cable, manual shaft, pressure tap, connector
The left side of the case carries most of the small seals, and they all drip onto the same part of the pan rail. Dye tells them apart.
TV cable seal
The TV cable housing plugs into the case and seals with an O-ring. When the cable has been replaced with a cheap universal, or the bracket at the carburetor is bent and pulls the housing sideways, the seal gets cocked and weeps. Replace the seal, and check the cable while you are there. On this transmission the TV cable sets line pressure and shift timing, and B&M's chart lists a binding or misadjusted TV cable under slipping, late harsh shifts, soft 2-3 shifts and no-shift complaints. Any time the cable comes out of the case, it has to be readjusted before the car leaves.
Manual shaft seal
The outside shift lever rides on the manual shaft, which passes through a lip seal in the case. Linkage that has been yanked on for decades wears the shaft and the seal. The seal can be replaced from outside on some installations, but the clean way is with the pan off so you can support the shaft and check the inside detent lever and manual valve link.
Line pressure tap
B&M's instructions place the line pressure tap just above the outside manual linkage on the left side of the case. Anyone who has hooked a gauge to this transmission has had that plug out. If it was reinstalled dry or overtightened, it weeps. Clean it, seal the threads with a thread sealant rated for ATF, and snug it.
The case electrical connector for the lockup wiring has its own seal too. A hardened one leaks around the connector body and wicks fluid into the harness.
Pan gasket and filter
The 200-4R pan is stamped steel and it bends. Years of overtightening dimple the flange around every bolt hole, and a new gasket cannot seal over those dimples. Flatten the flange on a block before you blame the gasket. B&M's procedure is specific: remove all old gasket material from the pan and case rail, use grease or petroleum jelly to hold the gasket in place, and do not use any gasket sealer or silicone. The same instructions remind you that the 200-4R was not built with a drain plug, which is why so many pans come off bent from someone prying them down full of fluid.
Two other pan-side notes from the B&M sheet: make sure the filter tube O-ring is in the case bore and not still on the old filter, since a cut or missing filter O-ring shows up as pump buzz or whine, and do not block the servo exhaust hole near the pan rail. Torque the pan bolts evenly in a cross pattern and stop at the service spec. More torque does not make it seal better.
Tailhousing: speedometer gear and rear seal
The mechanical speedometer driven gear sits in a housing on the left side of the extension. It seals two ways: an O-ring on the outside of the housing, and a small lip seal on the driven gear shaft. A wet speedometer cable usually means the shaft seal. Swapping driven gears to correct the speedometer after a gear change is when these get disturbed, so check this first on any car with a rear gear swap in its history.
The rear seal at the driveshaft yoke fails for two reasons. The yoke surface is grooved, or the extension housing bushing is worn and lets the yoke wobble. If the yoke has a groove where the seal rides, a repair sleeve or a new yoke is the fix. If you can move the yoke up and down in the bushing, replace the bushing with the seal or the new seal will be gone in a month.
Front pump seal: why replacing only the seal fails
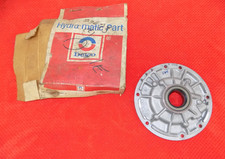
The front seal is the one that means pulling the transmission, so it is the one you most want to get right the first time. The seal itself is rarely the root cause. The usual root cause is clearance at the pump bushing where the torque converter hub rides.
Sonnax explains the mechanism in its oil-flow article. Excess converter hub bushing clearance causes pump noise, wear and reduced pump efficiency, and converter oil flowing past the hub bushing contributes to front seal leaks while giving converter pressure a direct path to exhaust. Sonnax puts a number on it: an extra .003" of clearance on a 2" converter hub has roughly the same area as a .100" hole (Sonnax, "Anatomy of a Transmission: Oil Flow in the Pump-PR-Converter-Cooler-Lube Circuits"). That is a lot of oil pushed at the back of a seal that was only designed to see drainback. Sonnax's 200-4R unit page lists its pump bushing for exactly this "worn pump bushing" condition (Sonnax 200-4R parts).
The front seal repair that lasts includes these checks:
- Pump bushing. Check the hub-to-bushing fit with the converter in your hand. If it rocks, the bushing is done. Press the new bushing in with a press, not a hammer, and size it to the hub.
- Converter hub. Look at the area where the seal lip rides. A groove, rust pitting, or a sharp edge cuts a new seal. A grooved hub means a different converter.
- Drainback hole. Make sure the passage behind the seal that drains oil back to the sump is open. A blocked drainback lets pressure build behind the seal and push it out of its bore.
- Pump outer O-ring and bolt washers. Fluid that runs down the outside of the pump body, not from the seal lip, usually comes from the large outer O-ring on the pump body or the sealing washers under the pump bolts. Replace both any time the pump comes out.
- Converter itself. Wipe the converter dry and check the weld seams and the drain plug, if it has one. A converter seam leak drips in exactly the same place as a front seal.
- Converter alignment. Check that the converter pilot is centered in the crank and that the flexplate bolts and dowels are right, especially after an engine swap. A converter that runs off-center walks the seal out of its bore.
A seal with a locking retainer that holds it against the pump body is a good upgrade on a performance build that sees high converter charge pressure. Seat it fully and square in the bore, with a light coat of ATF on the lip.
Fluid for the refill
The 200-4R was built for DEXRON II-era fluid, which is no longer licensed. GM's current fluid guidance lists DEXRON VI for GM automatic transmissions where DEXRON VI, an earlier-generation DEXRON or AW-1 is specified, and says DEXRON ULV is not a suitable replacement for DEXRON III or DEXRON VI (GM Service Insights, "Use the Right Transmission Fluid"). Use a licensed DEXRON VI. B&M's instructions call for about 6 quarts to reach the full mark after a pan and valve body job. A pan-only drop takes less, so fill to the cold mark, then set it hot.
Preventing the next leak
Set the level hot and leave it there, keep the cooler flowing so heat does not harden every seal in the case, and on a rebuild replace the pump bushing and all the outside seals, not just the lip seals. After any service, check for leaks with the engine running, then drive it hot and look again. That is the last step in B&M's procedure too.
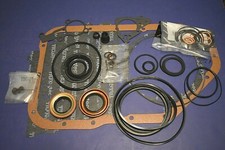
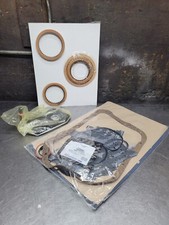
Overhaul gasket and seal kits, pumps, filters and the rest of the 200-4R catalog for sealing this unit up for good.
Shop 200-4R parts →Shop the part for this fix: 200-4R Front Seal & Pump Retainer Kit
If the leak is at the bell housing, this is the seal with the locking retainer that holds it in the pump bore. Pair it with a new pump bushing. CoreTransmissionParts also stocks speedometer housings with seals, cooler adapters and the full gasket and seal kit.
Shop the front seal kit at CTP → All 200-4R parts at CTP →FAQ
Where does a 200-4R usually leak?
The most common spots are the pan gasket, the cooler line fittings on the right front of the case, the TV cable seal and manual shaft seal on the left side, the speedometer driven gear housing and rear seal on the tailhousing, and the front pump seal. An overfilled or overheating unit can also push fluid out the vent, which looks like a leak but is not a failed seal.
Why does my 200-4R front seal keep leaking after replacement?
Usually because the pump bushing is worn. Sonnax notes that excess converter hub bushing clearance pushes converter oil past the bushing and contributes to front seal leaks, and an extra .003 inch on a 2 inch hub is about the same as a .100 inch hole. Replace the bushing, check the converter hub for grooves, and confirm the drainback passage is open.
Can I fix a 200-4R leak without removing the transmission?
Yes, for every leak point except the front pump seal, the pump O-ring and the pump bolt washers. Vent, cooler fittings, TV cable seal, pressure tap, case connector, pan gasket, speedometer gear housing and the rear seal can all be serviced in the car, some with the pan off.
How do I tell a rear main seal leak from a 200-4R front seal leak?
Check both fluid levels first. Transmission Digest documented a suspected front seal leak that turned out to be engine oil, found only because the engine was down and the transmission was full. ATF is red to brown and thin, engine oil is amber to black, and UV dye in one fluid will show you which one is escaping.
Should I use sealer on a 200-4R pan gasket?
No. B&M's 200-4R instructions say not to use gasket sealer or silicone. Clean both surfaces completely, straighten any dimples in the pan flange, hold the gasket in place with a little petroleum jelly and torque the bolts evenly.
Sources
- Sonnax, "Anatomy of a Transmission: Oil Flow in the Pump-PR-Converter-Cooler-Lube Circuits" — excess converter hub bushing clearance causes pump noise, wear and reduced efficiency; oil past the hub bushing contributes to front seal leaks; .003" extra clearance on a 2" hub equals roughly a .100" hole. sonnax.com
- Sonnax, GM 200-4R unit parts listing — pump bushing listed for the worn pump bushing condition, plus 200-4R servo, accumulator and seal kits. sonnax.com
- B&M Racing & Performance, Shift Improver Kit 35265 for 1981-90 THM200-4R, installation instructions — no factory drain plug; no gasket sealer or silicone on the pan; servo exhaust hole; filter tube O-ring; line pressure tap above the outside manual linkage; about 6 quarts after valve body service; troubleshooting chart for foaming at the breather and TV cable faults; leak check hot. B&M instructions (PDF)
- Transmission Digest, Wayne Colonna, "Shift Pointers: Where's that fluid leak coming from?" (May 2024) — suspected front seal leak turned out to be engine oil; check fluid levels before assuming a transmission leak. transmissiondigest.com
- Gears Magazine (ATRA), Mike Brown, "Identifying ATF Contamination" — water entering through the transmission vent; clutches absorb water and must be replaced; antifreeze and water test strip interpretation. gearsmagazine.com
- GM Service Insights, "Use the Right Transmission Fluid" — DEXRON VI covers GM transmissions specifying earlier DEXRON fluids; DEXRON ULV is not a replacement for DEXRON III or VI. gmserviceinsights.com