The 4L65E is the reinforced branch of the 4L60E family — RPO M32, five-pinion planets, a beefier input shaft, bolted behind 6.0L and 8.1L engines in 2500-series trucks, Escalades, H2s and the Trailblazer SS. It also arrived after GM had already moved converter clutch control to the electronically controlled capacity clutch (EC3) strategy, and that single fact drives most of what you are about to read.
P0894 is Transmission Component Slipping. It is not a part number. It is the PCM telling you that something inside the case turned slower than the commanded state permits. On a 4L65E that something is the torque converter clutch far more often than it is a planetary member, and the reason is almost never the converter itself.
What P0894 Actually Measures
The PCM runs two pieces of arithmetic continuously.
Gear ratio. Input speed sensor RPM divided by output speed sensor RPM gives actual ratio. The PCM knows what ratio it commanded. The OE 4L60/4L65E gear set is a wide-ratio design — Sonnax calls the 3.06 first gear the steepest of any four-speed automatic, dropping to 1.63 in second, with third being direct at 1.00. So in commanded second gear the math should land near 1.63:1. Read 1,850 RPM at the ISS with 1,000 RPM at the OSS and you are at 1.85:1, which is nowhere near second and nowhere near first. Something is slipping between the two sensors.
Converter clutch slip. Engine RPM minus input speed sensor RPM. With the clutch commanded on, that number should sit inside a narrow band. When it wanders outside, the PCM has caught the converter clutch slipping.
Both calculations feed the same code. That is why P0894 shows up on scan data with nothing else to go on, and why guessing is expensive.
The PIDs that matter
- Trans ISS and Trans OSS — the two speed sensors. Graph both. A ratio that is wrong in one gear and correct in the others points at one clutch or band. A ratio that is wrong in every gear points at a speed sensor or a reluctor, not a clutch.
- TCC Slip Speed — engine RPM minus ISS. This is the number the code is watching when the fault is converter-side.
- TCC PWM Solenoid Duty Cycle — the single most useful PID on this transmission, and the subject of the next section.
- Trans Fluid Temp — because this fault is famously heat-dependent. A unit that only sets P0894 hot is telling you about a clearance that opens up when the aluminum grows and the fluid thins.
Why the 4L65E Being an EC3 Unit Changes the Diagnosis
Early 4L60E converter clutch control was on or off. The PCM energized the TCC solenoid, the converter clutch valve stroked, release oil exhausted and the apply circuit opened. Sonnax describes the change that followed: pulse width modulation arrived in the mid-1990s, adding a second solenoid to control a regulated apply valve so the clutch could ramp on instead of slamming on. Under PWM the duty cycle sweeps from 0 percent unlocked to about 90 percent at full lockup.
EC3 came next, and it is what a 4L65E runs. The valves and solenoids stayed essentially the same but the strategy did not. Under EC3 the PCM does not want the clutch fully locked most of the time. It deliberately holds 20 to 40 RPM of converter clutch slip under most operating conditions, using that slip to absorb torsional pulses. The friction lining had to change with it, from the high-carbon PWM material to a high-thermal-slipping compound built for continuous controlled slip. Put PWM-era lining in an EC3 converter and it wears out early; put on/off lining in either and it burns.
This matters for two reasons. First, on an EC3 4L65E, slip is normal — so a customer complaint of "it slips a little at cruise" is not automatically a failure. Second, because the PCM is constantly adjusting duty cycle to hold that slip window, it will quietly compensate for a leaking hydraulic circuit long before it gives up and sets a code. That compensation is visible, and it is the best diagnostic tool you have.
The Number One Cause: TCC Regulator and Isolator Bore Wear
The TCC regulator valve does not sit still. It oscillates continuously to regulate apply pressure, and it does that inside an aluminum valve body casting. Sonnax technical support engineer Tory Royce, writing for the TASC Force, puts it plainly: the constant oscillation of the TCC regulator and isolator valves in the aluminum valve body causes casting wear, which allows critical apply pressure to exhaust. Sonnax lists the resulting symptom set for that bore as code 894 and 1870, overheated converter, low TCC apply pressure, burnt 3-4 clutch, harsh 1-2 shift, and low line pressure.
Read that list again. Exhausting apply pressure does not only starve the converter clutch — it bleeds down the circuit that feeds line pressure too, which is how a converter complaint ends up burning a 3-4 pack. One worn bore, five different customer complaints.
There is a second trap in the same bore. The common repair is to ream the regulator section and install Sonnax kit 77754-04K, which puts a wear-resistant sleeve and a hardcoat-anodized valve in the worn area and includes a lengthened isolator valve so it rides in unworn casting. Royce notes that many builders assume 77754-04K restores the whole bore, and on a high-mileage unit it may not: the isolator section can be worn too. That wear is detectable by vacuum testing, and the fix is to oversize that end with reamer 77754-RM5 or tool kit F-77754-TL4 and install isolator sleeve kit 77754-ISO so the new isolator valve also runs in a sleeve.
4L65E TCC Regulator Valve and Isolator Sleeve Kit (Sonnax 77754-04K)
This is the actual repair for the bore that sets P0894 on an EC3 4L65E — sleeve, regulator valve, isolator valve and spring. You still need the reamer and the bore work; the kit does not drop into a worn casting on its own. Confirm your valve body is a 1998-later EC3 unit before ordering.
View the 4L65E TCC regulator and isolator kit →Need the rest of the job? Browse the full 4L65E parts collection.
Catch It on the Scan Tool Before the Code Sets
Here is the diagnostic that separates a one-trip repair from a comeback. Under EC3, when the PCM decides to apply the clutch it raises the regulator solenoid duty cycle in rapid steps to around 50 percent, which is where the target 20-40 RPM slip lands under most driving conditions. Under high torque or sustained freeway load it pushes to 98 percent for full lock. Those are your reference points.
As the regulator bore wears, the duty cycle required to hold that slip window climbs. Sonnax gives a concrete example: a vehicle with relatively few miles showing an average TCC duty cycle around 79 percent is a PCM compensating for circuit wear, most likely in the regulator bore. It has not set a code yet. It will.
So on a P0894 4L65E, log duty cycle and slip together on a steady 45-55 mph cruise, hot. Three patterns:
- Duty climbing well above 50 percent to hold normal slip. Hydraulic leak in the apply circuit. Bore wear until proven otherwise.
- Duty pegged high, slip still excessive. The circuit has lost enough pressure that the PCM has run out of authority, or the clutch lining is gone.
- Duty normal, slip excessive, and the fault appears only hot. Look hard at the TCC PWM solenoid itself before condemning the bore. A hairline crack in the solenoid snout loses the signal pressure acting on the regulator valve and mimics a worn bore exactly — and it is a classic reason a P0894 comes back after a correct bore repair.
The Shortcut That Destroys Converters
Somewhere in the last twenty years the industry worked out that you could make TCC slip codes disappear by blocking the regulator valve with an inner pump slide spring from a 700-R4, effectively converting the unit back to on/off lockup. It works, in the sense that the code goes away. It is also one of the worst things you can do to a 4L65E.
Sonnax quantifies the damage: blocking the valve admits full line pressure into the apply circuit, up to 140 psi under load, against OE apply pressures of roughly 60 to 80 psi. The listed consequences are cracked or deformed TCC pistons, broken damper rivets, torsional driveline disturbance, damaged crankshaft bearings, harsh apply feel, and friction lining delaminating off the TCC piston.
If you buy a used or reman 4L65E valve body, or you are chasing a converter that has now failed twice, pull the regulator valve and look. A 700-R4 pump slide spring where the regulator spring belongs tells you exactly why the last converter came apart. And the bore wear that prompted the modification is still in there.
When It Is the 3-4 Clutch, Not the Converter
The other component that slips on this family is the 3-4 pack, and it produces a very different scan pattern: gear ratio wrong in third and fourth, correct in first and second, with converter slip normal. Chase that one mechanically.
GM preliminary bulletin PIP5031, issued June 2012 for 4L60E-equipped Colorado, Canyon, Express, Savana, Silverado and Sierra models, documents slipping, late or missed shifts in third and fourth caused by the turbine shaft moving in the input housing. That movement bleeds off 3-4 clutch feed pressure. The bulletin's inspection is unusually simple: if the 3-4 clutch feed hole is visible, the turbine shaft has walked and the input housing must be replaced. It also notes the ISS teeth can move far enough out of position to drop the signal and set P0716 and P0717. The bulletin covers the 4L60E (RPO M30), but the input housing and shaft interface carry over to the 4L65E, and so does the failure mode.
Sonnax technical writer Brian Wing frames the broader problem: low line pressure and leaks of third-gear oil are the root cause of most 3-4 slipping, and the 3-4 circuit is long — interconnected with the D4, forward clutch, second, second clutch and third accumulator circuits, so small leaks at several junctions add up to a pressure loss big enough to slip the pack. His inspection routine is worth adopting whole:
- Air check the loaded input drum and confirm the 3-4 and forward clutches apply without leakage.
- Vacuum test the input housing checkball. It must pull 25 in-Hg. Anything below 25 inches is an impermissible leak — reseat or replace. A checkball that cannot exhaust also burns clutches in partial apply, from centrifugal fluid it has no way to dump.
- Air check the housing bore to shaft. Hot, clean housing straight out of the washer, oil poured around the spline area, pressure into the 3-4 feed port with the shaft sealing ring feed blocked, and watch for bubbles. Galling in the housing shaft bore means a new input housing. The galling comes from a sharp leading edge on the input shaft press area — dress that edge, and use Loctite above the feed hole (never in it) when installing a shaft.
- Replace the 3-4 backing plate with a heavy-duty piece. The OE plate flexes during apply, which builds heat unevenly in a pack that has no room to spare. Stop the flex and you remove a leading cause of burnup.
- Install new load release springs. The OE piston return spring is light and needs the help to keep the plates from floating, dragging and glazing.
- Do not skip the stator support. Inspect the sleeve where the input shaft seal rings ride, confirm the sleeve has not rotated and blocked feed holes, and replace the front and rear stator support bushings — they are what hold the shaft steady so the sealing rings can hold pressure. When pressing the stator into the pump cover, support the assembly so you do not crack or warp it, then dial-indicate the assembled stack. There is no published runout spec, but more than a few thousandths means inspect and rework.
- Vacuum test the pump. Boost valves leak, especially with high line pressure, and the boost sleeve physically moves and wears its bore — use a replacement sleeve with external O-rings. Vacuum test the pressure regulator valve, which causes line pressure instability when worn. Shake a clean, dry pump assembled with only the slide inside; if you cannot hear the slide moving, a binding slide is your unexplained low line pressure.
The Repair Order That Works
- Verify fluid level and condition hot, on level ground. Low fluid slips everything. Dark fluid with clutch material in it moves this from a valve body job to a rebuild.
- Log ISS, OSS, TCC slip and TCC duty cycle hot. Sort converter-side from gear-train-side before anything comes apart.
- If converter-side: pull the valve body and vacuum test it. Test the valves in rest position. A low vacuum reading at the TCC regulator and isolator locations is your wear reading.
- Ream and sleeve; do not just swap valves. A new valve in a worn casting leaks the same as the old one did. The regulator section gets 77754-04K; if the isolator end also tests low, oversize it and add 77754-ISO.
- Replace the TCC PWM solenoid while you are in there. It is cheap relative to the labor, and a cracked snout will send you right back to the bore you just fixed.
- Inspect the converter. If it ran hot and slipping long enough to set the code, the lining is glazed or gone. Make sure the replacement uses lining rated for EC3 continuous-slip duty — PWM-era material will not survive commanded slip.
- Flush the cooler and lines. Debris from a failed clutch goes straight back into the new one otherwise.
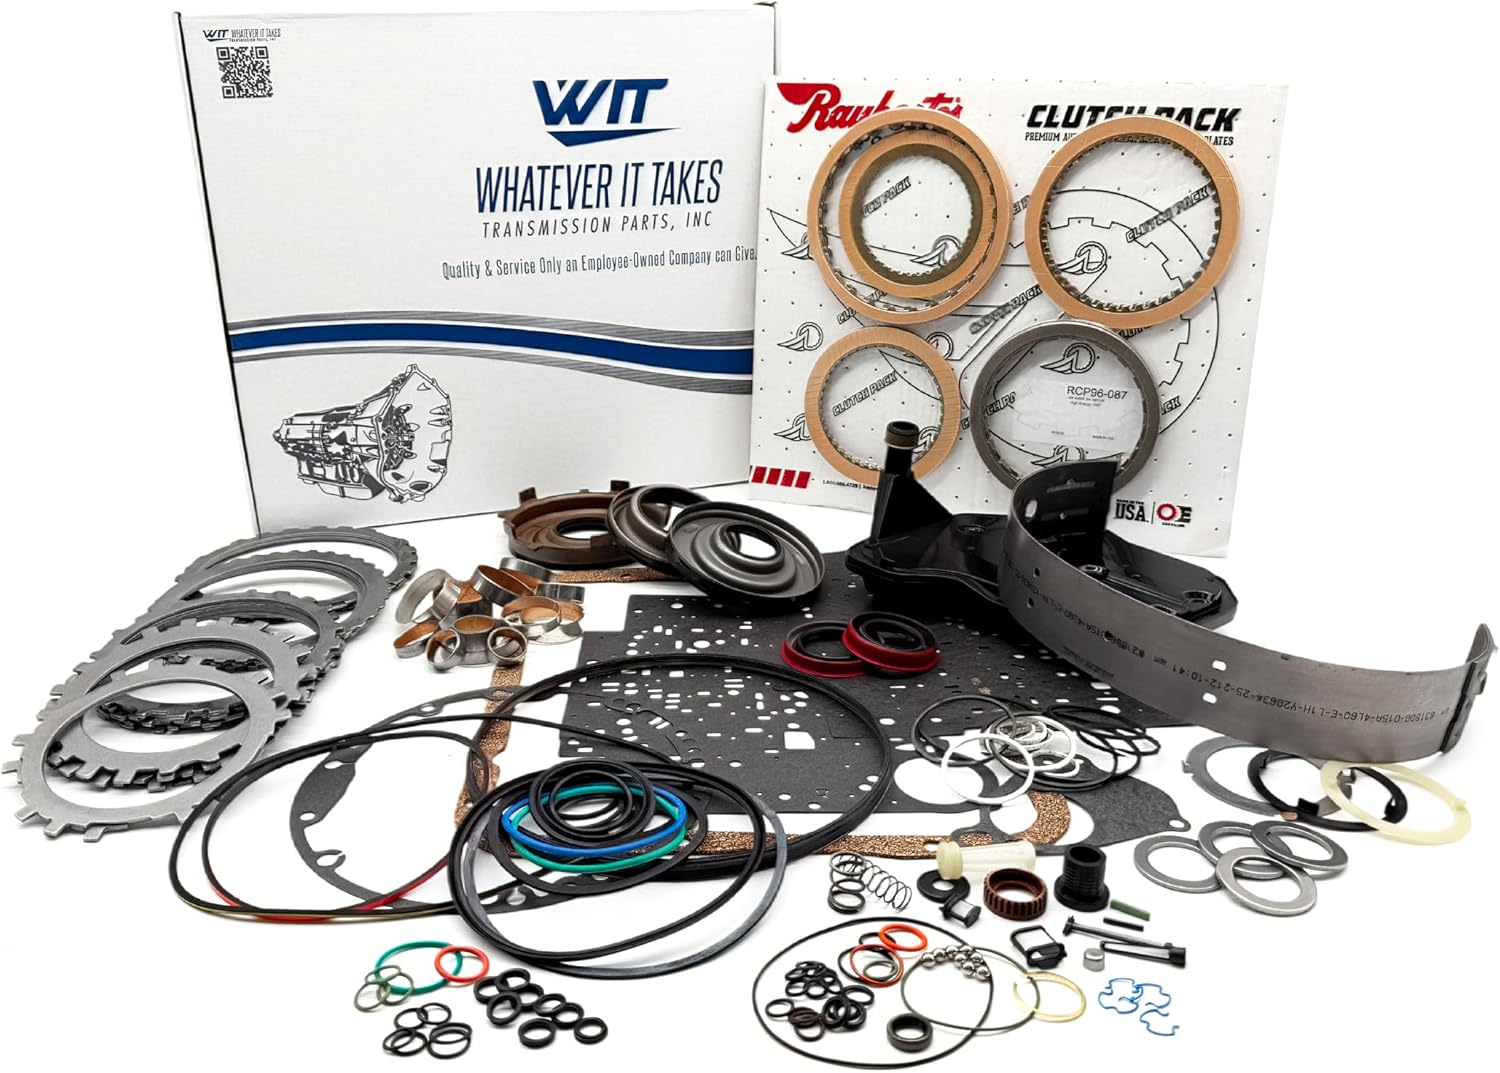
4L65E TCC regulator and isolator kits, PWM lock-up solenoids, 3-4 clutch packs, input housings, valve body components and DEXRON VI — shipped fast from the USA.
Shop 4L65E parts →Fluid and Refill
Use DEXRON-VI. The Lubegard OEM ATF conversion chart lists DEXRON VI as the specified fluid for 4L65-E applications from the 2006 model year forward, including the 6.0L LQ4 Hummer H2 and the 4.8/5.3/6.0/6.2L GM trucks, with earlier 4L65-E applications carrying DEXRON III and DEXRON VI as the accepted service fill. Do not substitute a generic multi-vehicle fluid on an EC3 unit; the converter clutch is running in continuous controlled slip and the fluid's friction characteristics are part of how that slip stays stable.
The same chart puts 4L65-E capacity at 11 quarts (10.6 liters) total and 5 quarts (4.7 liters) for a pan drop and filter. Buy the full 11 if the converter and cooler came off, because a converter that was slipping badly enough to set P0894 is getting replaced or flushed either way. Fill it, run it through the gears, and set the level hot — a 4L65E checked cold reads low and gets overfilled, which foams the fluid and produces its own set of slip complaints.
After the repair, expect a relearn period. The PCM has been compensating for a leaking circuit, so its adaptive TCC values are skewed high. Clear the codes and let it relearn, or reset the adaptives with a capable scan tool, then re-log duty cycle on a hot cruise to confirm it settled back near the 50 percent apply reference instead of climbing again.
FAQ
What does P0894 mean on a 4L65E?
P0894 is Transmission Component Slipping. The PCM compares the input speed sensor against the output speed sensor to calculate actual gear ratio, and compares engine speed against input speed to calculate converter clutch slip. When a rotating component turns slower than the commanded state allows, it sets P0894. It names a symptom, not a part. On a 4L65E the fault is usually the converter clutch circuit rather than a planetary member.
Is P0894 on a 4L65E always a bad torque converter?
No, and replacing the converter alone is the most common way this job comes back. Sonnax documents that on the 4L60-E family, constant oscillation of the TCC regulator and isolator valves wears the aluminum valve body casting, which lets converter apply pressure exhaust. The converter then slips because it never receives full apply pressure. Recondition the bore and the original converter often applies correctly again.
How do I catch TCC bore wear before P0894 sets?
Watch the TCC PWM solenoid duty cycle on a scan tool during steady cruise. Sonnax notes that under EC3 control the PCM raises duty in steps to around 50 percent to begin apply, holds 20 to 40 RPM of slip, and goes to 98 percent only under high load. A low-mileage unit sitting at an average of 79 percent is the PCM compensating for circuit wear, most likely at the regulator bore.
Should I block the TCC regulator valve to get rid of the code?
No. Blocking the regulator valve with a 700-R4 inner pump slide spring returns the unit to on/off lockup and admits full line pressure, up to 140 psi under load, against an OE apply range of roughly 60 to 80 psi. Sonnax lists cracked or deformed TCC pistons, broken damper rivets, torsional driveline disturbance, damaged crankshaft bearings and delaminated friction linings as the results. It hides the wear instead of fixing it.
Can P0894 come from the 3-4 clutch instead of the converter?
Yes. The 3-4 pack is the other component that slips on this family. GM preliminary bulletin PIP5031 describes the turbine shaft moving in the input housing on 4L60-E units, which bleeds off 3-4 clutch pressure and distresses the pack. Sonnax adds that low line pressure and third-gear oil leaks are behind most 3-4 slipping. If the pack is burnt, the converter is not your problem.
Sources
- Sonnax — "20 Years Later: What's New with 4L60-E PWM Modifications" (December 9, 2014). Backs the PWM and EC3 control history, the second TCC solenoid added for the regulated apply valve, the 0 to 90 percent PWM duty sweep, the EC3 target of 20 to 40 RPM commanded slip, duty raised in steps to about 50 percent for apply and 98 percent for full lock, the 79 percent average duty cycle as evidence of regulator bore wear, and the consequences of blocking the regulator valve with a 700-R4 inner pump slide spring: full line pressure up to 140 psi against OE apply of 60 to 80 psi, cracked or deformed TCC pistons, broken damper rivets, torsional driveline disturbance, damaged crankshaft bearings and delaminated friction linings. Also backs the PWM versus EC3 friction lining difference. sonnax.com
- Sonnax — Tory Royce, "Understanding 4L60-E Series Isolator Bore Wear & How to Address It" (January 27, 2025). Backs that PWM controls arrived in 1995 and EC3 on 1998-later models, that 20 to 40 RPM of TCC slip is normal operation, that constant oscillation of the TCC regulator and isolator valves causes aluminum casting wear that lets critical apply pressure exhaust, that the common fix is reaming the bore and installing kit 77754-04K, that the isolator section can also be worn and is detectable by vacuum testing, and that reamer 77754-RM5 or tool kit F-77754-TL4 plus isolator sleeve kit 77754-ISO addresses it. sonnax.com
- Sonnax — TCC Regulator & Isolator Valve Kit 77754-04K product data. Backs the symptom list attributed to this bore — code 894 and 1870, overheated converter, low TCC apply pressure, burnt 3-4 clutch, harsh 1-2 shift and low line pressure — the stated cause that excess wear at the TCC regulator and isolator valve bore allows TCC apply pressure to exhaust, the note that exhausting apply pressure also diminishes line pressure and can result in burnt clutches, the 4L60-E, 4L65-E and 4L70-E fitment covering all years and 1998-later EC3 units, and the kit contents including the hardcoat-anodized regulator valve, wear-resistant sleeve and lengthened isolator valve. sonnax.com
- Sonnax — Brian Wing, "All Over the Map: Attacking 4L60/E Burnt 3-4 Clutches with Confidence" (June 6, 2018). Backs that low line pressure and third-gear oil leaks are the root cause of most 3-4 slipping, that the 3-4 circuit interconnects with the D4, forward clutch, second, second clutch and third accumulator circuits, the 25 in-Hg input housing checkball vacuum spec, the housing bore-to-shaft air check and galling inspection, the sharp input shaft leading edge and Loctite-above-the-feed-hole instruction, the flexing OE 3-4 backing plate, the load release springs, the stator sleeve and support bushing inspection, the dial-indicator runout check, and the pump boost valve, pressure regulator valve and sticking pump slide checks. sonnax.com
- General Motors — Preliminary Information bulletin PIP5031, June 2012 (hosted by NHTSA). Backs the bulletin number and date, the affected 2012 Colorado, Canyon, Express, Savana, Silverado and Sierra models with the 4L60E (RPO M30), the complaint of slipping, late or missed shifts in third and fourth, the distressed 3-4 clutch, the turbine shaft moving in the input housing causing loss of 3-4 clutch pressure, the visible 3-4 clutch feed hole as the inspection criterion, the ISS teeth moving out of position setting P0716 and P0717, and the instruction to install a new input housing. static.nhtsa.gov
- Lubegard — OEM ATF and Conversion Chart, 12th Edition. Backs the 4L65-E fluid specification and capacities: DEXRON VI as the specified fill for 2006-and-later 4L65-E applications including the 6.0L LQ4 Hummer H2 and the 4.8, 5.3, 6.0 and 6.2L GM trucks and SUVs, DEXRON III with DEXRON VI accepted on earlier applications, and a total capacity of 11 quarts (10.6 liters) with 5 quarts (4.7 liters) for a pan and filter service. lubegard.com