An AOD that drives fine around town and goes soft the moment you load it — up a grade, hooked to a trailer, or just into the throttle in third — is almost never telling you the clutches are worn out. It is telling you line pressure is not rising with load. That is one specific circuit, and it is testable in about twenty minutes with a gauge, a piece of shim stock and a warm engine.
The reason the AOD punishes low line pressure harder than a C6 or a TH400 comes down to how Ford built it. Per SAE Technical Paper 800004, presented by Sam Dabich in February 1980, the AOD is a four-speed that "incorporates a new fuel-efficient torque converter, split torque in third gear and a full mechanical drive in fourth (overdrive)," and in overdrive "engine power completely bypasses the torque converter and follows a direct mechanical path to the driveshaft."
Read that again with a wrench in your hand. In third, part of the engine's torque goes around the converter through a mechanical path. In fourth, all of it does, and the direct clutch is what holds that path together. There is no fluid coupling left to soak up a torque spike — whatever the engine makes, the direct clutch carries as a friction joint. Drop line pressure ten percent on a TH400 and it gets sloppy. Drop it ten percent on an AOD in third or fourth and the direct clutch starts converting throttle input into heat.
That is the whole story of "slips under load." Under light throttle the clutch has enough clamp. Under load it does not, because the pressure that was supposed to rise with throttle never did.
First, separate slip from flare
Worth thirty seconds before you go further. A flare is engine RPM jumping during a shift and then settling — a timing or overlap problem. A slip is RPM climbing while you are already in gear and the vehicle is not accelerating with it. On an AOD the two feel similar from the driver's seat because the 3-4 shift is a band-to-clutch handoff. Road test with a tach: if RPM climbs 300 to 500 in third at part throttle on a hill and settles when you lift, that is the direct clutch slipping and you are in the right article. Our flare versus slip breakdown goes deeper.
There is also no scan tool answer here. An AOD is hydraulically shifted with a mechanical governor — no shift solenoids to graph, no ratio monitors to read. Your diagnostic instrument is a pressure gauge.
The one test that settles it: TV pressure
The AOD has no vacuum modulator. Throttle load reaches the hydraulic system through a mechanical throttle valve (TV) linkage — a rod on carbureted applications, a cable on EFI applications — and that TV pressure is what raises line pressure as load increases. If TV pressure is wrong, line pressure is wrong at exactly the moment the transmission needs it most, and the clutch pack pays for it.
Ford's own procedure, reproduced in TCI Automotive's AOD throttle valve adjustment instruction sheet (document 431000), goes like this:
Rod linkage (carbureted)
- Set curb idle to spec first, throttle solenoid positioner not energized. Everything downstream is wrong if idle is wrong.
- Hang a 100 psi gauge on the TV port, on enough hose to read from the driver's seat.
- Get TV control pressure gage block D84P-70332-A, or make one .390 to.404 in. thick.
- Engine at full operating temperature, fluid roughly 100–150°F, off fast idle, park brake on, air cleaner off, A/C off, in Neutral.
- Insert the block between the carburetor throttle lever and the TV linkage adjusting screw. TV pressure should read 28–38 psi, as close to 33 as you can get. The screw moves it 1.5 psi per turn — in raises, out lowers.
- Pull the block, let the lever return to idle. TV pressure must now be less than 5 psi. If not, back the screw out until it is, then re-check the blocked reading is still 28–38.
Cable linkage (EFI)
Same gauge, same temperatures. Insert TV cable gage tool T86L-70332-A between the crimped slug on the cable end and the plastic fitting at the throttle lever, push it in fully, and set TV pressure to 30–40 psi, targeting 33 psi, using the white toggle lever and slider on the cable adjuster behind the throttle body bracket. Remove the tool and confirm idle TV pressure drops below 5 psi.
Those two numbers — roughly 33 psi loaded, under 5 at idle — are the entire specification. A unit that cannot hit both will slip or burn, and new clutches do not change that.
Transmission line pressure test gauge kit, 500 psi with adapters
Covers the AOD TV and line ports plus GM and Mopar fittings. Guessing at TV setting is how AODs get rebuilt twice.
View the gauge kit →Reading what the gauge tells you
| What you see | What it means | Where to go next |
|---|---|---|
| Blocked TV pressure low, adjusts up cleanly to 33 psi with the screw or slider | Linkage was simply out of adjustment | Set it, road test. This is the fix on a large share of post-swap failures. |
| Screw or slider runs out of range before reaching 28 psi | Base setting is off at the transmission end | Adjust the rod at the transmission lever first, then redo the carburetor-end setting. |
| Cannot reach 28–38 psi even after the transmission-end adjustment | Internal TV circuit leak | Valve body out. Throttle valve plug and sleeve. |
| TV pressure is correct but line pressure barely rises with throttle | Pressure regulator boost circuit leak | Boost valve and sleeve in the pump/regulator circuit. |
| Idle TV pressure will not drop below 5 psi with the block removed | Linkage is preloaded, or the TV plug is hanging up | Check for a binding cable or bracket first, then the valve. |
Cause 1: the linkage, and the swap that killed it
The most common AOD in a shop today is not in the car it left the factory in. It is behind a small block in something that came with a C4, and whoever installed it reused the wrong bracket, ran the cable at the wrong pivot radius, or set it "by feel." The TV circuit here does double duty as the line pressure control, so a cable a quarter inch short is not a shift-quality complaint — it is a countdown.
Too low burns the direct clutch and the overdrive band. Too high gives harsh, late shifts and hurts nothing mechanically in the short term. If you have to be wrong, be wrong high.
Cause 2: throttle valve plug and sleeve wear
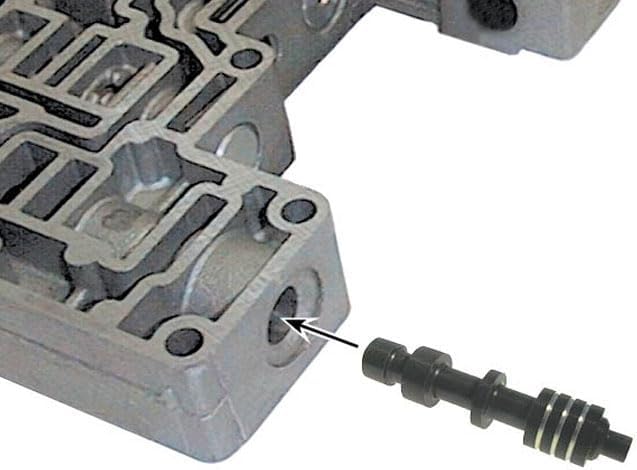
Now the internal version of the same problem. In the valve body, a hardened steel throttle valve plug reciprocates inside an aluminum sleeve, thousands of cycles per drive. Sonnax describes the failure directly: the plug wears the inside diameter of the sleeve, which "allows throttle valve feed oil to leak past the plug and exhaust, resulting in poor line rise." Their symptom list for that bore is uncontrollable shift timing, low line rise, overheated clutch, overheated band, and TV pressure imbalance — which is a fair description of every AOD that has ever come in slipping under load.
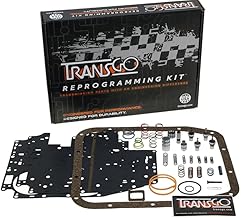
This is why an AOD can have a perfectly adjusted cable and still cook itself: the linkage delivers the right mechanical input, and the valve body leaks it away before it becomes pressure. The repair is a drop-in valve and sleeve — Sonnax lists 76989K with an O-ringed sleeve to seal against the casting bore, and 76989-03K in a factory-style no-O-ring configuration. Do not try to save a worn sleeve by fitting a new plug alone. The wear is in the bore.
Cause 3: pressure regulator boost valve and sleeve
The other leak, and the one that shows up as slipping with a delayed reverse alongside it. The boost valve is what multiplies TV pressure into line pressure rise. Sonnax again: severe wear of the pressure regulator boost sleeve allows boost oil leakage, and the resulting poor line rise causes soft slide shifts, delayed Reverse, low line rise and direct clutch failure. The mechanism is identical to the TV bore — hardened steel valve, aluminum sleeve, decades of reciprocation.
Sonnax's fix for that circuit is boost valve kit 76990K (O-ring style), 76990-03K (factory-style sleeve) or 76990-04K, a larger-ratio version for more line pressure across the board. Building an AOD behind more torque than Ford ever put in front of it, the large-ratio kit is the honest answer instead of jamming the TV setting to the high side of spec.
Separating causes 2 and 3: TV pressure at the TV port tells you whether the throttle circuit is intact; line pressure at the line port tells you whether that signal is being converted into clamp. Correct TV with weak line rise means boost. Weak TV means throttle valve. Test both ports.
Cause 4: accumulator pistons that dump pressure
The AOD's accumulators use molded and bonded rubber pistons, and after thirty-plus years they delaminate. Sonnax's AOD catalog ties the 2-3 accumulator piston (76836A) to 2-3 flare, direct clutch failure and 3-4 neutral, and lists accumulator piston kit 76890-21K against a symptom set that reads exactly like a load complaint: no Forward unless RPM is increased, low line pressure in Forward, bonded piston seal delamination, direct clutch failure and overdrive band distress.
"No forward unless you rev it" is the giveaway. That is not a worn clutch, that is a circuit bleeding off at low pump volume. Pull the accumulator pistons with the pan down and look at the bond line between rubber and aluminum. If it has lifted anywhere, it leaks under load.
Cause 5: the overdrive band and servo, if it is only 4th
If the slip is confined to overdrive — third pulls hard, fourth goes soft — look at the band side before condemning the direct clutch. Band apply force tracks line pressure through the servo, so the same weak-line-rise problem shows up as a distressed overdrive band. Sonnax lists an overdrive servo pin kit (76833) against 3-4 concerns, 4-3 concerns, OD band failure and forward clutch failure, and a larger Super Hold servo (76890-17KP) calibrated to increase apply force progressively as line pressure rises. Check the case bore where the servo pin rides while you are in there; a worn pin bore leaks apply oil and mimics a glazed band.
Fluid: get the type right, and the level righter
The AOD was a MERCON unit. As Transmission Digest lays out in its history of ATF development, MERCON was developed in the mid 1980s to replace Ford Type H, and on the Ford side "MERCON gave way to MERCON V." MERCON is long out of licensed production, so the current-shelf answer is a fluid meeting MERCON V. Do not put Type F in it — different friction specification, different generation of clutch material.
Level matters as much as type on a load complaint. Check it hot, engine idling, in Park, on level ground. Low fluid aerates at exactly the moment the pump is working hardest — a slip that shows up only on grades and towing, and one that will fool you into pulling a transmission that was fine. Overfull does the same thing from the other side: the rotating assembly whips the fluid into foam, and foam does not carry pressure. Total fill runs in the twelve-quart neighborhood with a dry converter, a pan drop returns roughly four, but the dipstick is the specification, not the jug count. Verify against the service data for your application.
The order that actually works
- Check the fluid hot — level, color, smell. Burnt and dark means you are already into clutch material; keep going, but set the customer's expectations now.
- Road test with a tach and pin down slip versus flare, and which gears.
- Gauge the TV port and run Ford's adjustment procedure. 28–38 psi blocked, under 5 psi at idle.
- Gauge the line port and watch it rise with throttle. Correct TV plus flat line rise sends you to the boost circuit.
- Drop the pan. Read the debris. Clutch material means the direct pack; band material means overdrive. Pull and inspect the accumulator pistons for delaminated bonds.
- Valve body off: throttle valve plug and sleeve, boost valve and sleeve. Replace both if either is worn — they age at the same rate.
- Only then plan the teardown. Roughly half the AODs I see for this complaint never needed one.
The pattern to internalize is simple. On a unit that mechanically bypasses the converter in top gear, clamp force is not a comfort feature, it is the whole drivetrain connection. Restore line rise and most "slipping" AODs stop slipping.
Need parts for this job?
AOD master rebuild kits for 1980-1993 units, bands and servo components, filters and pan gaskets, pressure test tooling and MERCON V — all in one place, shipped from the USA.
Shop AOD parts →Reference note: a unit-specific technical manual pays for itself on the first job. The ATSG Ford AOD technical manuals carry the clearance and endplay tables this article does not.
Related reading: our 700R4 TV cable and line pressure guide (the GM version of the same failure), how to check line pressure, and transmission slipping diagnosis.
Sources
- SAE International Technical Paper 800004 — Sam Dabich, "Ford Motor Company Automatic Overdrive Transmission," 1980 Automotive Engineering Congress and Exposition, published February 1, 1980 (DOI 10.4271/800004). Backs the AOD architecture this article builds on: a four-speed incorporating a fuel-efficient torque converter, split torque in third gear and full mechanical drive in fourth, and the statement that in overdrive engine power completely bypasses the torque converter and follows a direct mechanical path to the driveshaft. saemobilus.sae.org
- TCI Automotive instruction sheet 431000, "Ford AOD Throttle Valve Adjustment," rev. 08/2001. Backs the complete Ford TV adjustment procedure quoted above: the 100 psi gauge on the TV port; TV control pressure gage block D84P-70332-A or a fabricated block.390–.404 in. thick; fluid temperature 100–150°F in Neutral with A/C off; rod-linkage TV pressure of 28–38 psi with 33 psi as the target; the adjusting screw's 1.5 psi per turn; the requirement that TV pressure fall below 5 psi with the block removed; and the cable-linkage version using gage tool T86L-70332-A with a 30–40 psi window. static.summitracing.com (PDF)
- Sonnax — Throttle Valve Plug Kit 76989K (Ford AOD). Backs the throttle valve bore failure mechanism: the hardened steel plug reciprocating in the aluminum sleeve wears the sleeve's inside diameter, allowing throttle valve feed oil to leak past the plug and exhaust, resulting in poor line rise. Also backs the symptom list — uncontrollable shift timing, low line rise, overheated clutch, overheated band, TV pressure imbalance — and the availability of the O-ringed 76989K and factory-style 76989-03K repairs. sonnax.com
- Sonnax — Boost Valve Kit 76990K (Ford AOD). Backs the pressure regulator boost circuit failure: severe wear of the boost sleeve allowing boost oil leakage, producing poor line rise, and the stated symptom set of soft slide shifts, delayed Reverse, low line rise and direct clutch failure. Also backs the existence of the 76990-03K factory-style and 76990-04K large-ratio alternatives. sonnax.com
- Sonnax — Ford AOD unit parts catalog. Backs the accumulator and servo details: 2-3 accumulator piston 76836A against 2-3 flare, direct clutch failure and 3-4 neutral; accumulator piston kit 76890-21K against no Forward unless RPM increased, low line pressure in Forward, bonded piston seal delamination, direct clutch failure and OD band distress; overdrive servo pin kit 76833 against 3-4 concerns, 4-3 concerns, OD band failure and forward clutch failure; and Super Hold servo 76890-17KP, described as calibrated to progressively increase band apply force as line pressure increases. sonnax.com
- Transmission Digest — "Automatic-Transmission Fluid: What is today's reality?" Backs the Ford fluid lineage used here: Type H released for the C5, MERCON developed by the mid 1980s to replace Type H, and MERCON subsequently giving way to MERCON V on the Ford side. transmissiondigest.com