The 4R70W is the transmission that ended up behind half of Ford's rear-drive fleet for two decades. It grew out of the AOD when Ford went electronic, and per Transmission Digest it showed up as early as 1993, one year after the AOD became the AOD-E. The "W" is for wide-ratio: Ford deepened first gear to 2.84:1 to help the 4.6 and 5.4 modular motors off the line, then carried the same case forward as the 4R75W and 4R75E with beefier internals for the trucks. Crown Victoria, Grand Marquis, F-150, Expedition, Explorer, Mustang, Town Car. If you turn wrenches on domestics, you have one of these on the bench right now or you will next week.
It is a durable unit, but it fails in a small number of very specific, very repeatable ways. Most of them are hydraulic, not mechanical, and most of them get misdiagnosed as "bad clutches" when the clutches only burned because something upstream stopped sealing. This is a rundown of the failure modes that actually matter on the bench, how to confirm each one with a scan tool and a pressure gauge instead of a guess, and the fixes that stop the comeback. For more Ford coverage, see our Ford transmission hub.
| Spec | 4R70W / 4R75W |
|---|---|
| Type | 4-speed RWD, Ravigneaux geartrain, electronic |
| Gear ratios | 1st 2.84 • 2nd 1.55 • 3rd 1.00 • OD 0.70 • Rev 2.32 |
| Fluid | Mercon V (do not substitute Mercon LV or SP) |
| Approx. capacity | ~13.9 qt dry fill; ~4.5-6 qt at a pan drop |
| Pan bolt torque | 108-132 in-lb (9-11 ft-lb), criss-cross |
Failure 1: The 2001-Up Forward/Direct Clutch Cross-Leak
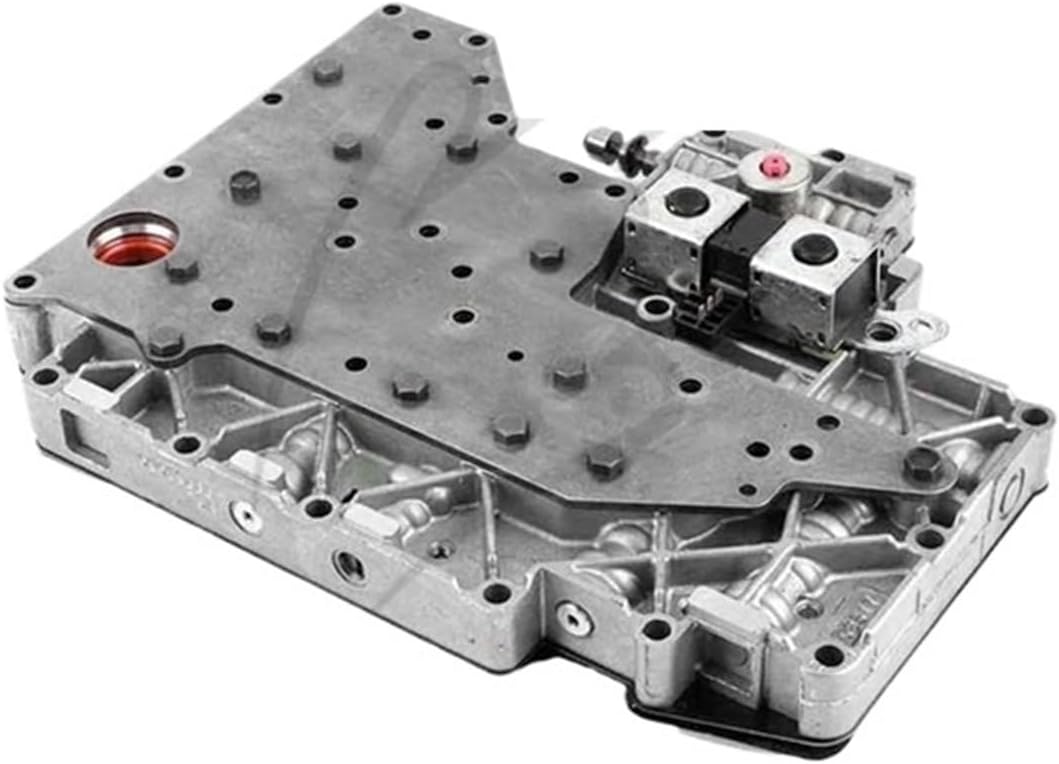
This is the one that fools people, and it is worth understanding in detail because the "damage" you find is a symptom, not the cause. Up through 2000, the valve body had a two-bolt stiffener plate sitting under the 2-3 accumulator whose only job was to mechanically clamp the separator plate and lower gasket against the casting. Beginning with 2001 models, Ford deleted that plate to save cost and cast the old Capacity Modulator Valve bore closed at the same time, per Sonnax technical specialist Gregg Nader. The 2-3 accumulator retainer now seats directly on the separator plate with nothing clamping the gasket in that area.
Here is why that matters. In this unit the Forward clutch is fed from the pump at the front, and the Direct clutch is fed through the output shaft at the rear. Those two circuits are kept isolated everywhere except one spot: the casting under the separator plate, right below the 2-3 accumulator. With no stiffener plate clamping the gasket there, Forward clutch pressure pushes up on the unclamped separator plate and bows it. Sonnax measured that plate bowing up as much as 0.011 inch under normal Forward pressure. When it bows, Forward oil cross-leaks straight into the Direct clutch circuit.
What you see on the vehicle
Dragging clutches. A cross-leak that applies Direct while Forward is applied means two elements are trying to hold at once, so you get a bind-up, a burnt smell, and eventually cooked Forward and Direct frictions. Many rebuilders also find a cracked separator plate at the 2-3 accumulator and blame the crack. As Nader puts it, the cracks may not look good, but "dragging clutches is far more destructive." The crack is a side effect of the same missing plate; it is not the leak path that kills the clutches.
The fix that actually holds
You cannot torque your way out of this and a plain gasket-and-plate rebuild will come back. The real fix is to put the mechanical clamp back: drill and tap the two bolt-hole locations, drill the separator plate, and install a two-bolt retainer. If you have a pre-2001 core you can modify its plate; otherwise Sonnax sells the parts as valve body retainer plate kit 76507F-01K. Reinstall on a fresh, flat separator plate. Miss this on a 2001-up unit and you are rebuilding it twice.
Failure 2: Overdrive Servo Regulator Bore Wear
The classic 4R70W-family complaint is a burned overdrive band, a lost 4th gear, or a 4-3 neutral condition where the truck falls on its face coming out of overdrive. The reflex is to replace the band and the servo and move on. Do that on a worn valve body and it comes right back.
Per Sonnax, the root cause is wear at the inside diameter of the overdrive servo regulator boost valve sleeve, caused by the valve constantly oscillating in the bore. Once the sleeve wears, the regulated overdrive oil leaks off to exhaust and the servo can no longer be properly regulated, so the OD band slips and burns. Sonnax covers the failure across the whole family: 4R70E, 4R70W, 4R75E, and 4R75W.
How to confirm it before you tear into the band
This is a vacuum-test call, not an eyeball call. Bore wear is hard to see with the naked eye. Pull the valve body, cap the port for the overdrive servo regulator circuit, and pull a vacuum on it. If it will not hold the recommended minimum in-Hg, the bore is leaking and a new OEM valve alone will not seal it. The repair is a drop-in Sonnax overdrive servo regulator kit (76948-29K) with a hardcoat-anodized valve and a high-grade aluminum sleeve, or the reaming-required oversized kit (76948-59K) for bores that are too far gone for the drop-in. Restore the seal in the valve body and the new OD band lives.
On the scan tool, an OD-servo/band issue shows up as a gear-ratio error in 4th: watch input (TSS) versus output (OSS) speed and calculate the ratio. If 4th commands but the calculated ratio hangs at the 3rd-gear 1.00:1 or bounces toward neutral instead of settling near 0.70:1, the OD element is not holding. Full walkthrough in our guide to reading transmission live data.
Failure 3: Pressure Regulator Valve and Bore Wear
If a 4R70W comes in with soft or delayed engagements, general slip under load, and no single clutch to blame, put a gauge on it before you condemn hard parts. Sonnax reports that the pressure regulator (PR) valve in the 4R70W, 4R70E, 4R75W, 4R75E, and AODE is prone to severe wear, with visible scoring on the EPC end of the valve. That wear drops line pressure or causes low line rise, which starves every apply circuit and burns clutches that were fine until the pressure fell off.
The trap here is the same as the OD servo: replace the valve, ignore the bore, and it still leaks. Sonnax is blunt that if the valve is scored that badly, the bore is likely compromised too, and a new valve will not seal a worn casting. Vacuum-test the PR bore. If it will not hold, it needs to be reamed and fitted with an oversized valve, not just a replacement valve dropped in.
Confirming low line pressure on the vehicle
Hook a mechanical gauge to the line pressure tap, get the unit to operating temperature, and record pressure at idle in Drive, then under a wide-open-throttle stall or manual-low snap. As a ballpark, a healthy unit sits in the neighborhood of 55-70 psi at idle in Drive and should climb strongly under load toward the 170-190 psi range; always compare against the Ford pressure chart for that exact year and application rather than a generic number. Pair the gauge reading with the commanded EPC pressure PID on the scanner. If commanded EPC is high but actual line pressure stays low across all ranges, you are looking at the pump or a worn PR circuit, not a solenoid. Our transmission pressure testing guide walks through the full procedure.
OTC 5610 Transmission & Engine Oil Pressure Tester Kit
You cannot diagnose PR valve wear or a tired pump by feel. This kit gives you the fittings and gauge to read actual line pressure at the tap and compare it to spec at idle and under load, so you know whether the problem is hydraulic pressure or a burned element before the case comes apart.
View in the ShopFailure 4: The Ravigneaux Carrier Bushing (2004-2008)
The 4R70W and 4R75W use a Ravigneaux geartrain, and the main pinion carrier is a heavy assembly supported by a bushing at each end. Per Transmission Digest, this carrier has a reputation for failure, particularly on 2004 to 2008 vehicles. The larger bushing lives on the mouth side, where the sun gear and shaft come in near the low one-way clutch; the smaller one is in the snout that splines into the Direct clutch hub. Because the gearset is heavy, that support bushing tends to wear.
When it wears, you get the noise and the debris. A worn carrier bushing lets the gearset run off-center, which shows up as a whine or growl that changes with load and eventually puts bronze in the pan. If you drop a pan on a mid-2000s Panther-platform or F-150 unit and find bushing material on the magnet along with a whine complaint, inspect the carrier before you close it back up. Rebuilding the clutches and reusing a carrier with a worn bushing is how a unit comes back with the same noise a month later.
Torque Converter Shudder and Fluid Discipline
Shudder on TCC apply, usually felt in the 3-4 range at light throttle, is a signature 4R70W complaint and it is very often a fluid problem before it is a converter problem. These units are sensitive to fluid condition on the converter clutch friction. The correct fluid is Mercon V, and it matters: do not fill one with Mercon LV or Mercon SP, which are different specifications for different transmissions.
Before you condemn a converter, do a proper flush. Drop the pan, change the filter, and actually evacuate the converter through the cooler line rather than a pan-drop-only that leaves most of the old fluid in the converter and lines. On this unit, only about 4.5 to 6 quarts come out at a pan drop while the full dry-fill is close to 13.9 quarts, so a pan-only service barely dents the total charge. Refill with fresh Mercon V and road test. It can take a number of miles for shudder to clear after a full fluid exchange. If clean fluid does not fix it, then it is the converter.
Two more fluid rules that keep these alive: torque the pan bolts to 108-132 in-lb in a criss-cross pattern so you do not warp the flange and induce a leak, and add or verify an auxiliary cooler on anything that tows. Heat is what ages the fluid that then eats the converter clutch. See our complete ATF fluid types guide for how Mercon V differs from the fluids it is often confused with.
A Sane Diagnostic Order for a 4R70W
When one of these lands on the lift, resist the urge to pull it on symptoms alone. Work the hydraulics first, because most of what looks like a clutch failure on a 4R70W starts as a seal or pressure problem:
- Scan and road test. Pull codes. Watch TSS and OSS, calculate the gear ratio in each gear, and log TCC slip (engine RPM minus TSS) and commanded EPC. Note which gear or shift the fault lives in.
- Line pressure test. Gauge at idle in Drive and under a WOT stall. Low across the board with high commanded EPC points at the pump or PR circuit, not a solenoid.
- Check the fluid. Color, smell, and what is on the magnet. Bronze means a bushing; black and burnt with friction material means cooked clutches, and then you ask what leaked to burn them.
- On teardown, vacuum-test the valve body. PR bore, overdrive servo regulator bore, and the boost circuit. Do not reuse a bore that will not hold vacuum.
- On a 2001-up unit, address the missing stiffener plate. Install kit 76507F-01K or a modified early plate before you button up, every time.
Do it in that order and you stop guessing. The 4R70W is not a mysterious transmission; it is a well-documented one that punishes shops for skipping the vacuum test and the pressure gauge. Fix the bore, restore the clamp, use the right fluid, and these units go another 150,000 miles without complaint.
If you decide the unit is too far gone to save on the bench and you are weighing a rebuild against a reman, our rebuild vs. replace vs. reman breakdown lays out how to price that call for the customer.
Need parts for this job?
Rebuild kits, hard parts, solenoids, valve bodies, filters, gaskets and the correct fluid for this unit — shipped fast from the USA on secure checkout.
Shop 4R70W parts →Sources
- Sonnax (Gregg Nader, TASC Force). "4R70W, 4R75W 2001-Later Forward & Direct Clutch Problems: The Easy Valve Body Fix" — deleted 2001 stiffener plate, forward/direct cross-leak, 0.011" plate bow, retainer plate kit 76507F-01K. sonnax.com/tech_resources/135
- Sonnax. "Overdrive Servo Regulator Kit 76948-29K" — overdrive servo regulator boost valve sleeve wear causing burnt OD band, no 4th, and 4-3 neutral; vacuum-test confirmation. sonnax.com/parts/2402
- Sonnax. "Watch Out For 4R70W Pressure Regulator Valve & Casting Wear" — PR valve scoring on the EPC end, reduced line pressure/low line rise, and the need to ream and fit an oversized valve. sonnax.com/tech_resources/1152
- Transmission Digest. "An Inexpensive Fix for the 4R70W" — 4R70W introduced circa 1993 (a year after the AOD-E), and Ravigneaux pinion carrier bushing wear notably on 2004-2008 units. transmissiondigest.com/an-inexpensive-fix-for-the-4r70w
- Sonnax. "Ford AODE, 4R70W, 4R75W, 4R70E, 4R75E Valve Body Layout" — reference for identifying the PR, boost, and overdrive servo regulator circuits during vacuum testing. sonnax.com/tech_resources/1043