Take a 4L60E valve body off the case and the first thing that falls into your drain pan — if you are not careful — is a handful of small check balls. They roll, they hide, and they all look nearly identical. Put one back in the wrong pocket, leave one out, or add one that does not belong, and you can hand yourself a harsh 1-2 shift, a slipping band, or no reverse on a transmission that was otherwise built perfectly. The separator plate and its check balls are the part of a 4L60E rebuild where careful people still get bitten.
This is what the separator plate actually does, how many check balls the 4L60E uses and where they live, what each one controls, and the reassembly mistakes that create real driveability complaints. The 4L60E is the electronically controlled descendant of the 700-R4 / 4L60, so much of its valve-body hydraulic layout carries straight over from that family [6].
The short version: The separator (spacer) plate is the calibrated orifice plate sandwiched between the valve body and the case. Most 4L60E valve bodies use seven check balls seated against that plate, with an additional check ball in the case that serves the low/reverse (PR) circuit. Each ball meters or blocks a specific feed passage. A missing, extra, or mislocated ball does not throw a code — it changes shift feel or kills an apply. Count them, photograph them, and reference a layout before you close it up [1][3].
What the Separator Plate Actually Does
The separator plate — also called the spacer plate — is the flat steel plate that sits between the valve body casting and the transmission case, sandwiched by a gasket on each side. It is not a passive spacer. It is drilled with dozens of precisely sized orifices that meter how fast fluid moves between the valve body and the clutch and band apply circuits, and it carries the machined ball seats that the check balls seal against [1].
Two jobs matter here. First, the orifices set shift timing and feel: a smaller hole slows an apply and softens a shift, a larger hole speeds it and firms it up. Second, the plate provides the seat surface for each check ball. When a ball is pushed against its seat, it blocks flow in one direction; when fluid pushes it off the seat, it opens and flows freely the other way. That one-way behavior is the entire point of a check ball, and it depends on a clean, unworn seat in the plate [3].
Because the plate meters apply pressure, it is also the single most common thing a shift kit modifies — more on that below.
How Many Check Balls, and Where They Live
Across the standard 4L60E, 4L65E, and 4L70E valve bodies, the working number to remember is seven check balls in the valve-body/spacer-plate area, plus one in the case for the low/reverse (PR) circuit. That case ball sits in the rear-center of the case, not on the valve-body plate, which is exactly why it is so easy to overlook during reassembly. GM revised valve-body castings and plates over the production run, so always confirm against a layout for the specific unit in front of you rather than assuming every year is identical [1][2].
The check balls themselves are not all the same. Several are steel; some circuits use a larger-diameter ball, and over the years many rebuilders switched to imidized (tough plastic) check balls because a slightly conforming ball seals better against a worn or lightly scored plate seat than a hard steel ball does [3]. If you are reusing an original plate, inspect every seat — steel balls wear the aluminum-alloy and steel seats over hundreds of thousands of cycles, and a leaking seat behaves exactly like a missing ball.
Before you disassemble: Photograph the valve body from directly overhead with all check balls in place, and count them out loud into a parts tray. The single most reliable way to get the count and the locations right on reassembly is to have your own photo of this transmission, backed up by a published valve-body layout [1]. Memory and generic diagrams are where mistakes come from.
What the Individual Check Balls Do
You do not need to memorize every ball, but you do need to understand the ones that create complaints when they are wrong. Here are the circuits that matter most on the bench.
The overrun clutch control ball
The overrun-clutch check ball cushions the overrun apply. Overrun clutch feed pressure seats the ball and is forced through a small metering orifice, which slows the fluid and softens the apply; when the overrun clutch releases, feed oil unseats the ball for a quick exhaust [3]. This is a textbook one-way check-ball-plus-orifice pairing, and it is why an extra or misplaced ball in the overrun feed passage disrupts that circuit and can produce odd engine-braking or apply-feel complaints.
The 1-2 / band apply ball
This is the #8 check ball, and Transmission Digest puts a number on the orifice it works with: the #8 ball permits band apply oil to flow through the .067 in to .086 in orifice in the separator plate during the 1-2 upshift [7]. If that ball is accidentally left out or set in the wrong pocket, band apply is no longer cushioned and the classic result is a harsh 1-2 shift. This is one of the most common "I built it and now it bangs into second" complaints, and it is almost always a check ball or plate-orifice issue rather than a clutch problem.
Two cautions from the same write-up before you chase that shift anywhere else. First, techs often enlarge that plate feed orifice, so inspect it for correct size on any plate you did not drill yourself — an opened-up orifice changes band apply timing whether or not the ball is in the right hole [7]. Second, the #8 ball is only one of several things that make a 4L60E bang into second: the accumulator valve sticking or its spring cocked in the bore, the wrong servo apply area, and high line pressure commanded after TCC slip codes P1870 or P0894 all produce the same complaint [7]. Check the ball and the orifice, then rule the rest out with a pressure gauge before you pull the pan again.
The accumulator check balls
Accumulators cushion apply by absorbing a slug of oil so the clutch or band does not slam on; the check balls in those circuits meter that action [4]. On the 4L60/E family, the 3rd accumulator checkball assembly is a known leak point — Sonnax specifically warns that even a minor leak there can lead to band and 3-4 clutch failure, because the leak bleeds off apply pressure the 3-4 elements need [5]. The 4th accumulator ball, by contrast, simply meters accumulator oil so the piston does not slam the case and rarely causes trouble.
The low/reverse (PR) case ball
The check ball in the rear-center of the case is part of the park-reverse (PR) circuit. It is easy to leave out because it lives in the case, not the valve body, and forgetting it disturbs the low/reverse apply oil. When someone reports "no reverse" or a reverse problem after a rebuild, a mishandled case check ball and its circuit belong on the short list of suspects [1].
When the factory deletes a ball on purpose
Not every 4L60/4L65E plate carries the same ball count, and assuming it does is how a "correct" rebuild ends up wrong. Transmission Digest documented the paddle-shift 4L65E Corvette, where GM eliminated the #5 checkball and modified the valve body spacer plate to change how the overrun clutch is fed [8]. Using GM Tech Guide hole numbering, hole 38c was blocked, hole 35c/39 was blocked, the #5 ball was removed, and hole 35a was relocated, which connected overrun clutch feed to the D3 circuit and forced that feed to meter past the #6 ball and through the 4-3 sequence valve [8].
The practical effect is that the overrun clutch applies in first, second and third when the driver selects the manual range, instead of waiting for third the way a PRND321 unit does. You can tell the two apart from the driver's seat: the shift quadrant on the modified unit reads PRNDS, the conventional one reads PRND321, and Transmission Digest notes that none of the manual-shift-capable parts interchange with conventional shift system parts [8]. If you put a #5 ball back into a plate that was built without one, you have changed the hydraulics, not corrected them. Check the quadrant and the plate before you populate the pockets.
The Reassembly Mistakes That Cause Real Complaints
None of these set a diagnostic trouble code. They all feel like something else, which is what makes them expensive to chase after the transmission is back in the vehicle.
| Mistake | Typical complaint |
|---|---|
| Ball left out of the band-apply circuit | Harsh 1-2 shift |
| Extra or eighth ball added to the valve body | Blocked feed passage, wrong or lost apply |
| Case (low/reverse PR) ball forgotten | Reverse concern / low-reverse apply issue |
| Leaking or worn plate ball seat | Behaves like a missing ball; slip or harsh feel |
| 3rd accumulator checkball leak | Band and 3-4 clutch damage over time |
The through-line is simple: on a 4L60E, the correct number of check balls is a fixed target, and more is not better. Adding a ball that does not belong — the mythical "eighth" ball in the valve body — can block a passage that is supposed to flow. Confirm the count against a layout, seat every ball in its own pocket, and verify the case ball is present before the valve body goes on [1][3].
Shift Kits and Separator Plate Modifications
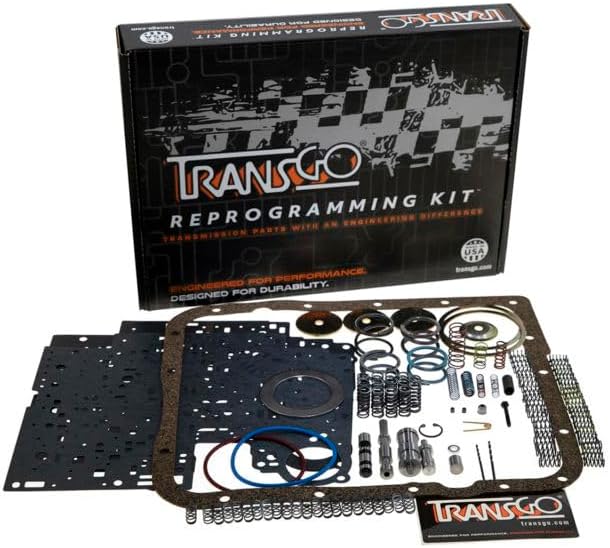
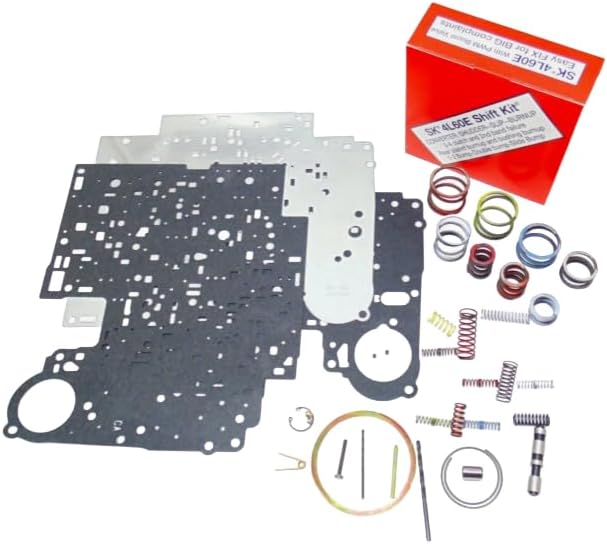
Because the separator plate meters apply pressure and timing, it is the heart of nearly every 4L60E shift kit. TransGo, Sonnax, and similar kits either supply a re-drilled plate or instruct you to enlarge specific feed orifices to increase apply pressure and firm up shifts, which shortens the clutch and band slip time during each shift and reduces wear. Published TransGo separator-plate instructions, for example, call out shift-feed hole sizes in ranges such as roughly.055–.063 in. for four-cylinder and 3.1 V6 applications and about.065–.070 in. for larger V6 and V8 applications, and note that some 1993–1995 plates came with holes smaller than the original spec.
Two cautions from the bench. First, plate drilling is often optional, not mandatory — and if you are also installing a shift-correction or reprogramming kit, you follow that kit's hole sizes instead of the plate's defaults, because doing both can over-modify a circuit. Second, drilling is one-way: you can always open a hole larger, but you cannot put metal back. Measure, verify against the specific kit instructions, and step up in size gradually. When in doubt, a purpose-built performance plate that is already drilled to a proven calibration removes the guesswork [1].
Whether you are correcting a harsh shift or building for more capacity, the separator plate and its check balls are where the 4L60E's shift quality is actually decided — long before the clutches and bands ever see pressure.
Doing the job? Our 4L60E common failure symptoms guide and line pressure testing walkthrough cover the diagnostics that pair with this work, and the full 4L60E service guide covers the rest of the unit.
Sources
- Sonnax — GM 4L60-E, 4L65-E, 4L70-E Valve Body Layout, the exploded valve-body/separator-plate location guide identifying check ball and orifice positions. sonnax.com/tech_resources/1059
- Sonnax — GM 4L60-E Valve Body Identification Guide, on the different 4L60E valve-body castings and plates used across the production run. sonnax.com/tech_resources/614
- Sonnax — Hydraulics Fundamentals Part VIII: Check Valves, on how a check ball seats against the separator plate to block or pass flow and why worn steel-ball seats leak. sonnax.com/tech_resources/881
- Sonnax — Hydraulics Fundamentals Part II: Accumulators & Shift Feel, on how accumulator check balls cushion clutch and band apply. sonnax.com/tech_resources/675
- Sonnax — Guard Against 4L60/E Band & 3-4 Clutch Failure: Test the 3rd Accumulator Checkball Assembly for Leakage. sonnax.com/tech_resources/323
- Sonnax — GM 4L60 (700-R4) Valve Body Layout, reference for the shared valve-body hydraulic lineage the 4L60E inherits. sonnax.com/tech_resources/1057
- Transmission Digest — "4L60E Harsh 1-2 Shift" (April 30, 2021). Backs the #8 check ball identification and the .067 in to .086 in band apply orifice size in the separator plate, the warning that the plate feed orifice is frequently enlarged in the field, and the other 1-2 shift causes that mimic a misplaced ball: a sticking accumulator valve or cocked spring, the wrong servo apply area, and the high line pressure mode commanded after TCC slip codes P1870 / P0894. transmissiondigest.com
- Transmission Digest — "GM 4L65E: The Purpose of Omitting the #5 Ball" (April 9, 2020). Backs the section on factory-deleted check balls: the eliminated #5 checkball and modified spacer plate on the paddle-shift application, the GM Tech Guide hole changes (38c blocked, 35c/39 blocked, #5 ball removed, 35a relocated), the resulting overrun clutch feed through the D3 circuit past the #6 ball and 4-3 sequence valve, the PRNDS versus PRND321 quadrant identification, and the statement that manual-shift-capable parts do not interchange with conventional shift system parts. transmissiondigest.com