P0870 on a 68RFE is one of the more expensive codes to guess at, because the two most common causes sit at opposite ends of the repair spectrum. One of them is a laptop and half an hour at a dealer. The other is a valve body on the bench with a reamer in it. Plug the code into a generic lookup and you get a description that points at neither, which is how a truck ends up with a new solenoid pack, a new pressure sensor, and the same code.
This is a diagnostics walkthrough for Ram 2500 and 3500 trucks running the 6.7L Cummins behind the 68RFE. If you want the broader failure map for this unit first, read our 68RFE weak spots and fixes guide, then come back for P0870 specifically.
What P0870 Actually Means on a 68RFE
First, clear up the name, because this is where most of the wasted labor starts. Type P0870 into a generic OBD-II lookup and you get the SAE description, "Transmission Fluid Pressure Sensor/Switch C Circuit." That wording implies a wiring problem. Chrysler's own naming for this unit is different and much more useful.
In FCA's service bulletins the code appears verbatim as "P0870 - Hydraulic Pressure Test (68RFE Only)". That phrasing shows up in bulletin 18-010-21 Rev. A and again in its successor 18-101-22 Rev. A, both published against Ram 2500 and 3500 trucks with the 6.7L Cummins. Read that description literally, because it describes exactly what the module is doing: it runs a hydraulic pressure test. The module commands a clutch circuit, then reads the corresponding pressure switch to confirm the hydraulics actually did what the electronics asked. When that confirmation does not come back the way the gear logic requires, the test fails and the code sets.
So P0870 is not a report that a wire is broken. It is a report that the transmission's own self-check on the overdrive circuit came back wrong. A wire is only one of several things that could make that happen, and on this transmission it is rarely the one.
How the RFE Pressure Switch System Works
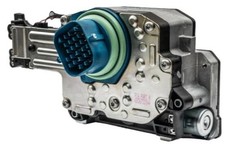
You cannot diagnose this code without understanding the sensing side, so here is the actual hardware. The RFE family monitors clutch apply through five pressure switches built into the solenoid pack. Each switch has its own individual circuit with a single signal wire fed with system voltage. Per Sonnax's RFE pressure switch write-up, that is 12.6 to 14.4 volts on the signal wire, with current inside the solenoid pack limited to 50mA or less by a 300-ohm resistor for each switch.
Each switch sits naturally open with no hydraulic pressure behind it. When clutch pressure reaches roughly 22 psi, the switch snaps from open to closed. Going the other way, it does not release back to open until pressure falls to about 11 psi. That built-in hysteresis matters for intermittent codes: a marginal leak that parks pressure between 11 and 22 psi will make a switch chatter, and the code will come and go with fluid temperature and throttle position.
When a switch closes, it pulls its signal wire nearly to ground and the module sees 25 to 50 millivolts on that circuit. Here is the trap, and it is the single most important electrical fact on this system: an open signal wire and a wire shorted to ground both look identical to a closed switch at the module. Absence of voltage is interpreted the same as switch-closed. If you call a switch "stuck closed" without proving the wire, you will replace a good solenoid pack.
Step One: Check Calibration Before You Touch Anything
This is the step that saves the most money and gets skipped the most often. Both FCA bulletins mentioned above are PCM reprogramming bulletins, and both list P0870 among the trouble codes the updated software resolves. The repair procedure in 18-010-21 Rev. A is straightforward: reprogram the PCM with the latest software, and then, if the truck is equipped with the 68RFE, perform the transmission Quicklearn procedure before clearing codes. The bulletin also calls for a battery charger holding voltage between 13.2 and 13.5 volts through the flash so the process does not abort partway.
Two honest caveats, because this gets oversold on forums. First, those bulletins are written against 2019 Ram 2500 (DJ) and 3500 (D2) trucks with the 6.7L Cummins, sales codes ETL and ETM. They are not a blanket fix for every 68RFE ever built, and you need to verify bulletin and calibration applicability against the actual VIN rather than assuming. Second, the later bulletin 18-101-22 Rev. A carries a hard prerequisite: it applies only to vehicles that already have the updated CP3.3 high-pressure fuel injection pump installed under recall Y78, and the calibrations supporting the older CP4 pump were deactivated. Flash the wrong thing and you create a new problem.
The practical takeaway stands anyway: on a 68RFE truck showing P0870, check the PCM calibration level before you pull a pan. If the software is behind and the bulletin applies, that is a flash and a Quicklearn, not a teardown.
Chasing a P0870 this week?
Solenoid switch valve repair kits, solenoid packs, filters, separator plates and the ATF+4 to put it back together — the parts that actually address this code, shipped from the USA.
Shop 68RFE parts →Step Two: The KOER Reverse Pressure Switch Test
If calibration is current and the code is still there, prove the electrical side next. Sonnax points out a genuinely useful quirk of the RFE design: with key on and engine running with the selector in Reverse, all five pressure switches should read open. That gives you a single known-good baseline state to test against, which most transmissions do not hand you.
- Set KOER in Reverse and read all five switches. All open, roughly 12.6 to 14.4 volts on each signal wire, means the relay is feeding the solenoid pack, the harness is intact, and the module is seeing all five circuits correctly.
- Wiggle-test while you watch. Gently move connectors and harness sections and look for any switch that flickers to a closed state. This is where chafed wires and spread terminals give themselves up. Anything you find here gets fixed before you go further.
- Note the exception. The low/reverse switch stays closed until roughly 150 rpm of output shaft speed is reached, and it may read open while rolling in Neutral or when the fluid is still cold. Do not chase that as a fault.
- Then watch the OD switch through the gears. The overdrive clutches carry 4th, 5th and 6th. So the OD pressure switch should be open in 1st, 2nd and 3rd, and closed in 4th, 5th and 6th. Drive it or command the gears and confirm each transition lands where it belongs.
The interpretation is clean. If the OD switch reads closed in 1st, 2nd or 3rd while the harness passed the wiggle test, the wiring keeps proving itself good every time it correctly reads open elsewhere, so you have a hydraulic cross-leak putting pressure into the overdrive circuit at the wrong time. If instead the OD switch stays open in 4th, 5th and 6th while the truck genuinely makes those gears, that is much rarer and points at a failed switch inside the solenoid pack, since something that shifts correctly clearly received both the command and the pressure.
When It Is Intermittent, Put a Scope On It
Some of these only set on a hot highway pull, and no scan tool sample rate will catch the sequence. Sonnax's method here is worth copying: run a pressure transducer on one scope channel and the pressure switch signal wire on another, then drive it. You are looking for one thing, which channel moved first.
- Pressure rises on the transducer, then the signal wire changes state. The switch is doing its job. The problem is hydraulic, in the valve body.
- Signal wire drops to low or no voltage with no pressure on the transducer. The problem is electrical, in the wiring, the switch, or the module.
One equipment note that catches people out: a solenoid circuit when it is cut off spikes momentarily to 42 to 46 volts, so the scope needs 100V capability if you add a solenoid channel. Four channels is the practical minimum for this test.
The Mechanical Root Cause: Solenoid Switch Valve Bore Wear
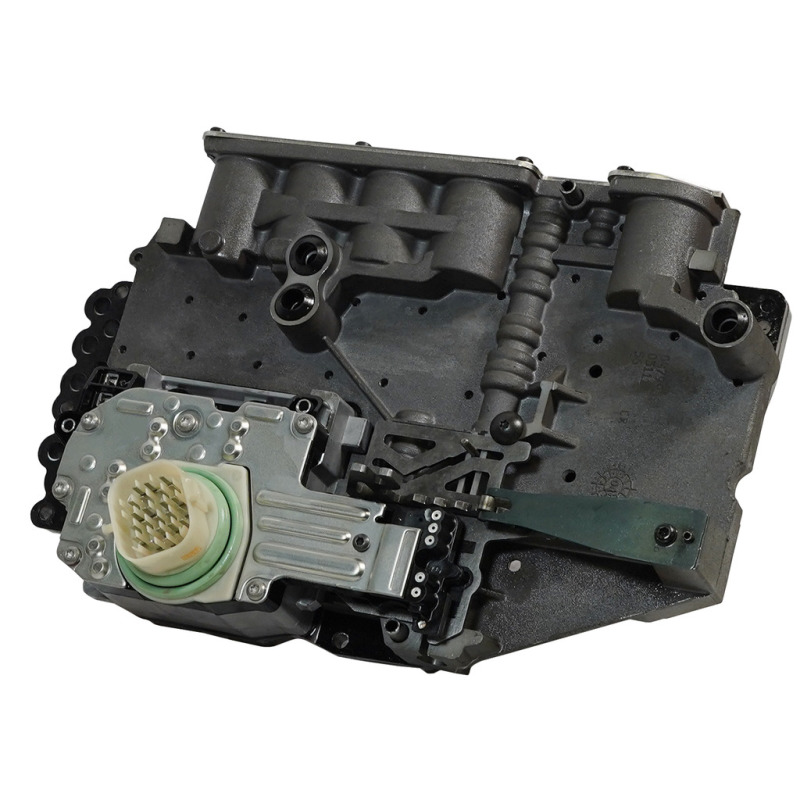
When the software is current and the electrical side is clean, the fault is almost always in the same place. The solenoid switch valve and its outer bore plugs stroke constantly as the unit shifts, and over miles that oscillation wears the aluminum valve body casting oval. Sonnax is direct about the scale of it: worn valve body bores and outer switch valve plugs are behind the related OD pressure switch code roughly 90 percent of the time, and they note this is so common that many shops simply ream and oversize the solenoid switch valves on every build as a matter of course.
Once there is clearance around a valve or plug, pressure crossleaks between circuits. Line pressure pushes past the worn clearance and partially feeds the overdrive circuit, or bleeds it when it should be full. Either way the pressure switch reports a state the gear logic says is impossible, the hydraulic pressure test fails, and the code sets. Sonnax's critical wear area guide for the 45RFE through 68RFE family lists the solenoid switch valve and the solenoid switch valve plugs as wear points tied to codes 841, 868, 871, 988, 1775 and 1776, along with bind-up, failsafe mode, burned OD clutches and wrong-gear starts.
Inspect for more than dimensional wear. The casting alloy used in these valve bodies is not especially forgiving, and some bores show erosion and porosity that no reamer will save. Check physically and confirm with a vacuum test.
Vacuum Testing the Bores
Vacuum testing is how you stop guessing. Cap the bore, pull vacuum, and read the gauge. For the low/reverse switch valve bores in the 68RFE, Sonnax gives a working threshold of 18 inches of mercury as satisfactory, with anything below that considered worn and due for replacement. The technique matters as much as the number: you have to manually shuttle the valve to whichever worm track you are testing to get a real reading, and any exhausts or holes inside the test area must be plugged or the reading is meaningless.
Why This Code Is a Warning About Your Overdrive Clutches
Do not treat P0870 as a nuisance light. A cross-leak that pressurizes the overdrive circuit when those clutches should be released drags them, and dragging clutches make heat. The 68RFE overdrive pack has very little margin for heat to start with: the OE frictions are single-sided with a steel core only .034 inch thick. For scale, the direct clutch steels in a 4L80-E are .080 inch. Those thin 68RFE steels have almost no mass to absorb or shed heat, so once they get hot they distort, which takes clearance out of spec, which keeps them from releasing fully, which burns them.
That is why solenoid switch valve wear and burned overdrive clutches keep showing up in the same teardown. Sonnax calls the solenoid switch valve plugs arguably the weakest link in the whole overdrive clutch system for exactly this reason. If a truck has been driving on a live P0870 for a while, plan on inspecting the OD pack when the valve body comes off. Fixing the cross-leak and buttoning it up over cooked clutches just brings the truck back on a hook.
68RFE Shift Solenoid Kit (solenoid pack with pressure switches)
The five RFE pressure switches live inside the solenoid pack, so this is the part you need when the KOER test proves a genuinely failed switch rather than a valve body cross-leak. Direct replacement for Ram 2500/3500 6.7L Cummins applications.
View the 68RFE solenoid kit →The Fix, In Order
- Verify PCM calibration first. If the software is behind and an applicable bulletin covers the VIN, flash it with a charger holding 13.2 to 13.5 volts, run the transmission Quicklearn, clear codes and road test. This costs an hour and resolves a real share of these.
- Run the KOER Reverse pressure switch test with a wiggle test on the harness and solenoid pack connector. Repair anything you find here before going further.
- Watch the OD switch through all six gears to classify the fault as a cross-leak, a failed switch, or neither. Scope it with a transducer if it is intermittent.
- Pull and vacuum-test the valve body. Test the solenoid switch valve bore and its outer plugs, and inspect the casting for erosion and porosity while you are in there.
- Ream and fit oversized valves and plugs where the bores read low. Sonnax offers oversized kits for these bores along with the required reamers and fixtures, and their low/reverse switch valve repairs for the 68RFE are the drop-in kit 92835-41K and the oversized 92835-45K for bores with extreme wear. If line pressure is also unstable, the oversized pressure regulator valve kit 44912-10K addresses PR bore wear in the same pass.
- Verify every checkball, the separator plate and gasket orientation against the correct diagram for that exact valve body. An assembly error from a previous repair sets these codes just as reliably as wear does.
- Inspect the overdrive clutch pack and replace burned frictions and glazed steels rather than reusing them. If the truck is making more than stock power, this is the moment to address OD clutch capacity properly.
- Refill with Mopar ATF+4 only, set the level at operating temperature, then re-run the KOER pressure switch test and a road test to confirm the OD switch now tracks the gears correctly. Run the fast learn so adaptive pressure control recalibrates to the repaired unit. Our transmission fluid spec chart has the ATF+4 details if you need them at the counter.
If you are already in the valve body, do the rest of the known RFE wear points in one pass rather than going back in later. Our 68RFE valve body wear fix and valve body testing write-ups cover which bores are worth reaming while it is on the bench.
Shop 68RFE parts →
Frequently Asked Questions
What does P0870 mean on a 68RFE?
On the 68RFE, Chrysler names P0870 the OD Hydraulic Pressure Test. FCA service bulletins list it literally as "P0870 - Hydraulic Pressure Test (68RFE Only)". It sets when the module commands the overdrive circuit, watches the overdrive pressure switch for confirmation, and does not get the switch state the gear logic expects. Generic code lookups call P0870 a Transmission Fluid Pressure Sensor C circuit fault, which is the SAE name, not the Chrysler name, and it sends people looking for a wiring fault that usually is not there.
Can a PCM software update really fix P0870?
On some trucks, yes. FCA bulletin 18-010-21 Rev. A and its successor 18-101-22 Rev. A both list P0870 among the DTCs resolved by reprogramming the PCM with the latest software, followed by a transmission Quicklearn on 68RFE-equipped trucks. Those bulletins are written against 2019 Ram 2500 and 3500 trucks with the 6.7L Cummins, so check calibration level and bulletin applicability for the specific VIN before you assume it applies.
How do I tell whether P0870 is electrical or hydraulic?
Start with the key on, engine running test in Reverse. All five RFE pressure switches should read open with roughly 12.6 to 14.4 volts on each signal wire. Wiggle the harness and connector while you watch. If everything stays open and sane, the wiring is proving itself and the fault is hydraulic. Remember that an open signal wire or a wire shorted to ground looks identical to a closed switch at the module, so never call a switch closed until you have verified the wire.
What causes P0870 when the software is already up to date?
Wear in the solenoid switch valve bore and its outer bore plugs. Those valves stroke constantly and wear the aluminum casting oval, which lets pressure cross-leak into and out of the overdrive circuit. Sonnax reports that worn bores and outer switch valve plugs are behind the related OD pressure switch code roughly 90 percent of the time, and lists the solenoid switch valve and its plugs as a critical wear area.
Will P0870 burn the overdrive clutches?
It can, and this is why the code deserves attention rather than a clear-and-drive. A cross-leak that feeds the overdrive circuit when the OD clutches should be released drags those clutches and builds heat. The OE 68RFE overdrive frictions use a steel core only .034 inch thick, against .080 inch for the direct clutch steels in a 4L80-E, so they distort and burn quickly once they run hot. Inspect the overdrive pack any time the truck has driven on a live P0870 for a while.
Sources
- FCA US LLC — Technical Service Bulletin 18-010-21 Rev. A, "Flash: Powertrain Control Module (PCM) Updates," March 5, 2021 (hosted by NHTSA). Backs the Chrysler code name "P0870 - Hydraulic Pressure Test (68RFE Only)", the PCM reprogramming remedy, the requirement to perform transmission Quicklearn on 68RFE-equipped vehicles, the 13.2-13.5 volt battery charger specification during the flash, and the 2019 Ram 2500 (DJ) / 3500 (D2) 6.7L Cummins ETL/ETM application. static.nhtsa.gov
- FCA US LLC — Technical Service Bulletin 18-101-22 Rev. A, "Flash: Powertrain Control Module (PCM) Updates," August 10, 2022 (hosted by NHTSA). Backs the repeated listing of "P0870 - Hydraulic Pressure Test (68RFE Only)" in the later calibration bulletin, and the prerequisite that the updated CP3.3 high-pressure fuel injection pump be installed under recall Y78 before that calibration is applied. static.nhtsa.gov
- Sonnax — "Dodge RFE Pressure Switch Diagnosis & Code P0871," Jim Mobley, January 20, 2025. Backs the five-pressure-switch RFE architecture, the 12.6-14.4V open-state signal voltage, the 300-ohm resistors limiting current to 50mA or less, the 22 psi close / 11 psi release thresholds, the 25-50mV closed-state reading, the warning that an open or grounded signal wire reads identically to a closed switch, the KOER-in-Reverse all-switches-open baseline test, the OD switch open-in-1-2-3 / closed-in-4-5-6 behavior, the low/reverse switch staying closed until 150 rpm output shaft speed, the transducer-plus-scope method for intermittents, the 42-46V solenoid cutoff spike requiring a 100V-capable scope, and the finding that worn bores and outer switch valve plugs cause the OD pressure switch code about 90% of the time. sonnax.com
- Sonnax — "68RFE Overdrive Clutch Failure: What to Check First When Troubleshooting OD Issues," Jason Larochelle, August 18, 2020. Backs the .034 inch OE overdrive clutch steel core thickness, the .080 inch 4L80-E direct clutch steel comparison, the heat-distortion failure mechanism that takes clearance out of spec, and the identification of the solenoid switch valve plugs as the weakest link in the overdrive clutch system due to crossleaks into and out of the OD circuit. sonnax.com
- Sonnax — "Chrysler 45RFE, 545RFE, 65RFE, 66RFE, 68RFE Critical Wear Areas & Vacuum Test Locations" (technical guide, PDF). Backs the solenoid switch valve and solenoid switch valve plugs as critical wear areas, the associated code list (841, 868, 871, 988, 1775, 1776) and symptoms including bind-up, failsafe mode, burned OD clutches and wrong-gear starts, and the oversized valve and plug kit part numbers available for those bores. sonnax.com (PDF)
- Sonnax — "Diagnosing 62TE, 68RFE Low/Reverse Switch Valve Issues," Chris Leach, July 14, 2025. Backs the 18 inches of mercury vacuum test threshold (below which the bore is worn and should be replaced), the requirement to manually shuttle the valve to each worm track and plug internal holes for an accurate reading, and the 68RFE repair part numbers 92835-41K (drop-in) and 92835-45K (oversized). sonnax.com