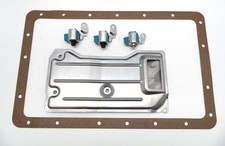
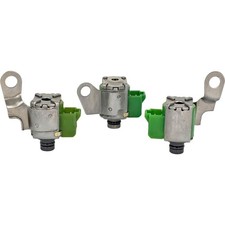
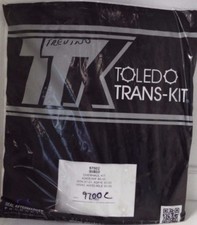
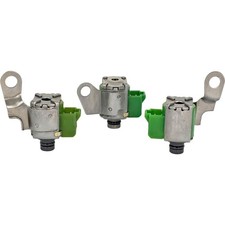
If your 1987 Jeep Cherokee XJ or Comanche with the AW4 automatic is stuck in one gear, skips overdrive, or never locks the converter on the highway, the three valve body solenoids are one of the first things a transmission tech checks. This kit replaces all three at once with new units and, as pictured, also includes a new oil screen and pan gasket, so the job is done in a single pan drop instead of two. 1987 was the first model year the AW4 went into the XJ and MJ, and many of these trucks are still running their original solenoids.
What the solenoid kit does in a 1987 AW4
The AW4 is an Aisin Warner four-speed with an electronic brain: a separate transmission control unit (TCU) reads vehicle speed, throttle position, shift lever position and brake switch, then switches three solenoids bolted to the bottom of the valve body. Jeep's AW4 overhaul manual describes solenoids 1 and 2 as the ones that sequence the 1-2, 2-3 and 3-4 shift valves, with solenoid 2 also tied to the overdrive elements, and solenoid 3 as the converter lockup solenoid that routes line pressure to the lockup clutch through the relay valve. Every gear the truck pulls depends on those three coils opening and closing on command.
Symptoms of a failing AW4 solenoid
- Truck takes off in third or fourth, or stays in first and will not upshift
- No overdrive (no 3-4 shift) on the highway
- Torque converter never locks up, so cruise rpm stays high and fuel economy drops
- No 4-3, 3-2 or 2-1 kickdown, which the factory troubleshooting chart lists under a faulty solenoid
- Shifting that is fine cold but acts up once the fluid is hot
- Harsh or erratic shifts after a pan service that disturbed the solenoid wiring
Worn clutches and a tired neutral safety switch or sensor can mimic some of these complaints on an AW4 this old, which is why testing first matters.
How to confirm before buying
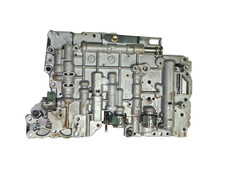
The factory test is simple. With the pan off, disconnect each solenoid lead and put an ohmmeter between the solenoid mounting bracket and the wire terminal. Jeep specifies 11 to 15 ohms; anything above or below that range means replace the solenoid. A coil can read in range cold and still fail hot, so if the meter says good but the symptom only shows up warm, the solenoid is still suspect. Also check the harness: the AW4 runs one feed wire per solenoid from the TCU, and a chafed wire or corroded pin gives the same symptoms as a dead coil. If your problem is harsh shifts with good solenoids, look at the AW4 valve body for 1987-2001 instead.
Fitment
This listing is for the 1987 AW4, which means the 1987 Jeep Cherokee XJ, Wagoneer (XJ-based) and Comanche MJ with the automatic. The AW4 changed in small ways over its 1987-2001 run, so match the solenoid connector and bracket shape on your valve body to the photo, or send us your year and VIN before you order. If your truck is a later model, see the 1990-1992 AW4 solenoid kit and the other AW4 parts in our Aisin transmission parts collection.
Install notes
- Drain the fluid, drop the pan, and remove the oil screen bolts and screen. Tag the solenoid wires if you are pulling all three so they go back on the same coils.
- Pull the solenoid bolt carefully; do not let valve body parts fall out when the solenoids come off.
- Install the new solenoids and torque the bolts to 10 N-m (7 ft-lbs). Install the new screen with a new gasket at the same 7 ft-lbs.
- Clean every trace of old sealer off the pan and case. Pan bolts are 7.4 N-m (65 in-lbs) and the drain plug is 20 N-m (15 ft-lbs) per the factory procedure.
- Fill with Mercon-type ATF; Jeep lists Mopar Mercon as recommended and Dexron II as the alternative. Check the level hot in Park.
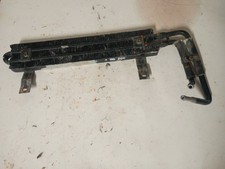
If the fluid was dark or the truck tows, add an AW4 transmission cooler while you are under it; heat is what cooks AW4 solenoids and clutches. If the pan was full of friction material, a solenoid kit will not save it and an AW4 overhaul kit is the better spend.