The 6L90 puts a computer on top of the valve body, and that one design decision is responsible for most of the money wasted on these units. The TEHCM sets a solenoid performance code, the shop reads the code, the shop buys a module, and the truck comes back six weeks later with the same complaint. The solenoid was never the problem. The bore feeding it was.
Aluminum valve body castings wear in a completely predictable way. A steel spool strokes in a soft bore a few hundred million times, the clearance opens up, and oil starts crossing the land instead of stopping at it. Nothing breaks. Nothing looks wrong on the bench. The valve still slides freely and the casting still passes a visual. What it cannot do anymore is hold a pressure difference, and every solenoid downstream of that bore is now being fed garbage.
Here is how to find that wear on a 6L90, how to separate it from an actual electrical fault before you commit to a teardown, and what the bench repair looks like when you get there.
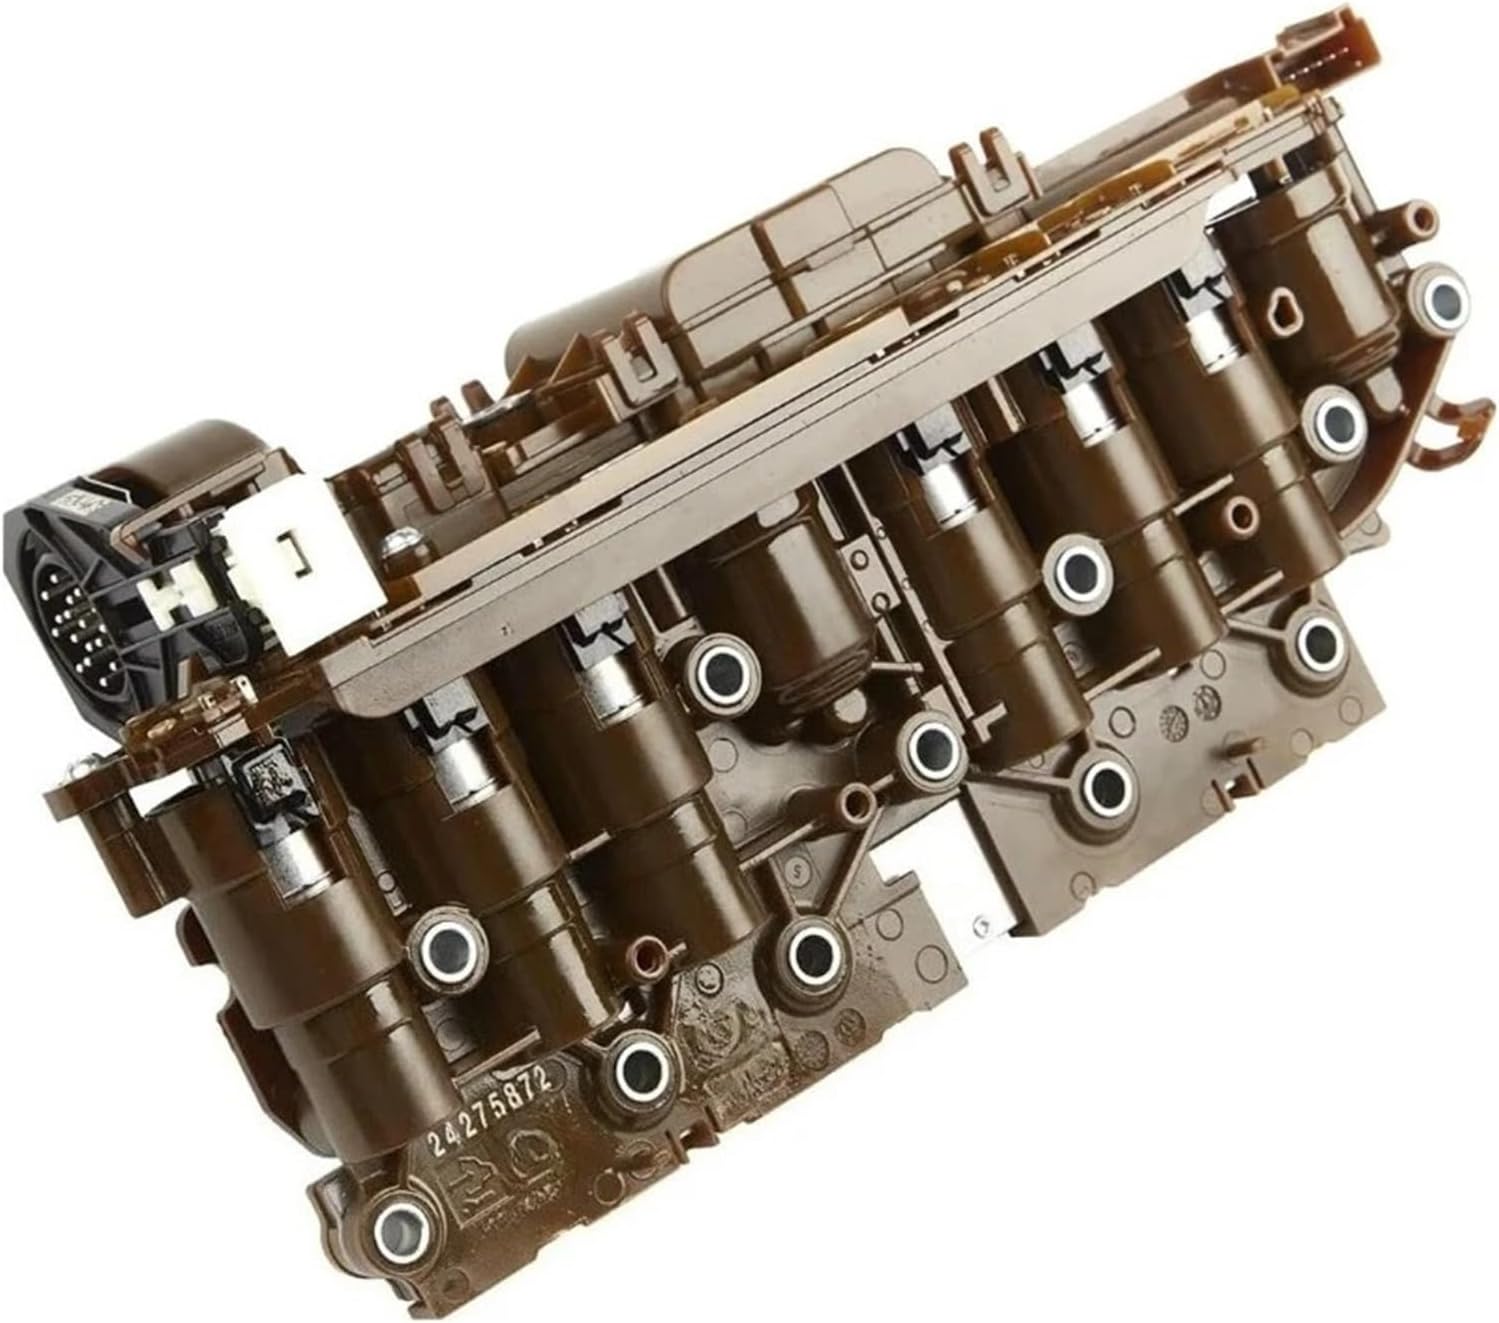
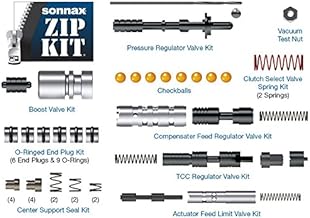
Know exactly what casting is on your bench
The 6L90 is the heavy-duty member of the GM 6L family, which also includes the 6L45, 6L50 and 6L80. It is structurally similar to the 6L80, but roughly 25 percent of the internal components were upgraded for torque capacity, and the case was lengthened by 1 3/8 inches to house the stronger input and output gearsets. Many parts interchange between the two. The valve body is where that assumption bites people.
A 6L80 valve body will physically bolt onto a 6L90 case, and vice versa. The center support holes in the upper casting sit at a different offset between the two models, so if you install the wrong one, you get forward gears and no reverse, because the case ports never line up with the upper casting. Sonnax technical support specialist Tory Royce also warns against relying on the machined-down boss (A, B, C or D) on the upper casting as an ID method, since some valve bodies have no boss machined down at all.
There is a second split to watch. Sonnax lists its remanufactured units as two families: 2006 to 2009 units and 2010-and-later units. They look very similar. Verify the identification before you order anything, because a correct-looking wrong part will burn a full day of labor.
The bores that actually wear, and what each one does when it leaks
Wear is not random. It concentrates where a valve oscillates constantly in a narrow band of bore. On the 6L family, that puts four locations at the top of the list, and the Sonnax vacuum test guide for the 6L45 through 6L90 flags each one with the specific complaint it produces.
| Location | Where it lives | What the leak looks like from the driver's seat |
|---|---|---|
| Actuator feed limit (AFL) valve | Lower valve body | Solenoid performance codes, wrong gear starts, harsh shifts, soft shifts, clutch failure |
| Pressure regulator and boost assembly | Pump body | Erratic, high or low line pressure, clutch slippage, harsh shifts, soft shifts, low or no cooler flow, overheated transmission, burnt clutches |
| TCC regulator apply valve | Lower valve body | P0741 and P0742, failsafe mode, overheated fluid, high TCC slip RPM, harsh shifts, harsh TCC apply |
| Compensator feed valve | Lower valve body | Harsh shifts, downshift clunk, bump and flare shifts, bind-up, burnt clutches |
The AFL valve is the one worth understanding in detail, because it is upstream of everything electronic. Its job is to take line pressure and regulate it down to a lower, constant feed pressure for the control solenoids. Every pressure control solenoid in the TEHCM meters that feed to produce clutch apply pressure. When the AFL bore wears, that feed is no longer constant, and Sonnax describes the result plainly: excess wear in the AFL bore "prevents proper regulation of oil pressure supplied to control solenoids resulting in harsh or soft shifts, solenoid codes, wrong gear starts, and clutch/band failure."
That is the whole misdiagnosis in one sentence. A perfectly good solenoid fed inconsistent pressure behaves like a failing solenoid, and the TEHCM logs it as one.
Rule out the cheap stuff before you pull the pan
Two checks separate a valve body job from a much smaller one, and both take minutes.
Check the cooler lines first
GM bulletin PIP5792E covers 6L80, 6L90, 8L90, 10L80 and 10L90 vehicles where customers report harsh shifts, shudder, surge, stall or high transmission fluid temperature, before or after an overhaul. The listed root cause is not internal at all: a twisted cooler line on low-mileage vehicles. The correction is to disconnect the cooler line at the auxiliary cooler, untwist it, and reconnect. On some vehicles you have to drop the underbody panels to see the lines clearly. If a fresh rebuild came back harsh, look here before you blame your own work.
Read line pressure and let it tell you electrical or hydraulic
Line pressure behavior is the single most useful number on a 6L90, because the failure signatures are distinct:
- Line pressure stuck around 60 to 68 psi with no RPM rise at all points at the TEHCM line pressure solenoid stuck in exhaust, not at the casting. Sonnax notes that unplugging the transmission produces no different result in this condition, which is a fast confirmation on the driveway.
- Line pressure at or below 30 psi at idle is a classic missing pressure regulator boost valve roll pin in the pump. The vehicle may still move, but nothing about it will be normal.
- Line pressure that is normal but erratic and all over the place with RPM fits a stuck compensator feed regulator valve, which is fed by line pressure and will also throw delayed engagements, harsh chattering shifts or downshift clunks depending on where it hangs.
- Line pressure completely normal alongside a missing gear pushes you toward a stuck clutch regulator valve, a displaced checkball or a mechanical problem, not a pressure supply problem.
That last line is worth internalizing. On this unit family, a hard missing-gear complaint with textbook line pressure is almost never the pump.
Use the application chart to aim the diagnosis
Before you touch a bolt, map the complaint against the clutch and solenoid application chart. The 6L90 applies two elements per gear, so a single failed element produces a very specific pattern of missing gears, and that pattern points at one circuit.
| Range | Elements applied |
|---|---|
| Reverse | 3-5-Reverse clutch and Low & Reverse clutch |
| 1st (drive) | 1-2-3-4 clutch, Low sprag holding |
| 2nd | 1-2-3-4 clutch and 2-6 clutch |
| 3rd | 1-2-3-4 clutch and 3-5-Reverse clutch |
| 4th | 1-2-3-4 clutch and 4-5-6 clutch |
| 5th | 3-5-Reverse clutch and 4-5-6 clutch |
| 6th | 4-5-6 clutch and 2-6 clutch |
Read it the way it is meant to be read. No reverse, no 3rd and no 5th is one element: the 3-5-Reverse clutch circuit. No 2nd and no 6th is the 2-6 circuit. Missing 1st through 4th is the 1-2-3-4 circuit, and on this unit a forward slip or a 1-2-3-4 solenoid performance code frequently traces to a cracked 1-2-3-4 apply piston rather than anything in the valve body at all. Sonnax notes the OE piston has such a high failure rate that most shops replace it on every repair.
The bench procedure: vacuum test, do not eyeball
Once the valve body is out and split, vacuum testing is how you convert "it looks fine" into a number. Pull the valve to its rest position, seal the test port, and pull vacuum. A tight bore holds. A worn bore bleeds down, and the rate of loss is proportional to the wear.
The part most shops get wrong is the pass/fail threshold. Sonnax does not publish one universal number for every bore and neither should you. Their guidance is to record readings across the units you build, calculate an average for each bore, and then set a minimum standard that fits your own warranty exposure. A shop doing 100,000-mile fleet trucks needs a tighter standard than a shop doing budget resale work. What matters is that you have a number, you write it down, and you take a second reading after the repair so you know it actually changed something.
Two testing details specific to this family are easy to miss. The converter feed limit valve location must be tested using the AFL valve rather than the converter limit valve, positioned so the spool face and port face are flush. Several end-plug locations can only be tested with a vacuum test plate, testing at the port between the valve and the end plug.
What the repair actually is
For a worn AFL bore, Sonnax kit 104740-47K is a drop-in sleeve and valve assembly. The billet sleeve seals off existing moderate bore wear and gives the valve a new, unworn bore to work in, and the kit includes a new spring so limit pressure is correct with the sleeve installed. No reaming required, which matters on a casting where you may not have a reamer fixture handy.
One caveat from Sonnax that is worth respecting: proper AFL action depends on correct line pressure supply reaching the AFL valve in the first place. If your line pressure numbers were bad, fix the pressure regulator and boost circuit before or alongside the AFL, or you will just be feeding a new valve the same bad supply. For heavier bore wear that a sleeve will not cover, the oversized valve route requires reconditioning the bore first.
6L80 / 6L90 / 6L45 / 6L50 Pressure Regulator Valve Kit
Addresses the pump-body pressure regulator bore wear behind erratic line pressure, low cooler flow and overheating. Fits the whole 6L family.
View the pressure regulator kit →Assembly mistakes that read exactly like bore wear
A meaningful share of 6L90 comebacks are not wear at all. They are reassembly errors that produce identical complaints, and they are worth checking before you condemn a casting:
- Wrong separator plate for the valve body type. A Type 2 plate on a Type 1 valve body gives no forward. A Type 1 plate, part number 24245720, on a Type 2 valve body gives no 3rd and no reverse. Line pressure reads normal in both cases. Early Type 1 valve bodies cannot be updated to the later eight-checkball plate; the correct Type 1 plate uses seven checkballs.
- Clutch select valves or springs installed backwards. This causes no movement. Valves go in first, springs outboard. A stuck clutch select valve produces the same loss of forward, reverse or both, again with normal line pressure.
- Checkballs out of place. A shrunken or displaced number 1 checkball gives no forward. The number 5 checkball out of place gives no reverse, sometimes intermittently.
- TEHCM filter gasket left out. Rare, but it produces no movement with low or no line pressure.
- Wrong or wrongly programmed TEHCM. If you replace one, verify the part number and program file match the VIN, or you can end up with a no-movement or no-upshift condition that has nothing to do with hydraulics.
One more that saves a tow: during OE programming or the relearn process, a temporary no-move condition can occur. Sonnax's fix is to remove the scanner, remove the key, open and close the driver door, wait 15 to 20 minutes, and come back. It is usually fine.
Torque, fluid and the relearn that finishes the job
Getting the hydraulics right and then bolting it together carelessly wastes the repair. The published figures for this valve body family:
| Fastener or step | Spec |
|---|---|
| TEHCM to valve body bolts (10 mm, 8 mm and 7 mm head) | 71 in-lb, all bolts |
| Input and output speed sensor harness bolts | 100 in-lb |
| Valve body to case attaching bolts | 100 in-lb |
| Fluid | DEXRON-VI, filled to factory spec |
| Fluid temperature for fast adapt | Warm to approximately 185 degrees F |
Sequence matters on the TEHCM. Finger-tighten the 10 mm head bolts first so there is no gap between the module and the valve body, then install the 7 mm head bolts, then torque everything to 71 in-lb. Inspect the pressure switch film and seals while it is apart, and use an ESD ground strap, because static discharge will kill the module. When you install the transmission range switch, make sure the plastic leg seats into the manual valve.
Then finish it properly. Perform a fast adapt with a scan tool after verifying fluid temperature. A battery disconnect will not substitute for it. Road test 10 to 15 upshift and downshift cycles at light throttle through all six speeds, plus four or five passing-gear maneuvers at highway speed. A small 2-3 upshift flare or overlap, a clunk into 4th and a 3-2 downshift clunk are all normal during adaptive relearn and typically clear themselves inside those 10 to 15 cycles. If you hand the truck back before the relearn settles, the customer will call it a failed repair.
Keeping the casting alive
Bore wear is driven by heat, contamination and hours of valve activity, and you control two of those. Heat is the big one on 6L90 trucks because they live under load, and the cooling circuit is worth verifying on every one of these that comes in hot. That is exactly why GM's harsh shift bulletin PIP5792E lands on a cooler line as the root cause rather than anything internal: restricted flow shows up as shift quality long before it shows up as a burnt clutch.
The rest is unglamorous. Keep the fluid DEXRON-VI, keep it clean, and treat a split sump filter as evidence rather than a consumable, since Sonnax attributes a broken or split filter to pressure regulator bore wear or a worn pump rotor or slide assembly. Finding one means the pump gets inspected, not just replaced with another filter. And vacuum test every casting you open, whether you think it needs it or not. The failure is invisible without a gauge, which is exactly why it keeps getting missed.
6L90 valve body kits, pressure regulator and AFL repairs, shift kits, TEHCM-related tooling and overhaul kits — shipped fast from the USA.
Shop 6L90 parts →Sources
- Sonnax — Actuator Feed Limit Valve Kit 104740-47K, product and application data. Backs the AFL valve's role regulating oil pressure supplied to the control solenoids, the quoted symptom set from AFL bore wear (harsh or soft shifts, solenoid codes, wrong gear starts, clutch and band failure), the drop-in sleeve and valve design with new spring, the 6L45/6L50/6L80/6L90 application, and the note that proper AFL action depends on correct line pressure supply. sonnax.com
- Sonnax — "GM 6L45, 6L50, 6L80, 6L90 Vacuum Test Guide," August 21, 2013. Backs the critical wear locations and their symptom lists (AFL, pressure regulator and boost assembly, TCC regulator apply valve, compensator feed valve), the P0741/P0742 and TCC slip associations, the requirement to test the converter feed limit location using the AFL valve with spool and port faces flush, the end-plug locations requiring a vacuum test plate, and the GM 6L45-6L90 clutch and solenoid application chart used for the gear-by-gear element table. sonnax.com
- Sonnax — "GM 6L45/50, 6L80/90 No Movement Conditions: Analysis & Repair Tips," Jim Mobley, TASC Force, March 8, 2023. Backs the 60-68 psi stuck line pressure signature of a line pressure solenoid stuck in exhaust and that unplugged is no different, the sub-30 psi idle pressure from a missing boost valve roll pin, the erratic line pressure of a stuck compensator feed regulator valve, the Type 1 versus Type 2 separator plate mismatches and plate part number 24245720 with seven checkballs, clutch select valve orientation (valves first, springs outboard), the number 1 and number 5 checkball symptoms, the TEHCM filter gasket omission, the incorrectly programmed TEHCM condition, the temporary no-move during programming and its 15-20 minute reset, and the 1-2-3-4 apply piston failure rate. sonnax.com
- Sonnax — "6L50, 6L80, 6L90 Remanufactured Valve Body Tech & Install Tips" (GM6L80E, GM6L80L, GM6L90E, GM6L90L), revision 09-06-24. Backs the 71 in-lb TEHCM bolt torque and tightening sequence, the 100 in-lb speed sensor harness and valve-body-to-case torques, the ESD ground strap caution, the TRS plastic leg into the manual valve, the 2006-2009 versus 2010-later valve body split, DEXRON-VI fill, the approximately 185 degree F warm-up, the fast adapt requirement (battery disconnect will not suffice), the 10-15 shift cycle road test with 4-5 passing maneuvers, the normal relearn flare and clunk behavior, and the split sump filter pointing to pressure regulator bore wear or pump rotor/slide wear. sonnax.com (PDF)
- General Motors — Preliminary Information bulletin PIP5792E, "6L80 6L90 8L90 10L80 10L90 10L000 Equipped Vehicles With A Harsh Shift Shudder Surge Stall Or High Transmission Fluid Temperature," published 07/29/2022, via the NHTSA technical service bulletin database. Backs the harsh shift, shudder, surge, stall and high fluid temperature complaint before or after overhaul, the twisted cooler line root cause on low mileage vehicles, and the disconnect-untwist-reconnect correction including removing underbody panels to inspect. static.nhtsa.gov (PDF)
- Transmission Digest — "GM 6L80 No Reverse Condition Explanation," Tory Royce, Sonnax TASC Force, January 14, 2026. Backs the 2006 6L80 introduction, the roughly 25 percent internal component upgrade and 1 3/8-inch longer case on the 6L90, the fact that a 6L80 valve body bolts to a 6L90 case and vice versa, the different center support hole offset in the upper casting producing forward but no reverse, and the caution against relying on the machined-down A/B/C/D boss for identification. transmissiondigest.com