Most 8HP pan leaks I see after a service were not caused by a bad pan or a bad gasket. They were caused by a 3/8 ratchet. The pan bolts on this transmission are tightened to single-digit and low-double-digit newton-meters, which is a number you cannot hit by feel. The plastic pan used on most 8HP units is the filter housing too, so an overtightened flange can do more than leak. It can distort the filter's seal to the valve body and leave the pump drawing air.
This is the reference I wish every quick-lube and dealer tech had taped to the lift: the actual ZF pan bolt torques by pan material, the plug torques, the bolting sequence, which hardware is single-use, and how to set the level when you are done. Every number here comes from ZF's own service documents, listed at the bottom. It applies across the 8HP family (8HP45, 8HP50, 8HP51, 8HP55, 8HP65, 8HP70, 8HP75, 8HP76, 8HP90, 8HP95) including the Chrysler-assembled 845RE and 850RE in Ram, Jeep and Dodge products. ZF's own sheet says the vehicle manufacturer's instructions take priority, so if your OEM service information gives a different number for a specific application, use that one.

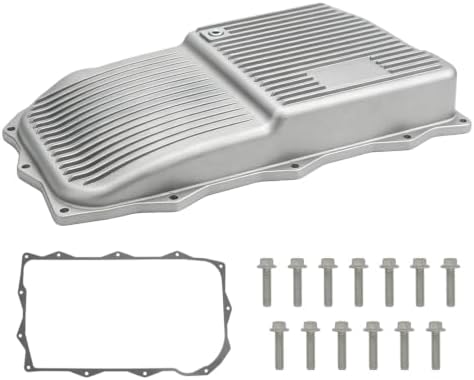
The Pan Bolt Torque Spec, by Pan Material
The 8HP has been built with three different pan designs, and ZF gives a different torque for each. Per ZF Service Information 50130 EN, the oil change kit sheet for the 8HP (revision 11.2024):
| Pan material | Pan screw torque | Imperial equivalent | Filter |
|---|---|---|---|
| Plastic (composite) | 10 Nm | 89 lb-in (7.4 lb-ft) | Integrated in pan |
| Aluminum | 4 Nm + 45° | 35 lb-in, then 45° turn | Separate part |
| Steel plate | 12 Nm | 106 lb-in (8.9 lb-ft) | Separate part |
The ZF 8HP70 repair manual adds the hardware details: the pan is held by 13 screws, they take a Torx T40, and the manual's torque table lists the pan screws at 10 Nm (plus or minus 1 Nm) for the plastic-pan unit it covers. During reassembly the manual instructs fitting the new pan and securing it "with 13 new screws."
Why the aluminum pan uses torque plus angle
The 4 Nm figure on an aluminum pan only seats the screw head. The clamp load comes from the 45-degree turn after it. Thread pitch, not thread friction, sets how far the screw stretches in 45 degrees of rotation, so torque-angle gives more consistent clamp load across the flange than a straight torque value, especially when you are working with soft fasteners. Do the angle with a gauge or by marking the screw head and the pan with a paint pen at the 4 Nm seat.
Why plastic gets a lower number than steel
The composite pan's flange cannot take steel-pan clamp load. At 10 Nm the gasket is compressed evenly. Push past that and the plastic between each pair of bolts bows away from the case, which opens a gap at exactly the spots where the bolts were cranked hardest. That is why "it leaked, so I tightened it more" usually turns a weep into a drip.
Use a Wrench That Can Actually Read These Numbers
Most 3/8-inch click wrenches start at 10 to 15 ft-lb (roughly 14 to 20 Nm). The plastic pan spec sits below the bottom of that range, and a click wrench is least accurate at the bottom 20 percent of its scale anyway. Use a 1/4-inch drive wrench graduated in inch-pounds or newton-meters for the pan screws and the drain plug. Save the 3/8 wrench for the fill plug.
Quick conversions for the numbers you will actually use on this transmission:
- 4 Nm = 35 lb-in
- 5 Nm = 44 lb-in
- 8 Nm = 71 lb-in
- 10 Nm = 89 lb-in
- 12 Nm = 106 lb-in
- 17 Nm = 150 lb-in (12.5 lb-ft)
- 35 Nm = 25.8 lb-ft
Bolting Sequence: Crosswise, Center Outward
ZF's instruction in SI 50130 EN is short and it applies to both removal and installation: loosen or tighten the oil pan bolts crosswise from the center outwards. Thread every screw in by hand first, then make the torque pass in sequence.
- Clean the case sealing surface with a lint-free cloth. ZF specifically calls for clean, lint-free cloths for anything that touches the transmission.
- Make sure the case threads are clean and dry. Old fluid and thread debris eat torque, so a screw can click at 10 Nm and still be under-clamped.
- Set the pan in place and confirm the gasket is seated in its groove all the way around. On integrated-filter pans, make sure the filter neck lines up with its bore before the pan touches the case. Do not force it.
- Run all 13 new screws in by hand until the heads just touch.
- Starting with the screws nearest the middle of the pan, work outward in a crisscross pattern, alternating side to side, to the final torque (or to 4 Nm on an aluminum pan).
- On an aluminum pan, make the 45-degree pass in the same sequence.
Do not add RTV to the factory-style gasket. It is designed to seal dry, and the extra material squeezes into the sump where the filter can pick it up.
Which Hardware Is One-Time-Use
ZF is consistent on this across documents. The ZF Aftermarket workshop guide for passenger car transmission oil changes says to use new screws when installing the oil pan and to install a new drain plug with a new seal. The 8HP70 repair manual's general notes go further: seals, O-rings and gaskets must always be replaced, and aluminum screws must always be replaced. The oil filling specification tells you to install a new screw plug after setting the level.
That is the reason a ZF oil change kit is built the way it is. Per ZF, the 8HP kits come in two forms: a seal and separate filter with screws for metal-pan units, or a complete plastic oil pan with the filter, seal and screw plug built in. On plastic-pan transmissions there is no such thing as "just a filter." The filter is part of the pan, so the pan is the service part.
Drain Plug and Fill Plug Torques
Plugs are where the biggest torque mistakes happen, because the fill plug and the drain plug on the same transmission differ by a factor of four or more. From the ZF Oil Filling Specification 8HP | 8P, document 1087.754.107c (05.02.2026), and SI 50130 EN:
| Plug | Size / drive | Torque |
|---|---|---|
| Fill / level plug, RWD and X AWD | M18x1.5, 8 mm hex | 35 Nm ± 3.5 |
| Pan drain plug, RWD and X AWD | M18x1.0, 10 mm hex | 8 Nm +1 |
| Fill plug, all-wheel distributor version | M22x1.5, 10 mm hex | 30 Nm ± 3 |
| Drain plug, threaded (8HP55/90) | M10x1, 5 mm hex | 12 Nm ± 1.2 |
| Drain plug, bayonet (8HP65/95A) | 8 mm hex | 8 Nm +1 (turn to stop) |
| 4th gen plastic pan drain plug | 8 mm hex | 8 Nm +1 |
| 4th gen plastic pan drain plug | 10 mm hex | 5 Nm +1 |
| 4th gen aluminum pan drain plug | 12 mm hex | 17 Nm ± 1.7 |
The 5 Nm drain plug on a fourth-generation plastic pan is the one that gets broken. It shares a hex size with the fill plug on some versions, and someone who just torqued the fill plug to 35 Nm will put the same wrench on the drain plug without thinking. A cracked drain boss on a plastic pan is not repairable. The pan is the fix.
Setting the Level After the Pan Goes Back On
Getting the torque right does not help if the level is wrong. ZF warns in SI 50130 EN that a low level damages the transmission, and that an overfilled unit pushes the excess out of the overflow as it heats up, where it can ignite on the exhaust. Plenty of "pan leaks after service" are really overfill coming out of the overflow.
The ZF prerequisites: no active limp mode, vehicle level on the lift, a scan tool connected to read transmission oil temperature, and electrical loads set per the vehicle maker. Then, from the filling specification:
- With the fill plug out, fill until fluid runs out of the fill hole. If the unit has an integrated electric oil pump, run it for at least 10 seconds.
- Start the engine and fill again until fluid runs out of the fill hole.
- If the vehicle has an additional oil cooler, bring the transmission above 75 °C so the cooler circuit fills, then let it come back down into the check window.
- For the level check, hold 2,000 rpm in Park for 30 seconds to fill the converter, return to idle, then select P, R, D, and manual 1 and 2, holding each for at least 10 seconds. Return to Park.
- Confirm the temperature is in the window, open the fill plug, top up if nothing comes out, or let it drain until it stops if it does.
- Install a new fill plug at 35 Nm and check for leaks.
The check window is 30 to 50 °C for most units. ZF lists exceptions: 40 to 50 °C for BMW applications and hybrids, 50 to 60 °C for Maserati, and 55 to 60 °C for Jaguar Land Rover AJ20 (P6/D6) engines. On fourth-generation 8HP units, ZF says the level check, fill and oil change can only be done with an OEM test device routine, so do not try to set the level on one of those by feel.
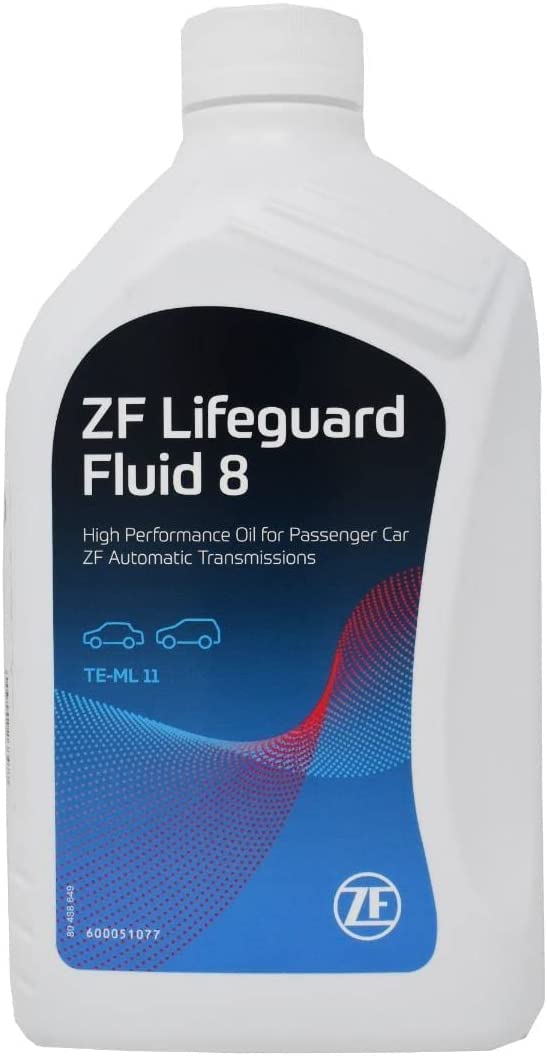
On the fluid itself, ZF says to use only the specified ZF LifeguardFluid and not to add any additives. On Ram trucks, FCA's TSB 21-019-23 calls for Mopar ZF 8&9 Speed ATF, part number 68218925AB.
Mistakes That Bring the Truck Back
- Reusing the old screws. ZF says new screws every time, and the repair manual says aluminum screws are always replaced.
- Torquing a plastic pan with a 3/8 wrench or by feel. 10 Nm is 89 lb-in. Use an inch-pound wrench.
- Going around the pan in a circle. Tighten crosswise from the center out so the gasket compresses evenly.
- Treating the aluminum pan like a steel one. 4 Nm plus 45 degrees is not the same thing as 12 Nm.
- Putting the fill plug torque on the drain plug. 35 Nm on a 5 or 8 Nm plug cracks the boss.
- Setting the level cold or hot. Outside the ZF window the reading is wrong, and an overfill comes back out of the overflow.
- Calling it a pan leak without checking above it. Cooler lines and the electrical connector drip off the pan rail too. Clean, dye and road test before you replace a pan that was fine. Our ZF8HP fluid leak guide walks through that order.
On service life: the ZF 8HP70 repair manual describes the fill as lifetime, then says the oil only needs replacing after 80,000 to 120,000 km (about 50,000 to 75,000 miles) depending on drive conditions, or after 8 years. ZF's workshop guidance adds that towing, high-speed driving and sporty driving age the oil faster and justify shorter intervals. If you are pulling the pan on a high-mileage unit and the fluid smells burned or the pan has chips or metal fragments in it, ZF says to stop and have it diagnosed rather than just refilling.
ZF 8HP Oil Pan and Filter Kit (1087298247)
The plastic pan with the filter built in, plus the gasket, drain plug and a full set of new screws, so you are not tempted to reuse the old ones. Torque the screws to 10 Nm, crosswise from the center out.
View the ZF 8HP pan and filter kit →Shop ZF8HP pans, filter kits, ZF-spec fluid and seal kits, shipped fast from the USA.
Shop ZF8HP parts →FAQ
What is the torque spec for ZF8HP oil pan bolts?
ZF Service Information 50130 EN gives three values based on pan material: 10 Nm (about 89 lb-in) for the plastic pan with the integrated filter, 4 Nm plus a further 45 degrees for an aluminum pan, and 12 Nm (about 106 lb-in) for a steel pan. Thread every screw in by hand first, then tighten crosswise from the center outward.
Can I reuse ZF8HP pan bolts?
ZF says no. The ZF Aftermarket oil change guidance calls for new screws whenever the pan is installed, and the 8HP70 repair manual states that aluminum screws must always be replaced. ZF oil change kits include a full set of pan screws for this reason.
What is the ZF8HP drain plug and fill plug torque?
On standard rear-wheel-drive and X all-wheel-drive units, ZF lists 35 Nm for the 8 mm hex fill plug and 8 Nm plus 1 Nm for the 10 mm hex drain plug in the pan. Fourth-generation units differ: the 10 mm hex plastic-pan drain plug takes only 5 Nm plus 1 Nm, and the 12 mm hex aluminum-pan drain plug takes 17 Nm.
What socket do ZF8HP pan bolts take?
The pan screws are Torx T40 per the ZF 8HP70 repair manual, which lists 13 screws holding the pan. The fill plug is an 8 mm internal hex on most rear-drive units and a 10 mm hex on the all-wheel distributor version.
Why does my ZF8HP pan leak after a service?
The most common causes are overtightening a plastic pan, which distorts the flange between bolts, reusing old screws, or tightening the screws out of sequence. An overfilled level set outside ZF's 30 to 50 C check window will also push fluid out of the overflow once the transmission heats up, which looks like a pan leak.
Sources
- ZF Friedrichshafen AG — Service Information 50130 EN, “Oil change kit for ZF 8HP automatic transmission,” 11.2024. Backs the pan screw torques by pan material (plastic 10 Nm, aluminum 4 Nm + 45°, steel 12 Nm), the crosswise center-outward sequence with screws started by hand, the drain and fill plug sizes and torques by variant, the LifeguardFluid-only and no-additives rules, and the overfill-through-the-overflow warning. aftermarket.zf.com (PDF)
- ZF Friedrichshafen AG — Service Information, “Oil Filling Specification 8HP | 8P,” document 1087.754.107c, 05.02.2026. Backs the plug torque tables for standard, all-wheel distributor and 4th-generation units, the fill and level-check steps, the temperature windows by application, the 75 °C additional-cooler fill, and the OEM test device requirement on 4th-generation units. aftermarket.zf.com (PDF)
- ZF ServiceLine — 8HP70 Repair Manual (rev. 14/04/25). Backs the 13 pan screws, the Torx T40 drive and 10 Nm pan screw torque, fitting the pan with 13 new screws, the rule that seals and gaskets are always replaced and aluminum screws are always replaced, and the 80,000 to 120,000 km or 8-year oil change guidance. 8HP70 repair manual (PDF copy)
- ZF Aftermarket — “How to Change the Transmission Oil on a Passenger Car” (workshop tips). Backs the new pan screws and new drain plug with new seal on every install, the filter and seal being integral to plastic pans, shorter intervals for towing and high-speed use, and stopping to diagnose when the drained oil smells burned or carries metal. aftermarket.zf.com
- ZF Aftermarket — “Oils and Oil Change Kits for Passenger Cars and Light Commercial Vehicles.” Backs the two 8HP kit forms (seal and separate filter, or complete plastic pan with integrated filter, seal and screw plug) and the high-voltage-technician requirement for hybrid 8P/8HP oil changes. aftermarket.zf.com
- FCA US LLC — TSB 21-019-23, “Transmission Oil Cooler Line(s) Not Fully Seated Causing Potential Oil Leak,” July 11, 2023 (hosted by NHTSA). Backs the Mopar ZF 8&9 Speed ATF part number 68218925AB for Ram 8-speed service. static.nhtsa.gov