A 4L60E that moves in nothing — no Drive, no Reverse, no manual low, engine runs fine, shifter feels normal — is one of the few complaints on this unit that people consistently diagnose backwards. The reflex is to pull it. But "no move in any range" is actually one of the easiest 4L60E failures to narrow down before the transmission comes out, because two cheap readings split the problem into three branches that barely overlap.
Those readings are line pressure at the case tap and cooler return flow. Take them in that order and you will know whether the pump is making pressure, whether that pressure is reaching the converter and the drums, and whether anything downstream is still connected.
The short version: Hook a 0–300 psi gauge to the line pressure tap and pull the cooler return line into a bucket. No pressure and no flow means the pump is not being driven — sheared rotor drive lugs, a shattered rotor, or a stacked pump. Normal pressure but no cooler flow means the oil is made but is not reaching the converter and clutch circuits — classically a replacement stator support whose charge-oil port does not line up with the pump cover. Normal pressure and normal flow means something mechanical is broken downstream. Three different jobs, three different price tags.
Before Anything Else: The Five-Minute Triage
None of the diagnosis below matters if you skip the boring stuff, and on a no-move complaint the boring stuff catches a real percentage of them.
- Fluid level, read correctly. The final level check is with the engine idling, the transmission in Park, on level ground, and the fluid at operating temperature — roughly 180–200°F. Reading it cold or off-level is how a badly low unit gets called "full."
- Manual linkage and the manual valve. Twist the manual shaft at the case with pliers, all the way to one end. If the output shaft will not turn, you are in Park; two detents back the other way is Neutral. A cable out of adjustment can leave the manual valve short of a range even though the shifter feels right in the cab.
- Range sensor position. The range sensor is aligned to the case with GM tool J 41364-A. A misindexed sensor will not cause a true mechanical no-move, but it sends the controller the wrong range and muddies every scan-tool reading afterward.
- Fluid condition on the stick. Look for excessive air bubbles. A foamy dipstick alongside erratic pressure points to pump cavitation — a low level, a leaking filter neck seal, or distorted pump face halves — not a broken drum.
Then tap the case. The line pressure port sits on the driver's side. Thread in a 0–300 psi gauge and read Park, Reverse and Drive at idle, then at light throttle. With the gauge still on, disconnect the cooler line ahead of the cooler and catch the return in a container at idle. Now you have your branch.
Branch One: No Line Pressure, No Cooler Flow
Zero on the gauge in every range means the pump is not turning oil. The 4L60E pump is driven directly by the torque converter hub, so the failure is almost always at that interface rather than inside the pump body.
Sheared pump rotor drive lugs
Wayne Colonna documented this pattern on rebuilt 4L60E units in 2002-and-later Trailblazers: shortly after the job the vehicle comes back with a sudden no-move, and on teardown "the lugs in the pump rotor are sheared off or the rotor itself is shattered." The cause traced to rebuilt 300mm B-85 converters built with insufficient overall height. The short converter lets the drive hub back out of the pump rotor during a hard-throttle passing-gear maneuver, and when the hub tries to index itself back in it is no longer aligned. It breaks the drive lugs off, and you have no line pressure from that moment on. Which means a no-move that appears after a rebuild is frequently a converter dimension problem, not a rebuild quality problem.
The numbers that prevent it: stab depth and overall height
To check stab depth, bolt the transmission to the engine and push the converter into the pump until the converter drive slot bottoms on the lugs of the pump gear, then measure the gap between the flexplate and the converter mounting pads. Per Sonnax that gap must be at least.125" to avoid damaging or destroying the pump, and no more than.250" or the pump gear fails. Too tight and you stack the pump on startup; too loose and the hub can walk out of the rotor.
Overall converter height is the other half. Sonnax gives the OE spec for 300mm 4L60E converters as 6.550", with the Corvette unit the exception at 6.254"–6.275". The problem child is the 4.2L Bravada/Envoy/Trailblazer VJCX converter, spec'd at 6.500" but typically measuring about 6.450" in OE form — Sonnax's position is that the correct height for it is actually 6.550". Colonna measured the short rebuilt units at roughly 6 7/16", or 6.4375". Well under a tenth of an inch decides whether the pump survives, which is exactly why it gets missed.
If a converter measures 6.500"–6.550" and stab depth is still too wide, shimming between the flexplate and the mounting pad is legitimate — but verify you still have enough pilot engagement in the crankshaft afterward. If the converter is 6.450" or shorter, shimming pulls the pilot out of the crank and you have traded one failure for another. Sonnax's fix there is a taller impeller hub, not extra internal clearance: adding.060" by stacking bearing races makes the converter less efficient, raises stall, and runs it hotter.
The other ways to get zero pressure
- Stacked pump. The converter was bolted to the flexplate before it was fully seated in the pump. On the first start it shoves the rotor into the cover and shears the gear, sending metal through the unit in seconds. Seated correctly, the converter drops in with an audible clunk as the hub engages the pump gear, and there is measurable setback afterward.
- Rotor fatigue from sustained high pressure. A unit driven a long time with a code set that commands maximum line pressure will eventually shatter the rotor under continuous demand. The rotor did not fail first — the unrepaired code did.
- Cavitation damage. Air bubbles plus erratic pressure means the pump is drawing air. Chase the level, filter neck seal, and pump face flatness before condemning hard parts.
If you find sheared lugs or a shattered rotor, assume the cooler and lines are contaminated with metal. Flush or replace them before any fresh unit goes in, or you will do this twice.
Branch Two: Normal Line Pressure, No Cooler Flow, No Engagement
This is the branch that starts arguments in shops, and it is the most instructive failure on the whole unit.
Sonnax technical specialist Ed Lee published the case in Transmission Digest in July 2012. A 2006 Chevrolet Suburban C1500 with the 5.3L V8 and 128,967 miles came in complaining of slipping in reverse and was sold a complete rebuild including a rebuilt converter. On the R&R, the tech found no cooler flow and no engagement in any drive range, including Reverse. Disconnecting the cooler line ahead of the cooler confirmed nothing was coming out of the transmission. The rebuilder blamed the installer for breaking the pump; the installer blamed the rebuilder. Then somebody put a gauge on the line pressure port, and the pressure was normal.
That single reading settled it. Normal line pressure proves two things at once: the pump is intact and turning, and the pressure regulator valve is not stuck open. The oil was being made and regulated correctly — it just was not going anywhere. That meant a restriction in the charge-oil circuit, downstream of regulation.
The build sheet showed the reverse drum and the stator support had both been replaced, and the converter rebuilder confirmed no oil had ever entered the converter. The stator support was the obvious suspect, and it was right: the charge-oil port in the replacement stator support did not align with the charge-oil passage in the pump cover. The converter never filled, no oil reached the cooler, and nothing applied.
Why the wrong stator support gets installed
Look at a 4L60E pump cover from the back. The passage on the right is cooler return/lube, and it has stayed in the same relative position for the entire life of the 4L60/65/70-E family. The next passage left is charge oil / TCC release — and that one was moved to make room for the input speed sensor.
The trap is that GM did not make the change all at once. The pump revisions leading to the ISS design happened in steps over more than a year, roughly February 2005 into early 2006 on some models. There are transition pumps whose cover has no drilled ISS hole but already has the boss cast in place for it — and those covers carry the converter feed hole in the late position, so they require the late, ISS-style stator support. A rebuilder who sees no sensor hole and reasons "no ISS, so early support" installs the wrong part and blocks the circuit. ATSG published a seven-page bulletin on the non-ISS to ISS transition in 2010 specifically to prevent this. A second tell: early-style boost valve bores reached all the way out to the pump's outer diameter, so a short boost valve assembly bore identifies a pump that needs the late-style support.
The three checks that confirm the right support
Sonnax product support rep Caleb Perham lays out a bench procedure that takes about a minute:
- Identify the shaft. Note the sealing ring locations on the input shaft — there are several variations. Watch for the anomaly: a cover with no ISS hole drilled, paired with a reluctor-style stator and an input shaft with no reluctor. That combination requires an ISS stator.
- Identify early vs. late pump. Lay a straightedge through the centers of the pump bolt holes. Converter feed hole slightly right of that line is an early pump; slightly left is late.
- Identify early vs. late stator. Look at the converter feed and lube holes in the stator. Directly in line with each other is early; converter feed to the right of the lube hole is late.
Match the pump result to the stator result. Early pump plus early stator, late plus late. Anything else and you are building the Suburban's failure into the unit on purpose.
| Sonnax stator support | Application |
|---|---|
| 77918S-K | 4L60/4L60-E, 245mm or 298mm converter, non-reluctor, universal bolt pattern |
| 77918S-1K | 4L60-E/65-E/70-E, 280mm or 300mm converter, non-reluctor, '99–'04 |
| 77918S-08K | 4L60-E/65-E/70-E, 298mm converter, reluctor style |
| 77918S-09K | 4L60-E/65-E/70-E, 280mm or 300mm converter, reluctor style, '04-later |
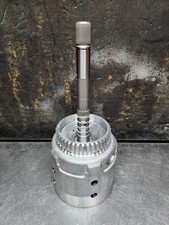
Sonnax Stator Support Shaft Assembly 77918S-09K
This is the late, ISS-style support for '04-later 280mm and 300mm reluctor units — the exact part the Suburban in that case study needed. If your pump cover has the ISS boss or a short boost valve bore, this is the side of the split you are on. Verify with the three checks above before you order, or browse the full 4L60E parts collection at our sister store CoreTransmissionParts if you need the early-style support instead.
Shop the Sonnax 77918S-09K stator support →Branch Three: Normal Pressure, Normal Flow, Still No Move
Pressure is right, the cooler is flowing, the converter is filling — and the truck still sits there. The hydraulics are doing their job, so the mechanical path from converter to output shaft is broken. Common culprits:
- Stripped or broken input shaft splines. The shaft turns and nothing behind it does. This is the most common true no-move once pressure checks out.
- Stripped turbine hub splines in the converter. Same result, different part — and why a no-move with good pressure gets the converter cut open, not just replaced.
- A completely burnt input drum. Forward and 3-4 clutches gone, reverse input gone with them, nothing holds in any range. The fluid tells you before the teardown does.
- Broken output shaft or a snap ring that let go. Less common, but it ends the job the same way.
The endplay trap on reassembly
If you are building the replacement, this is where a fresh unit becomes a comeback. Sonnax technical specialist Steve Garrett documented the stack-up problem: input shaft endplay spec is.005" to.035", and builders who cannot get the output shaft snap ring to install, or who find endplay out of range, usually assume they made an assembly mistake when the real cause is mismatched parts.
GM revised the reaction carrier bearing to a thicker design in March 2007 and changed the reaction carrier and shaft to suit it. Those three components have to be used as a matched set, and the revisions cover both the four-pinion and five-pinion carriers — so "it's the right pinion count" is not enough. Mix a pre-change carrier with a post-change bearing and the endplay is wrong and the snap ring will not go in.
Check it on the bench first. Set the planetary components and bearings onto the output shaft in the correct order, install the snap ring inside the front planet to retain them, stand the assembly sun-shell-face-down, and measure with a dial indicator or feeler gauge. Bench endplay should come out about.020" to.030". If it does not, swap one original component back in at a time and re-measure until the offending part identifies itself.
Putting It Together
| Line pressure | Cooler flow | What it means | Where to look |
|---|---|---|---|
| Zero, all ranges | None | Pump not being driven | Pump rotor drive lugs, shattered rotor, converter stab depth and overall height, stacked pump |
| Normal | None | Oil made but not delivered | Stator support / pump cover charge-oil alignment, blocked charge-oil circuit |
| Normal | Normal | Mechanical break downstream | Input shaft splines, turbine hub, burnt input drum, output shaft, endplay stack-up |
| Erratic, foamy stick | Weak/erratic | Pump cavitating | Fluid level, filter neck seal, pump face flatness |
This order works because each reading eliminates a whole category rather than a single part. Normal line pressure alone rules out the pump and a stuck-open PR valve in one measurement — that is what saved the Suburban job from becoming a second pump replacement. Every one of these readings is taken with the transmission still in the vehicle.
One habit worth building regardless of branch: air check the unit on the bench during every rebuild and vacuum test the valve body's critical bores. A burnt unit that arrives with a no-move cannot be road tested first, so bench work is the only verification you get before it goes back in the truck.
Working through the pressure side of this? Our line pressure testing walkthrough covers the gauge procedure in detail, and the 4L60E pump rotor and bushing wear guide picks up once you know the pump is the problem.
Sources
- Sonnax — "4L60-E: No Move After Rebuild," Ed Lee (July 28, 2012). Source for the 2006 Suburban C1500 case: no cooler flow, no engagement in any range, normal line pressure, and the replacement stator support whose charge-oil port did not align with the pump cover passage. Also the source for the ISS transition timeline and the short boost valve bore identifier. sonnax.com/tech_resources/50-4l60-e-no-move-after-rebuild
- Transmission Digest — "4L60-E No move after rebuild," Ed Lee (published July 1, 2012). Trade-press publication of the same case, including the 128,967-mile odometer reading, the original "slipping in reverse" complaint, and the diagnostic logic that normal line pressure proves both the pump and the PR valve are good. transmissiondigest.com/4l60-e-no-move-after-rebuild/
- Sonnax — "Overall Height Issues and Pump Gear Problems: 4L60-E, 300mm Converter, 4.2L Engine, Code VJCX," Ed Lee (April 24, 2011). Source for the stab depth window of.125" minimum to.250" maximum, the 6.550" OE overall height for 300mm converters, the 6.254"–6.275" Corvette exception, the VJCX 6.500"/6.450" discrepancy, and why a taller impeller hub beats shimming or added internal clearance. sonnax.com/tech_resources/10-overall-height-issues-and-pump-gear-problems
- Sonnax — "4L60-E Series Input Shaft, Stator & Pump Cover Compatibility: Three Easy Checks," Caleb Perham. Source for the three bench checks (shaft sealing ring locations, converter feed hole left or right of the bolt-hole centerline, stator feed hole in line with or right of the lube hole), the no-reluctor anomaly, and the 77918S stator support application table. sonnax.com/tech_resources/1419-4l60-e-series-input-shaft-stator-pump-cover-compatibility
- Sonnax — "Too Close For Comfort: Pinpointing 4L60-E Gear Train Assembly Problems," Steve Garrett (February 22, 2016). Source for the.005"–.035" input shaft endplay spec, the.020"–.030" bench endplay target, the March 2007 reaction carrier bearing revision affecting both four- and five-pinion carriers, and the one-part-at-a-time method for finding a bad stack-up. sonnax.com/tech_resources/256-too-close-for-comfort
- Vehicle Service Pros — "GM 4L60E transmission no engagement," Wayne Colonna, Powertrain Pro (January 1, 2020). Source for sheared pump rotor drive lugs and shattered rotors on rebuilt 2002-and-later Trailblazer units, the short rebuilt 300mm B-85 converter as root cause, the approximately 6 7/16" build height measurement, rotor failure from sustained commanded high line pressure, and cavitation signs (air bubbles on the dipstick, erratic pressure) from low level, filter neck seal leaks or distorted pump faces. vehicleservicepros.com/service-repair/underhood/article/21181962