Your scan tool says P0756 - Shift Solenoid "B" Performance or Stuck Off. That is the generic SAE title, and it is the reason half the internet will tell you to go buy a 2-3 shift solenoid. There is no such part on a 6L80. GM's own wording for the 6L50 (RPO MYB), 6L80 (RPO MYC) and 6L90 (RPO MYD) is Shift Solenoid (SS) 2 Valve Performance - Stuck Off, and once you read it that way the diagnosis stops being a parts-cannon exercise.
Performance means the electrical side already passed. A shorted, open or high-resistance circuit sets a circuit code, not this one. P0756 means the module energized shift solenoid 2, waited, did the ratio math off the speed sensors, and did not see the hydraulic result it asked for. Something between the winding and the clutch pack refused to move.
Related reading: our 6L80 P0751 write-up covers the same failure logic on the other on/off shift solenoid, and the 6L80 valve body testing guide covers the bench work referenced below.
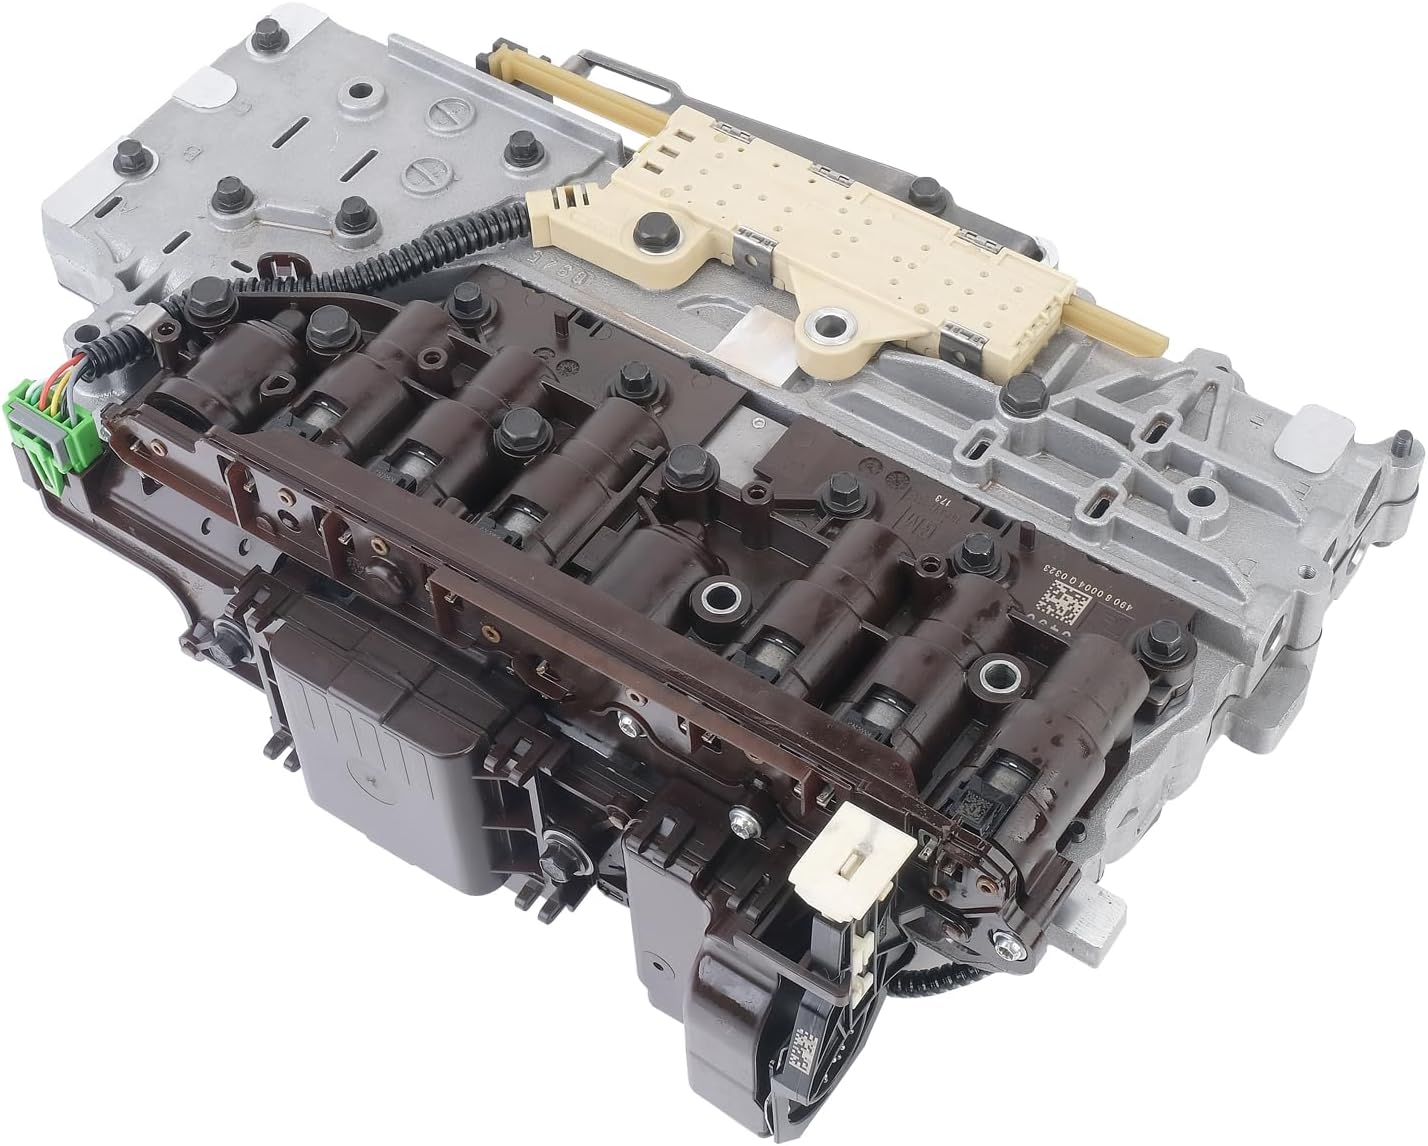
The exact conditions that set P0756
These are worth knowing verbatim, because they tell you what the truck has to be doing before the module will even look. Per ATRA's GM technical material for the 6L50/6L80/6L90, P0756 sets when all of the following are true:
- Engine speed is greater than 500 RPM
- High Side Driver (HSD) one is enabled
- The accelerator pedal position signal is valid
- The TCM receives a valid torque signal from the ECM
- Throttle position is 0.5% or greater
- Transmission fluid temperature is 0 C (32 F) or greater
- Commanded gear is 1st
- Transmission calculated gearbox slip is 200 RPM or greater for 10 seconds
- The transmission commands 2nd gear
- The transmission obtains a valid 2nd gear ratio for 3 seconds or more
Read the shape of that. The module sits in commanded 1st watching 200 RPM of slip build for a full ten seconds, then commands 2nd - and 2nd shows up clean. First was wrong; second was right. That is the module telling you the fault lives in whatever holds first gear, not in the 1-2 shift itself. Anyone diagnosing this as a bad 1-2 shift is reading the code title instead of the criteria.
What the module does once it sets
The default behavior explains the driver's complaint better than the complaint does. With P0756 stored, the TCM inhibits TAP shift functions and TCC operation, freezes adapts, commands high line pressure, and defaults to 2nd gear with reverse still available.
So the customer describes a truck that still drives, pulls away lazy and flat, shifts hard, has no converter lockup at highway speed, and backs up perfectly normally. That combination is not a random assortment of symptoms. It is the failsafe strategy, and recognizing it on the phone tells you which code you are about to pull.
What shift solenoid 2 actually does
Drop the 4L60E mental model at the door. The 6L80 does not use shift solenoids to run individual upshifts. Clutch apply pressure is metered by the pressure control solenoids. The two on/off shift solenoids exist to steer signal oil to the clutch select valves - the valves that decide which clutch a given control solenoid is currently feeding.
Sonnax's hydraulics series lays out the mechanism on the sister circuit, and the principle carries across both shift solenoids. Shift solenoid 1, an on/off solenoid, is turned on and strokes clutch select valve 2 to the left, connecting CBR1 pressure from pressure control solenoid 3 through clutch select valve 2 - which is functioning as a shift valve - to the low reverse apply circuit. Turn the solenoid off and spring pressure returns the valve to the right, opening an exhaust path.
That is the whole architecture in two sentences. The solenoid is a signal device. The clutch select valve is the part that actually moves oil. Which is exactly why a performance code on a 6L80 is a valve complaint far more often than a solenoid complaint - and why ATRA's specific inspection for P0756 is not the solenoid at all.
The specific inspection: clutch select valve #3
ATRA's guidance for this code is one line, and it is the most useful line in this article: for P0756, inspect the clutch select valve #3 in the lower valve body for evidence of wear and sticking.
Note lower valve body. The clutch regulator valves that the companion codes point at - 3-5-R, CBR1/4-5-6, 2-6, 1-2-3-4 - all live in the upper valve body. Clutch select valve #3 does not. If you have the upper body apart hunting for a P0756 cause, you are in the wrong casting.
Sonnax's vacuum test guide for the 6L45/6L50/6L80/6L90 family independently identifies clutch select valve #3 in the lower valve body as a critical wear area with a published test port, listing shift complaints as its symptom. Two independent authorities landing on the same valve for the same complaint is about as close to a confirmed root cause as this trade gets.
Sonnax Clutch Select Valve Kit 104740-31K
This is the repair for the exact valve ATRA names for P0756. It recovers the worn clutch select valve bore in the lower valve body instead of gambling on a TEHCM. Sonnax also lists this kit against 1-2-3-4 and 3-5-reverse clutch burn and cruise-disabled complaints, and notes it fits all models except early 6L80 units with OE separator plate 24246916 - check your plate before ordering. Bore sizing is done with tool kit 104740-BST31.
View the Clutch Select Valve Kit 104740-31K →The companion codes, and what each one means
P0756 rarely shows up alone on a high-mileage unit. ATRA groups it with four clutch pressure control performance codes, each with its own valve to inspect. Knowing the map saves you a teardown:
| Code | GM description | Inspect |
|---|---|---|
| P0756 | Shift Solenoid 2 Valve Performance - Stuck Off | Clutch select valve #3, lower valve body |
| P0776 | Clutch PC Solenoid 2 - Stuck Off | 3-5-R clutch regulator valve (upper); 3-6 reverse drum for cracks, seals for leakage |
| P0796 | Clutch PC Solenoid 3 - Stuck Off | CBR1/4-5-6 clutch regulator valve (upper); seals and circuit for leakage |
| P2714 | Clutch PC Solenoid 4 - Stuck Off | 2-6 clutch regulator valve (upper); seals and circuit for leakage |
| P2723 | Clutch PC Solenoid 5 - Stuck Off | 1-2-3-4 clutch regulator valve (upper); seals and circuit for leakage |
The pressure control codes share a trigger worth memorizing: input shaft speed above 60 RPM, the clutch commanded on, and the module detecting an incorrect oncoming clutch ratio - a flare - for 0.5 seconds with input speed more than 75 RPM away from the anticipated value. On P0776, P0796 and P2714 the module responds by commanding maximum line pressure, inhibiting TCC and freezing adapts. P2723 is the odd one: it defaults to reverse, park, neutral, 5th or 6th.
The causes common to all of them
When several of these codes set together, stop chasing individual valves. ATRA's list of shared causes is short and specific:
- Check balls not sealing on the spacer plate due to check ball wear. These wear round-to-flat and stop sealing long before they look bad.
- Spacer plate damaged, or worn check ball holes.
- Bore plugs undersized, or the wrong bore plug installed. The spec is 0.4528 in. +/- 0.0001 in. (11.502 mm +/- 0.004 mm). That is a tenth of a thousandth of tolerance - mic them, do not eyeball them.
- Debris.
- Cracks in the suspect drum, or seal leakage feeding the suspect drum.
That bore plug number is the one most shops have never seen, and it is why a rebuilt valve body with mixed-vintage plugs can throw a fistful of performance codes on a unit that is otherwise perfect.
Diagnosing it in order
1. Fluid level, condition and temperature first
These units take DEXRON VI only - GM P/N 88861037 in the US, 19264717 in Canada - and Chevrolet Performance's own 6L80 instruction sheet puts the warning in a caution box: failure to use the proper fluid may result in transmission internal damage. Approximate capacities from that same GM sheet:
| Service | Metric | English |
|---|---|---|
| Pan removal and filter replacement | 5.7 liters | 6.0 quarts |
| Overhaul (transmission volume only) | 9.9 liters | 10.5 quarts |
| Complete system, including cooler volume | 11.5 liters | 12.2 quarts |
Level matters more than volume here. GM's procedure is to idle the engine on level ground, move the selector through each range pausing about three seconds per range, return to park, idle at 500-800 RPM for at least a minute, then check against transmission fluid temperature. The hot check between 160 F and 200 F (71 C and 93 C) is the accurate one; the cold check at 80-90 F (27-32 C) is only a reference to confirm the unit is safe to move. Adjustments are small - GM says generally less than one pint (0.5 L). Production trucks set final level at the check plug rather than a dipstick, so do it hot and do it level.
2. Capture the full code set and freeze frame before clearing
P0756 by itself and P0756 with three pressure control codes are two different jobs. One code points at one valve. A cluster points upstream at the plate, the check balls, the bore plugs, or contamination. Record the freeze frame before you touch anything - the set criteria above mean the module already recorded the exact conditions for you.
3. Watch the ratio math on a test drive
Graph input speed sensor, output speed sensor, commanded gear and the shift solenoid 2 commanded state together. Divide ISS by OSS and compare against GM's published ratios for this unit: 1st 4.027, 2nd 2.364, 3rd 1.532, 4th 1.152, 5th 0.852, 6th 0.667. You are hunting for the pattern in the set criteria - commanded 1st with slip climbing past 200 RPM, then a clean 2.364 once 2nd is commanded. Seeing that live is your confirmation, and it takes one drive.
4. Put a mechanical gauge on it
Do not grade the module using the module's own pressure parameter. Hook a real gauge to the mainline port and watch idle pressure and rise. Sonnax gives the signature worth memorizing: when the TEHCM line pressure solenoid ends up stuck in an exhaust mode, line pressure sits around 60 to 68 psi with no RPM rise whatsoever, and unplugged reads no different. A flat 60-something that never rises is a line pressure problem that will write solenoid performance codes all day long. Chasing SS2 at that point is wasted labor.
5. Drop the pan and read what fell out
Cut the filter open. Clutch material moves this from a valve body job to a rebuild conversation; bright metal points at the pump or converter. Then go after every check ball, not just the one that looks wrong - worn check balls are the first item on ATRA's shared-cause list for this whole code family, and they are cheap. Inspect the spacer plate holes at the same time.
6. Vacuum test the lower valve body on the bench
This is the step that turns a diagnosis into a repair instead of a guess. With the valve body off, vacuum test clutch select valve #3 - the one ATRA names for P0756 - plus clutch select valve #2 and the actuator feed limit circuit while you are in there. Sonnax's guide notes that OE valves are shown and tested in their rest position unless otherwise indicated, and that a low vacuum reading indicates wear. Bore wear is invisible to the eye and measurable in ninety seconds with a hand pump.
The fix, by what you actually found
Worn or sticking clutch select valve
The primary repair for a confirmed P0756. Clutch select valve kit 104740-31K recovers the bore; heavier wear is addressed by sizing the bore with tool kit 104740-BST31. If the springs are tired or a previous repair lost one, the clutch select valve spring kit 104740-02K covers mid-2010-and-earlier units. Then follow the assembly rule that ruins otherwise good rebuilds: the clutch select valves go in first, springs outboard. Installed backwards, Sonnax says you get a loss of forward, reverse, or both - with normal line pressure, which is the exact combination that sends people back into a transmission they just built.
Worn check balls or a damaged spacer plate
Replace every check ball on any valve body service on these units, and verify plate type against the casting. The Sonnax no-movement writeup is specific: a Type 2 separator plate on a Type 1 valve body gives no forward, and a Type 1 plate (P/N 24245720, seven check balls) on a Type 2 body gives no third and no reverse. Line pressure reads normal in both cases. Early Type 1 valve bodies cannot be updated to the later eight-check-ball plate.
Undersized or mismatched bore plugs
Mic them against 0.4528 in. +/- 0.0001 in. If any are out, an o-ringed end plug kit - Sonnax lists 104740-23K with seven plugs for this family - is the correct repair, not a hopeful reinstall. This is the single most-skipped item on rebuilt 6L80 valve bodies.
Actually a bad TEHCM
It happens - but it is the conclusion, not the opening bid, and on a 6L80 the solenoids are not serviced separately from the module. Condemn it only after the fluid is right, pressure rises, the lower valve body passed a vacuum test, and the ratio data still shows a commanded state with no hydraulic result. If you replace it, verify the part number against the VIN and program it before operation: Sonnax warns that an incorrect or incorrectly programmed TEHCM will itself cause a no-movement or no-upshift condition. One quirk worth knowing - a temporary no-move can appear during the OE relearn. Pull the scanner, pull the key, open and close the driver door, wait fifteen to twenty minutes, and it is usually good to go.
Keeping the next one away
- Replace every check ball, not just the one that looks bad.
- Mic the bore plugs. 0.4528 in. +/- 0.0001 in., every time.
- Verify separator plate type against the valve body before it goes on.
- Clutch select valves in first, springs outboard.
- Air check the valve body before the pan goes on. Two minutes here catches an assembly error while it is still cheap.
- Fill with DEXRON VI only, then set the final level hot at 160-200 F.
- Drive the relearn. Adapts were frozen while the code was stored, and a fresh valve body with stale adapts feels wrong until it has cycled through the range.
Clutch select valve bore wear is a heat-and-mileage problem. Cooked fluid stops protecting an aluminum bore that strokes on every range change, and every extra degree shortens the clock. Service fluid and filter on a real interval instead of the lifetime-fill marketing, keep the cooler circuit unobstructed, and if the truck tows, treat cooling as part of the transmission rather than an accessory.
FAQ
What does P0756 mean on a 6L80?
Generic scan tools print it as Shift Solenoid B Performance or Stuck Off. GM's own wording for the 6L50, 6L80 and 6L90 family is Shift Solenoid 2 Valve Performance - Stuck Off. It is a performance code, which means the electrical circuit passed its own test, the module commanded shift solenoid 2 to change state, and the gear ratio the speed sensors reported did not match what that command should have produced.
Can you drive a 6L80 with P0756 set?
It will move, and that is exactly what fools people. When P0756 sets, the TCM inhibits TAP shift functions and torque converter clutch operation, freezes adapts, commands high line pressure and defaults to 2nd gear, with reverse still available. So you get a truck that pulls away sluggishly in 2nd, has no lockup and rides harsh, but backs up normally. Drive it to the shop, not through another tow season - the 200 RPM of slip that set the code is heat going into a clutch pack.
Is 6L80 P0756 a bad solenoid or a bad valve body?
On this unit it is far more often the valve body. ATRA's specific inspection for P0756 is the clutch select valve #3 in the lower valve body, checked for wear and sticking. Shift solenoid 2 only supplies signal oil - the clutch select valve is what actually strokes and routes clutch feed. A worn or sticking select valve produces this code with a perfectly healthy solenoid, and since the solenoids live inside the TEHCM on a 6L80, guessing wrong is an expensive mistake.
Why do P0756, P0776, P0796, P2714 and P2723 show up together on a 6L80?
Because they share upstream causes. ATRA lists the same short list behind all five: check balls that no longer seal because they have worn, a damaged spacer plate with worn check ball holes, undersized or incorrect bore plugs, debris, and cracks or seal leakage in the drum feeding the suspect clutch. One code points at one valve. Four or five together point at the plate, the check balls, the bore plugs, or contamination, and you should stop chasing individual solenoids.
Will replacing the TEHCM fix 6L80 P0756?
Sometimes, but it is the last conclusion rather than the first move. Prove the fluid level and condition are right, confirm line pressure rises off idle, and vacuum test the lower valve body - clutch select valve #3 especially - before you condemn the module. If you do replace it, verify the part number against the VIN and program it before operation, because Sonnax notes an incorrect or incorrectly programmed TEHCM will itself cause a no-movement or no-upshift condition.