The 8L90 gets blamed for a lot of things it did not do. A truck comes in with a bang on the 1-2, the owner has already been told it needs a transmission, and the actual problem is a piston bore in the control solenoid valve body that is a few thousandths out of round. The unit is mechanically stout. What wears first, and what wears predictably, is cast aluminum around moving valves and pistons.
This is the symptom-to-bore map for the 8L90 and its light-duty sibling the 8L45, plus the bench tests that prove which bore is leaking before you spend money. Everything here is either published Sonnax bore data, GM service information, or numbers off a pressure gauge.
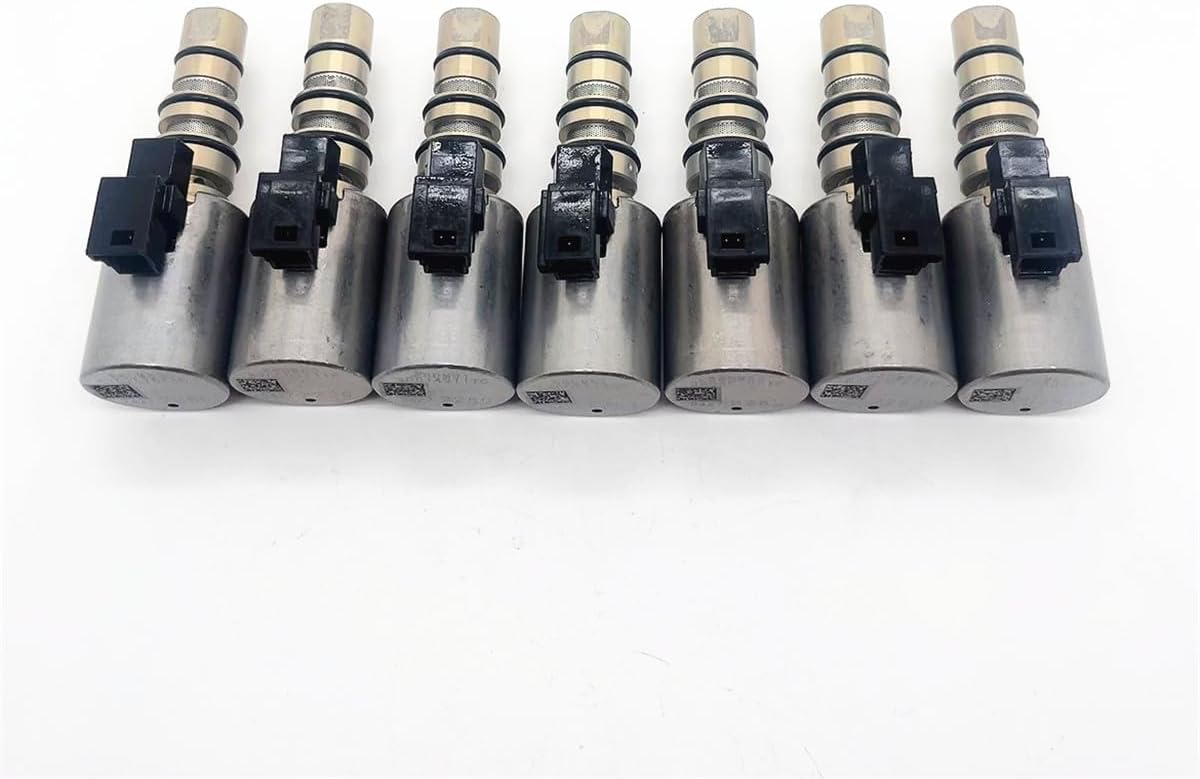
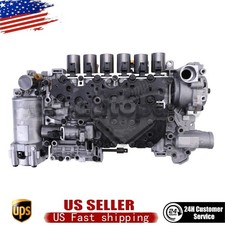
What Is Actually In There
The 8L90 uses a two-piece hydraulic stack: a lower valve body carrying the pressure regulator lineup and the main circuits, and a control solenoid valve body carrying the solenoids and the signal accumulator pistons. The control module is a standalone Delphi TCM, not a mechatronic like the ZF units, which is the one thing about this transmission every rebuilder is grateful for. Transmission Digest documents the rest of the architecture: a remote-access chain-driven pump, five friction elements, four planetary gear sets and an RPO of M5U, with Gears Magazine listing M5Q and M5X on the 8L90 and M5T and M5N on the 8L45.
Control is all variable force solenoid. There are seven VFS circuits and each one has a specific job, which is why a single leaking signal circuit produces a very specific complaint instead of general sloppiness. Per the Sonnax VFS circuit guide:
| Solenoid | Controls | Gears affected | Feed |
|---|---|---|---|
| S1 | Clutch control | 1-2-3-4-5, Reverse | Low (AFL) |
| S2 | Line pressure | All gears | High (line) |
| S3 | Clutch control | 4-5-6-7-8, Reverse | High (line) |
| S4 | Clutch control | 1-3-5-6-7 | High (line) |
| S5 | Clutch control | 1-2-7-8, Reverse | Low (AFL) |
| S6 | Clutch control | Low line pressure circuits | Low (AFL) |
| TCC | Converter clutch | 2-3-4-6-8 | High (TCC / PTS enable) |
Each of those seven circuits runs through a signal accumulator piston in a cast aluminum bore. The piston smooths the solenoid's signal pressure before it reaches the clutch control valve. When that bore wears, signal pressure exhausts past the piston instead of doing its job, and the clutch control valve never gets the command the TCM thinks it sent.
Symptom One: Harsh Shifts, Flare and Burnt Clutches
This is the volume complaint on these units and it has one dominant cause. Sonnax states plainly that 8L45 and 8L90 units suffer burnt clutches, shift concerns, low line pressure and converter apply complaints due to excess wear in the signal accumulator piston bores in the control solenoid valve body casting, and that the S3 and S4 locations are generally the worst.
Look at the table above and the pattern makes sense. S4 runs 1-3-5-6-7 and S3 runs 4-5-6-7-8 and Reverse. Between them they touch every forward gear, and both are high-line-pressure feeds, so they see the most work. A leaking S4 signal circuit gives you a harsh or flaring 1-2, because the clutch applying in first is being commanded by a signal that is partly going to exhaust. A leaking S3 circuit shows up higher in the box and in Reverse.
The failure mode is progressive and it eats parts while it progresses. Signal pressure leaks, apply pressure is wrong, the clutch slips through the shift, the clutch material glazes and then burns, and now you have a hydraulic ratio code and debris in the fluid on top of the original bore wear. Fixing the clutch without fixing the bore puts the truck back on the lift.
Symptom Two: Line Pressure That Will Not Come Down
This one breaks hard parts. Sonnax documents the mechanism specifically: wear at the inboard port of the pressure regulator bore, at the VFS signal port area, lets throttle signal pressure leak off. Without that signal the pressure regulator valve cannot stroke to its lower pressure position, so it parks in the high line pressure position and stays there.
Two other things stack on top of it. The OE line pressure blow-off spring is calibrated high enough in some units that it does not relieve until over 400 psi, and the OE shuttle valve has no O-rings, so it cannot seal against that much leakage. Combine a worn PR bore, a high blow-off setting and a leaking shuttle valve and Sonnax calls the result what it is: runaway pressure.
| Measurement | Value | Source |
|---|---|---|
| Normal peak line pressure | About 315 psi | Sonnax |
| Documented on worn units | Above 415 psi | Sonnax |
| OE blow-off spring relief point | Over 400 psi in some units | Sonnax |
| Target range after repair | 300 to 315 psi | Sonnax |
| Commanded line pressure, scan tool | Can approach 300 psi | Transmission Digest |
What 415 psi does to an 8L90 is not subtle. Sonnax reports valve body castings cracking in the worm tracks and drums failing catastrophically, because none of it was designed for that pressure. If you pull a unit apart and find a cracked worm track or a split drum with no obvious mechanical cause, check the pressure regulator bore and the blow-off spring before you build it, or you will do the same job twice.
Symptom Three: No Move or No Pressure After Install
Different animal entirely. If the unit drove in, was worked on, and now will not move, the cause is usually something that happened on the bench. Sonnax lists the realistic ones:
- Pump did not prime. The off-axis chain-driven pump does not self-prime well. Sonnax's bench prime is to sit the valve body face down in a drain pan, put the manual valve in Park with the first land flush with the casting, funnel ATF into the pump suction and spin the pump shaft clockwise with an electric drill and a half-inch chuck.
- Inner shuttle boost valve and bushing installed backwards. Facing outboard instead of inboard gives you low or no line pressure. Sonnax kit 154740-02K covers that assembly.
- Test port plug pulled. New OE valve bodies have a test port plug the original casting did not. Remove it and you have a significant line pressure loss with no other symptom to chase.
- Missing 1-2-7-8-R case seal underneath the valve body.
- Wrong valve body. A stop-start valve body on a non-stop-start unit leaks at the rear section casting where the stop-start accumulator attaches.
- No movement right after a fast learn or J2534 programming. Sonnax's fix here costs nothing: pull the key, get out of the vehicle and wait 15 minutes. It usually resolves itself.
One useful behavior to know: in failsafe the 8L90 gives you second gear and Reverse only. If a customer describes exactly that, you are looking at a default strategy, not a mechanical failure of five clutches.
Symptom Four: No Converter Apply or Shudder
Before you touch the valve body for a shudder complaint, rule out fluid. Gears Magazine puts the converter-related shudder in a specific window: a 23 to 28 Hz vibration, 20 to 80 mph, light throttle, fluid temperature between 122 and 158 degrees F, with moisture-absorbing fluid changing the friction dynamics as the primary cause and a complete flush with the updated DEXRON HP formulation as the fix. That is a fluid job, not a bore job.
If the fluid is right and current and the shudder is still there, then the hydraulic side is in play: the TCC signal accumulator bore, the converter feed limit valve, or the TCC regulator circuit. Sonnax publishes converter feed limit valve kits 154740-19K and 154740-22K, the oversized version, for the feed side of that circuit.
Testing It: Scan Tool First
Do not open anything until you have compared commanded line pressure to actual line pressure. The 8L90 makes this easy because it has a physical test port. Per Transmission Digest, the line pressure test plug is on the extension housing, and there are two plugs there: line pressure on the left, the 1-2-3-4-5/R circuit on the right. Put a mechanical gauge on the left port, watch the commanded value on the scan tool, and compare.
- Actual tracks commanded, both normal. Pressure control is working. Your problem is downstream, in a clutch circuit or a signal accumulator bore.
- Actual runs high and will not come down on command. Pressure regulator bore wear at the VFS signal port, blow-off spring, or both.
- Actual runs low across the board. Pump, boost valve orientation, missing case seal, pulled test port plug, or a badly worn PR bore.
- Actual is erratic. Worn PR bore or a leaking shuttle valve, since both let regulation wander.
Check the fluid at the same time, and check it right. There is no dipstick. The fill plug is a push-lock on the passenger side of the case and the pan has a stand pipe, so you bring the transmission up to roughly 100 degrees F, pull the stand pipe plug, and see whether fluid trickles out. Depending on application the 8L90 takes approximately 11.5 quarts of DEXRON HP. The updated GM fluid part number is 19417577, and Mobil 1 Synthetic LV ATF HP is licensed against DEXRON HP under license code J-62120. Do not put DEXRON VI or ULV in one of these.
Testing It: Vacuum Test the Bores
Sonnax is direct about this: vacuum testing is the best way to determine whether the bore repairs are needed. For the signal accumulator pistons the technique has one detail that people get wrong. Vacuum test the piston with the spring still in it, and put the test port opening in the center of the spring. Test each of the seven bores individually and write down what each one holds, so you have a record of which circuits are actually leaking rather than a general impression.
If you do not have a vacuum tester, gauge pins will tell you a lot. Sonnax also notes that you can block the original accumulators at different positions to measure wear at multiple points across the piston stroke, which is how you find a bore that is worn in the middle but still seals at the ends.
On the pressure regulator side, test both PR passages and check the shuttle valve sleeve as its own item. Sonnax lists sleeve wear as producing erratic or high line pressure and restricted converter and lube flow all by itself, independent of the valve.
The Fix
Signal accumulator bores
Two tiers. Kit 154740-06K is a drop-in piston kit with no reaming required and services four of the seven bores. Kit 154740-01K is the oversized kit: seven hardcoat anodized aluminum pistons, used with tool kit 154740-TL, for casting wear beyond what a drop-in will fix. The hardcoat anodizing is the point, since the original wear problem is soft aluminum against aluminum. Sonnax's 8L45-8L90-SHIFT-ZIP kit services all seven bores.
Pressure regulator lineup
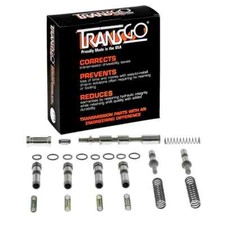
Kit 154740-29K is the pressure regulator and O-ringed shuttle valve kit, paired with pressure relief ball valve spring 154740-18 to bring maximum pressure back into the 300 to 315 psi range. The redesigned PR valve has a lengthened spring pocket spool at the VFS signal port area, which Sonnax says roughly doubles the sealing capability there, and the critical shuttle valve diameter is lengthened as well. Sonnax's standing recommendation is worth taking literally: replace the pressure regulator lineup and the line pressure blow-off spring every single time you rebuild one of these.
Sonnax 154740-29K Pressure Regulator & O-Ringed Shuttle Valve Kit
This is the exact kit for the runaway line pressure failure above, with the lengthened PR spool and the O-ringed shuttle valve. Our sister store stocks it along with the rest of the Sonnax 8L90 valve lineup.
Get the 154740-29K kit →Need a different valve in the lineup? The full 8L90 Sonnax valve kit selection is there too.
Assembly details that decide whether it comes back
- The end plug's step faces down toward the spring. Backwards is a rebuild you do twice.
- The plug has to seat flush with the casting surface. Casting variation is real, and Sonnax notes you may have to file to get it flush.
- Deburr sleeve edges. Burrs cause cross-leaks and pressure loss, which is the same symptom you were trying to fix.
- Vacuum test each bore after the repair, not just before.
Programming and Relearn, or It All Comes Back
The 8L90 will not behave after valve body work until the controller side is finished. Gears Magazine specifies PUN and TUN programming whenever the valve body or the transmission is replaced, because the standalone TCM carries part and unit numbers tied to that assembly.
Then the adaptive work. Clear the adaptive tables and run the relearn with transmission fluid temperature between 131 and 198 degrees F (55 to 96 degrees C). The coast-down relearn is its own procedure: accelerate to 65 mph, then decelerate to 25 mph with light braking, ten times. Skip the relearn on a good repair and the customer will describe the same harsh shift you just fixed.
Two shift adapt numbers worth knowing when you are reading data: the C2 clutch base volume is 12 cc and the C2 return spring value is 155 kPa. If either is far off after a relearn, the hydraulic repair is not finished.
What Sends These Back
- Replacing solenoids for a bore problem. A VFS solenoid can be perfect and still produce a harsh shift if the signal accumulator bore behind it exhausts the signal. Vacuum test before you buy solenoids.
- Building a unit without touching the PR lineup. The pressure that broke the drum is still there when you put the new drum in.
- Chasing a shudder into the valve body when the fluid is old. Rule out moisture-contaminated fluid and the wrong spec first.
- Reusing TTY bolts. Transmission Digest notes the 8L90 uses torque-to-yield bolts, including the two Torx Plus bolts holding the chain baffle to the valve body assembly, and that all TTY bolts in the unit should be replaced.
- Skipping the relearn. Good hydraulics with stale adapts drive like bad hydraulics.
FAQ
Can you fix an 8L90 valve body, or do you have to replace it?
Most 8L90 valve body failures are bore wear, not electrical, and bore wear is repairable. The two locations that matter are the seven signal accumulator piston bores in the control solenoid valve body casting and the pressure regulator bore in the lower casting. Sonnax sells drop-in and oversized piston kits plus a pressure regulator and O-ringed shuttle valve kit for exactly those bores. Replacement makes sense when the casting is cracked in the worm tracks, which happens after a runaway line pressure event.
What are the first symptoms of a bad 8L90 valve body?
Harsh 1-2 and 2-3 shifts, shift flare on the same upshifts, and a converter that will not lock or locks and shudders. Those three complaints all trace back to VFS signal pressure leaking out of worn signal accumulator bores, and per Sonnax the S3 and S4 locations are generally the worst. Burnt clutches and hydraulic ratio codes show up later, after the leak has been slipping a clutch for a few thousand miles.
How much line pressure should an 8L90 have?
Peak line pressure on a healthy unit runs around 315 psi, and Sonnax has documented worn units running above 415 psi. Transmission Digest notes commanded line pressure can approach 300 psi and that the extension housing carries two test plugs, the left one for line pressure. Compare actual to commanded on the scan tool first. If actual tracks 100 psi high and will not come down, suspect the pressure regulator bore and the blow-off spring, not the pump.
Do you have to program the TCM after replacing an 8L90 valve body?
Yes. Gears Magazine states PUN and TUN programming is required whenever the valve body or the transmission is replaced, because the standalone Delphi TCM carries part and transmission unit numbers tied to the assembly. After that you clear the adaptive tables and run the relearn, including the coast-down procedure, with transmission fluid temperature between 131 and 198 degrees F.
What fluid does an 8L90 take, and does the wrong fluid cause valve body problems?
DEXRON HP, not DEXRON VI and not ULV. GM's updated fluid part number is 19417577 and Mobil 1 Synthetic LV ATF HP carries the DEXRON HP license, code J-62120. Wrong or moisture-contaminated fluid will not wear a bore by itself, but it changes converter clutch friction behavior and is the documented cause of the 23 to 28 Hz shudder complaint, so rule fluid out before you tear a valve body apart for a shudder.
Sources
- Sonnax — "Watch Out for High Pressure in GM 8L45, 8L90 Valve Bodies" Backs the roughly 315 psi normal peak line pressure, the documented above-415-psi readings on worn units, the OE blow-off spring relieving over 400 psi, the wear at the inboard pressure regulator bore port at the VFS signal area, the O-ringless shuttle valve leakage, the cracked worm tracks and drum failures, the 300 to 315 psi post-repair target, the lengthened PR spring pocket spool and shuttle valve diameter, kit 154740-29K and spring 154740-18, and the recommendation to replace the PR lineup and blow-off spring every rebuild. Read the source
- Sonnax — "Troubleshooting GM 8L45, 8L90 No Move & No Pressure Conditions" Backs the off-axis chain-driven pump priming problem and the full bench prime procedure, the inner shuttle boost valve and bushing outboard/inboard installation error and kit 154740-02K, the new-OE test port plug line pressure loss, the missing 1-2-7-8-R case seal, the stop-start valve body mismatch leak, the 15-minute key-out fix after fast learn or J2534 programming, and the second-and-Reverse-only failsafe behavior. Read the source
- Sonnax — "GM 8L45, 8L90 VFS Solenoid Circuit Testing & Repair" Backs the seven-VFS circuit table in this article: which clutch or pressure each of S1 through S6 and TCC controls, the gears each affects, whether it is fed by high line pressure or low AFL, the statement that the S3 and S4 signal accumulator locations are generally the worst, and the spring-in-place vacuum test technique with the test port centered on the spring. Read the source
- Sonnax — "Tips for Tackling 8L45, 8L90 Shift Repairs With Sonnax Signal Accumulator Pistons" Backs vacuum testing as the primary determination method, the gauge-pin fallback, blocking the original accumulators at different positions to measure wear across the stroke, kit 154740-06K servicing four of seven bores drop-in, oversized kit 154740-01K with tooling 154740-TL, the 8L45-8L90-SHIFT-ZIP kit covering all seven bores, the end plug step facing down toward the spring and needing to sit flush, the sleeve deburring warning, and the adaptive reset and relearn requirement afterward. Read the source
- Sonnax — Oversized Signal Accumulator Piston Kit 154740-01K product data Backs the statement that 8L45 and 8L90 units suffer burnt clutches, shift concerns, low line pressure and converter apply complaints due to signal accumulator piston bore wear in the control solenoid valve body casting, that the wear exhausts VFS signal pressure, and that the kit contains seven hardcoat anodized aluminum pistons used with tool kit 154740-TL. Read the source
- Gears Magazine (ATRA) — "What Is Causing That? A Look at the GM 8L90's Most Common Concerns" Backs the standalone Delphi TCM, RPO codes M5Q and M5X for the 8L90 and M5T and M5N for the 8L45, the DEXRON HP fluid requirement and updated GM part number 19417577, the 131 to 198 degrees F (55 to 96 degrees C) relearn temperature window, the C2 clutch base volume of 12 cc and 155 kPa return spring value, the PUN and TUN programming requirement when the valve body or transmission is replaced, the coast-down relearn (65 mph down to 25 mph with light braking, ten repetitions), and the 23 to 28 Hz converter shudder window at 20 to 80 mph and 122 to 158 degrees F caused by moisture-absorbing fluid. Read the source
- Transmission Digest — "GM 8L90: The Other 8-Speed Automatic" by Mike Riley Backs the M5U RPO code, the remote-access chain-driven pump, five friction elements and four planetary gear sets, the no-dipstick push-lock fill plug on the passenger side with the pan stand pipe and the roughly 100 degrees F check temperature, the approximately 11.5 quarts of DEXRON HP fill, the two extension housing test plugs with line pressure on the left and 1-2-3-4-5/R on the right, commanded line pressure approaching 300 psi, and the Torx Plus TTY baffle bolts plus the guidance to replace all TTY bolts. Read the source
- Mobil (ExxonMobil) — Mobil 1 Synthetic LV ATF HP product page Backs that the fluid is approved and licensed by General Motors against DEXRON HP ATF under DEXRON license code J-62120, and is warranty approved for vehicles specifying DEXRON HP ATF. Read the source
- GM TechLink — 2025 Transmission Capacities & Fluids reference (PDF) GM's own published transmission fluid type and capacity reference chart, used to confirm the DEXRON HP specification and fill volume family for the 8L series. Read the source