The 200-4R pan comes off more often than any other part of this transmission. It comes off for a fluid service, for a shift kit, for a TCC solenoid, for a valve body, and for every "it was fine until the last guy touched it" leak. That makes the pan rail and the bolts around it the most abused hardware on the unit. The torque numbers are low, they are easy to beat, and getting them wrong shows up as a drip on the driveway within a week or a slipping 2-4 band within a few thousand miles.
This guide covers the real numbers for the pan, valve body and 1-2 accumulator bolts, where they come from, and the parts of a pan service that decide whether the job holds: the gasket, the servo exhaust hole, the filter seal, the refill and the road test. If you are here because of a leak rather than a service, read our 200-4R fluid leak guide first, because a wet pan rail is often fluid running down from somewhere higher.
The numbers: 200-4R pan and valve body torque
GM's factory service manual for these years is not freely published online, so the cleanest documented figures come from B&M's installation instructions for its 1981-90 THM200-4R Shift Improver Kit, P/N 35265. That kit is installed with the pan and valve body off, so the instructions walk through the whole job and give torque for every fastener you disturb. I have used these figures on the bench for years and they match what the factory hardware wants.
| Fastener | Torque | Notes |
|---|---|---|
| Oil pan to case (16 bolts) | 14 N-m (10 ft-lb) | Run all bolts in finger tight first. Overtightening deforms the gasket and causes leaks (B&M 35265, Step 20). |
| Valve body to case | 11 N-m (8 ft-lb) | Same figure for every valve body bolt regardless of length (B&M 35265, Step 18). |
| 1-2 accumulator housing | 11 N-m (8 ft-lb) | Snug finger tight on assembly, torque with the valve body bolts. |
| Refill after pan and valve body work | About 6 quarts | B&M's figure for a pan drop with the valve body off. Always finish on the dipstick, not the bottle count. |
Ten foot-pounds on an M8 bolt is barely past what a 1/4-inch ratchet does by feel. That is the point. The pan is stamped steel with a thin flange, and the clamping load needs to be spread evenly along a soft gasket, not concentrated at sixteen points. Use an inch-pound or small-range torque wrench. A 3/8 click wrench that starts at 10 ft-lb is at the bottom of its range, where most are least accurate.
Why "more" makes it leak
B&M's instructions say it plainly: if the bolts are overtightened, the gasket deforms excessively and the pan leaks. What actually happens is that the flange dishes inward around each bolt hole. The gasket gets crushed at the bolts and loses contact halfway between them. Tightening further only makes the dimples deeper. Once a pan has been cranked down a few times, the rail looks scalloped when you sight down it, and no new gasket at the correct torque will seal it until the flange is flattened again.
Valve body bolt lengths: the part people mix up
If the job goes past the filter (TCC solenoid, shift kit, valve body swap, accumulator springs), the valve body and accumulator bolts come out too. They are not all the same length, and a long bolt in a short hole will bottom out before it clamps, while a short bolt in a deep hole pulls only a few threads in aluminum. B&M's Figure 1 for the 200-4R lists four lengths:
- A: one bolt, 15.5 mm (0.61 in)
- B: three bolts, 30.0 mm (1.17 in)
- C: eleven bolts, 45.0 mm (1.76 in)
- D: five bolts, 60.0 mm (2.34 in)
Lay them out on a piece of cardboard punched in the pattern as they come out and you will never have to measure. On reassembly B&M has you thread five or six bolts into the case at different positions first to hold the separator plate and gaskets aligned, then install the rest and torque them all to 8 ft-lb. The gaskets are not interchangeable either: B&M notes the gasket marked with a "C" goes on the case side of the separator plate and the one marked "V" or "VB" goes on the valve body side. A swapped or misaligned valve body gasket is on B&M's troubleshooting list for slipping, erratic shifts and late, hard shifts. Sonnax's 200-4R valve body layout is the reference I keep on the bench for valve locations if anything comes out of the body itself.
Also on that list: loose valve body bolts and loose 1-2 accumulator housing bolts both cause slipping. Eight foot-pounds is light, but it is not optional. Every bolt gets the wrench.
The servo exhaust hole: the one that kills bands
This is the detail that separates a pan job from a comeback. B&M's Step 20 warns that to prevent premature band failure, the servo exhaust hole shown in its Figure 1 must not be obstructed. On the 200-4R the 2-4 servo exhausts through that passage. If the pan gasket is shifted, the wrong gasket is used, or a bead of silicone squeezes over it, the servo cannot release cleanly. The band drags, gets hot and wears, and you end up with a slipping or flared 2-3 that looks like an internal failure.
When you set the gasket on the pan, look at the case rail and find that hole before you lift the pan into place. If an aftermarket gasket covers it, it is the wrong gasket.
Pan service step by step
1. Drop the pan without a bath
B&M's method works: remove every bolt except three on one side, loosen those three a few turns, and let the pan tip and drain from the far side into your catch pan. If the pan is stuck to the old gasket, slide a flat screwdriver between pan and case and pry gently. This is a stamped pan, and prying hard at a corner is how a straight rail becomes a bent one.
2. Pull the filter and read the pan
The filter pulls straight down. Its pickup tube seals in the case with an O-ring or seal, and that seal sometimes stays in the bore, so check for it before the new filter goes in. Then look at what is in the pan before you clean it. A light gray paste on the magnet is normal wear. Brass or bronze flakes point at bushings or thrust washers. Steel slivers, chunks of friction lining or band material mean the unit is coming apart and a fluid service will not save it.
If the fluid looks milky or pink, or the clutch material in the pan is flaking, stop and check for water or coolant. Gears Magazine (ATRA) points out that friction material absorbs water and that clutches contaminated with moisture have to be replaced; there is no way to dry them out. A pan service on a contaminated unit only buys time.
3. Clean both surfaces completely
Scrape every bit of old gasket off the pan flange and the case rail, then clean the inside of the pan with solvent. Sight down the pan flange. If it is scalloped, flatten the dimples around each hole on a flat block with light hammer taps until the flange lies flat. This step fixes more repeat leaks than any gasket brand.
4. Install the filter
Put the new O-ring or seal on the filter tube, coat it with clean ATF and push the tube into the pump bore until it is fully seated. B&M notes that the filter retainer clip locates at the small depression in the filter housing. A cut or missing filter tube O-ring is on B&M's list of causes for pump buzz or whine, and it can also let the pump draw air and cause slipping. A clogged filter causes the same whine.
5. Hang the pan dry and torque it light
Set the new gasket on the pan and line up the holes. B&M recommends a little grease or petroleum jelly to hold it in place, and says not to use gasket sealer or silicone. Confirm the servo exhaust hole is clear, lift the pan up, start all sixteen bolts finger tight, then torque them to 10 ft-lb in a crisscross pattern from the center outward. I do two passes, the first around 6 ft-lb and the second at full spec.
6. Fill, reset the TV cable if you touched it, check for leaks
Fill to the full mark on the dipstick. B&M calls for about 6 quarts after a pan and valve body job. With the engine running, look for leaks, then lower the vehicle, recheck the level and adjust. If you disconnected or disturbed the TV cable at the valve body, it must be reset before the vehicle moves. B&M is direct about it: failure to reset the TV cable results in poor shift quality or transmission failure.
Which fluid
The 200-4R was built in the DEXRON-II era. GM's current guidance through GM Service Insights is that DEXRON-VI is the fluid to use in a GM automatic where DEXRON-VI, an earlier-generation DEXRON, or AW-1 is specified. Do not use DEXRON ULV. GM lists it for 10-speed units only, and it is not a substitute for the older fluids. A quality licensed DEXRON-VI is the right choice for a 200-4R on the road today.
Do not skip the cooler
If the pan showed metal or friction debris, or this pan drop follows a rebuild, the cooler and lines need attention too. Pat Barrow of Lubegard, writing in Transmission Digest, explains that a contaminated cooler is a common cause of premature failure in a replacement transmission, because the cooler and lines hold old fluid, clutch material and metal particles that are pumped straight back into the fresh unit. After a catastrophic failure it may not be possible to clean a cooler at all, and some rebuilders void warranty if the cooler is not replaced. On a fluid service with clean fluid and a clean pan, a back-flush is not usually necessary. But a cooler that was in line with a failed unit should be flushed or replaced, not trusted.
Road test and the leak check that matters
Drive 15 to 20 minutes until the fluid is fully hot, then recheck the level on level ground and put a light along the pan rail. B&M's last step is the same: test drive and recheck for leaks while the transmission is hot. A weep at one bolt usually means it missed the final pass. A weep along a whole side means the flange is still bent. Fluid running down from above the rail is not the pan at all; check the TV cable seal, the cooler fittings and the case connector before you pull the pan again.
While you drive it, pay attention to the shifts. If the shift quality changed after the service, look first at the TV cable setting and the valve body gasket orientation. If the 2-3 started flaring a few hundred miles later, think about that servo exhaust hole.
FAQ
What is the torque spec for 200-4R transmission pan bolts?
14 N-m, which is 10 ft-lb, per B&M's 200-4R installation instructions. Start all bolts finger tight, then torque them evenly in a crisscross pattern. Going tighter deforms the gasket and the stamped pan flange, which is the most common cause of a leak after a pan service.
What is the 200-4R valve body bolt torque?
11 N-m, or 8 ft-lb, for every valve body and 1-2 accumulator bolt. The bolts come in four lengths, 15.5, 30, 45 and 60 mm, and must go back in their original holes. Loose valve body or accumulator bolts can cause slipping.
Should I use RTV or gasket sealer on a 200-4R pan?
No. B&M's instructions say not to use gasket sealer or silicone. Hold the gasket in place with a little grease or petroleum jelly. Silicone can also squeeze over the servo exhaust hole, and an obstructed servo exhaust can cause premature 2-4 band failure.
How much fluid does a 200-4R take after a pan drop?
B&M calls for about 6 quarts after a pan and valve body job. A pan drop leaves fluid in the converter and cooler, so always finish by checking the dipstick hot on level ground instead of pouring in a fixed number of quarts.
What fluid does a 200-4R use?
A licensed DEXRON-VI. GM says DEXRON-VI can be used in GM automatics where an earlier-generation DEXRON fluid was specified, which covers the 200-4R. Do not use DEXRON ULV, which GM lists for 10-speed transmissions only.
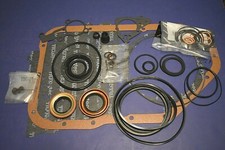
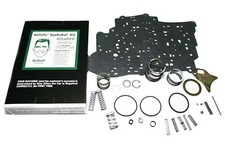
Overhaul gasket and seal kits, shift kits, solenoids, pumps and valve bodies for the 200-4R — shipped fast from the USA.
Shop 200-4R parts →Related 200-4R guides
Sources
- B&M Racing & Performance Products — Installation Instructions, Shift Improver Kit for 1981-90 THM200-4R, P/N 35265. Backs the 14 N-m (10 ft-lb) pan bolt torque and overtightening warning, 11 N-m (8 ft-lb) valve body and accumulator torque, the four valve body bolt lengths, C and V/VB gasket orientation, no gasket sealer or silicone, the servo exhaust hole and band failure warning, the filter tube O-ring and retainer clip, the three-bolt pan drain method, about 6 quarts refill, the TV cable reset warning, and the troubleshooting list. B&M instructions (PDF)
- GM Service Insights (GM/ACDelco) — "Use the Right Transmission Fluid". Backs DEXRON-VI being the fluid for GM automatics where DEXRON-VI, earlier-generation DEXRON or AW-1 is specified, and DEXRON ULV being a 10-speed fluid. gmserviceinsights.com
- Gears Magazine (ATRA) — "Identifying ATF Contamination", Mike Brown. Backs friction material absorbing water and moisture-contaminated clutches needing replacement, and gasket and clutch material flaking as a sign of coolant damage. gearsmagazine.com
- Transmission Digest — "To Flush or Not to Flush", Pat Barrow (Lubegard). Backs contaminated coolers and lines causing premature failure of replacement transmissions, debris that may not be removable after a catastrophic failure, and warranties that require cooler replacement. transmissiondigest.com
- Sonnax — GM 200-4R Valve Body Layout. Reference for valve train locations and orientation in the 200-4R valve body when it comes off during pan work. sonnax.com