The 4L60E valve body is the most misunderstood part of the whole transmission. People pull one out, blow it off with brake clean, bolt in new solenoids, and wonder why the rebuild still has a soft 1-2, a converter code, or a burnt 3-4 pack a year later. On a high-mileage 4L60E the aluminum bores are usually worn, and no amount of new frictions or a fresh pump will fix a valve that can no longer hold pressure. This is the bench walkthrough I wish more people had before they started: what the valve body controls, which valves genuinely wear, how to clean and test it, when to ream and sleeve, and the reassembly mistakes that bring the unit back.
The short version: On a worn 4L60E, the failures live in the aluminum bores, not the springs. The high-wear valves are the actuator feed limit (AFL) valve, the TCC regulator and TCC apply valves, the pressure regulator / boost valve in the pump, and the 1-2 and 2-3 shift valves. Clean it spotless, vacuum-test each bore to find the leakers, and repair the worn ones with oversized valves and reamed bores. A new solenoid on top of a leaking bore does nothing.
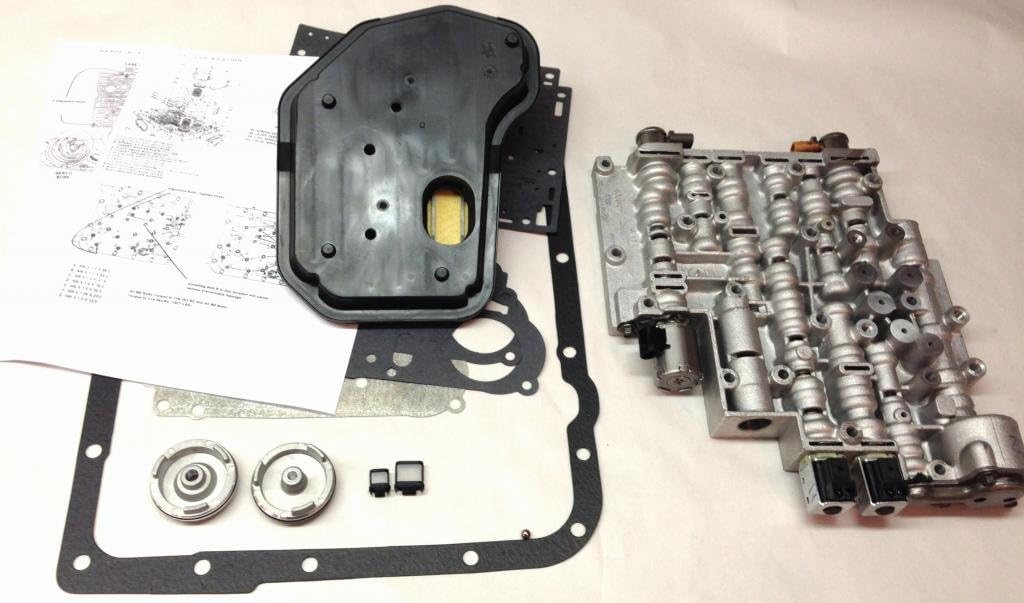
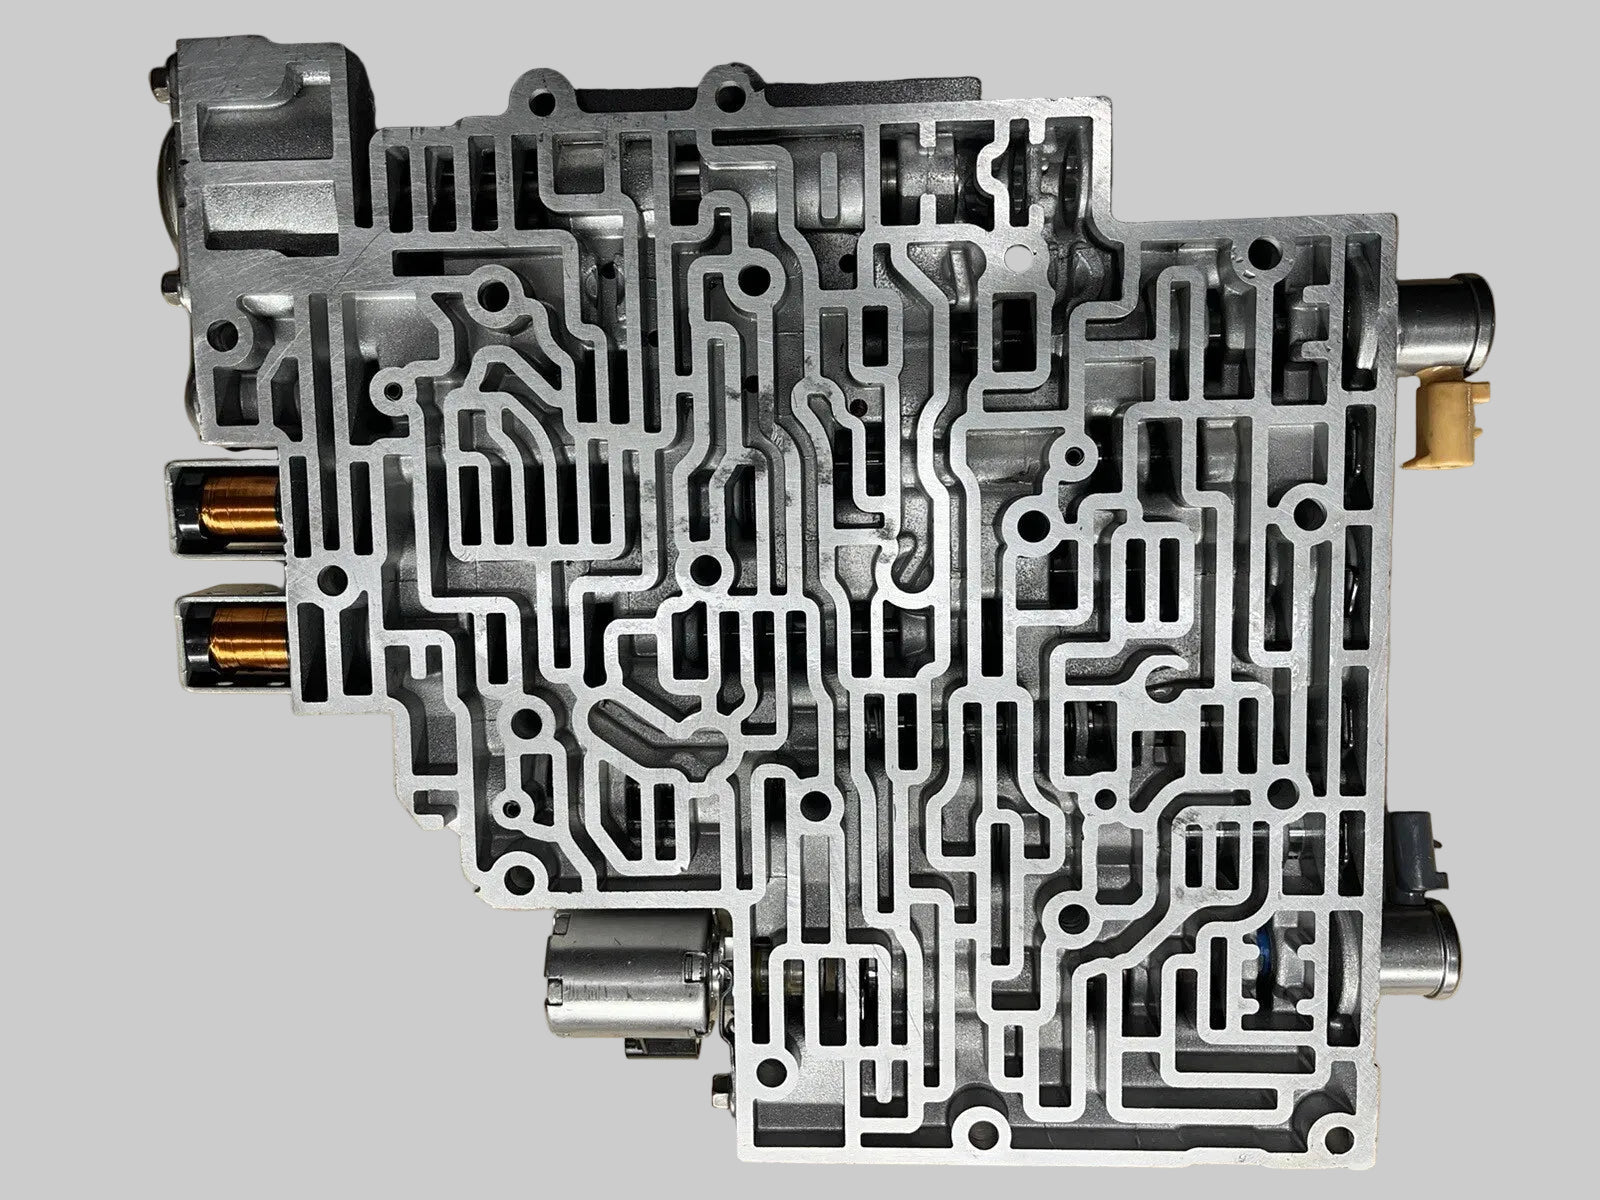
What the 4L60E Valve Body Actually Does
The 4L60E is an electronically controlled evolution of the 700-R4/4L60, used behind millions of GM trucks, vans, and rear-drive cars — Silverado and Sierra, Tahoe, Yukon, Suburban, Express and Savana vans, Camaro, and the S-10 among them. The computer commands the shifts, but hydraulics still do all the muscle work. Solenoids send signal oil, and the valves in the valve body translate that signal into apply pressure for the clutches and bands, into line pressure at the pump, and into torque converter clutch (TCC) apply [1].
Two things make this valve body worth understanding before you touch it. It is an aluminum casting, and aluminum bores wear when a steel valve oscillates against them for 150,000 miles. And the pressures that feed the shift solenoids all start from one place — the actuator feed limit circuit — so a single worn bore can starve half the transmission.
| Valve / circuit | What it does | Symptom when the bore wears |
|---|---|---|
| Actuator feed limit (AFL) | Regulates a steady feed to the shift solenoids and PWM circuits | 2nd-gear starts, wrong-gear starts, solenoid/ratio codes, low line |
| TCC regulator valve | Regulates converter clutch apply pressure | P1870 TCC slip code, shudder, overheated converter |
| TCC apply / switch valve | Switches the converter between apply and release | Converter codes, cross-leak of apply and release oil |
| Pressure regulator + boost valve (pump) | Sets line pressure and boosts it under load/reverse | Low line, reverse chatter, 3-4 clutch and 2-4 band failure |
| 1-2 and 2-3 shift valves | Route apply oil to make the upshifts | Harsh or flared shifts, neutral after 2-3, no 4th |
The Valves That Actually Wear
You do not rebuild a 4L60E valve body by replacing everything. You replace what wears. After enough of these on the bench, the same short list keeps showing up.
1. The actuator feed limit (AFL) valve
This is the one I check first, every time. The OE AFL valve has a large reaction area and is easily side-loaded, so it wears the valve body bore. As the bore opens up, oil pressure to the shift solenoids drops, which sets solenoid and ratio codes, and the same lost oil pulls down line pressure. The classic complaints are 2nd-gear starts, reduced 3-4 clutch life, band and clutch failure, harsh shifts, no 4th, and wrong-gear starts [2]. Because this circuit feeds the solenoids, a worn AFL bore can masquerade as a whole handful of unrelated electrical faults. Sonnax kit 77754-09K addresses it with a hard-anodized valve and a wear-resistant sleeve, and because of the valve diameter and sleeve, the repair requires the matching reamer and guide kit (77754-TL) [2].
2. The TCC regulator valve
In 4L60E, 4L65E and 4L70E units, severe wear of the TCC regulator valve bore — caused by the OE valve oscillating in its bore — lets regulated converter apply pressure exhaust. That is a primary cause of the P1870 TCC slip code and of overheated converters [3]. If you have a truck that sets P1870, shudders, or cooks converters, do not just throw a lock-up solenoid at it. Check that bore. Sonnax kit 77754-04K restores the regulator (and isolator) circuit rather than papering over it with a rebuilt converter that will fail again.
3. The TCC apply / switch valve
The apply valve is the switch that moves the converter between apply and release, while the regulator controls apply pressure — both can set slip codes. On PWM units, cross-leakage between converter signal oil and converter feed oil in this bore is a known problem; Sonnax addresses it with a PTFE-sealed valve (kit 77805E-K for PWM applications) [1]. Match the fix to whether your unit is early non-PWM or later PWM — the two are not interchangeable, and getting it wrong is a common parts mistake.
4. The pressure regulator and boost valve (in the pump)
The pressure regulator valve and its boost valve live in the pump cover, not the main valve body, but no valve-body job is complete without them because they set line pressure. Bore wear happens at roughly three spots, most commonly on either side of the decrease circuit where the double-spool PR valve oscillates; worn, it leaks line pressure under boost and decrease pressure off-boost [4]. Separately, the EPC solenoid's duty cycle wears the boost sleeve quickly, letting torque-signal oil leak past the boost valve and exhaust at the reverse orifice — the result is poor line rise, seen as 3-4 clutch failure, 2-4 band failure, reverse chatter, or poor shift quality. Sonnax oversized PR valve 77917-07 restores the pump cover to spec, and line-pressure booster kits pair a stronger PR spring with a larger-ratio boost valve for a progressive rise under load [4].
5. The 1-2 and 2-3 shift valves
Wear at the shift-valve spools and bore lands loses the pressure that makes clean upshifts. Complaints of 2nd-gear starts, neutral after the 2-3 shift, or no 4th are compounded by worn AFL bores, leaking O-rings, and tired solenoids — which is exactly why you fix the AFL circuit and the solenoid seals at the same time [5]. Sonnax is blunt about the limit here: a shift-valve spring kit is not a fix for leaking solenoids or leaking seals in the solenoid-signal or actuator-feed-limit circuits [5]. Fix the leaks first, then calibrate.
The Separator Plate and Checkballs
Before the valve body ever comes apart, note the checkball layout. The 4L60E uses a set of checkballs seated in the worm-track passages against the separator plate; a common practical count is seven loose checkballs in the valve body plus one on the case side of the plate near the 3-4 accumulator, in addition to encapsulated balls elsewhere in the unit. Each ball controls a specific apply or release orifice — one governs 2-4 band apply during the 1-2 upshift and proper band release on the 2-1 downshift, for example. Exact counts and positions vary by model year and calibration, so work from the ATSG manual or a Sonnax layout for your specific unit rather than from memory [6].
Two rules keep the plate job clean. Photograph every checkball in place before you lift the halves apart and bag them by location — a ball in the wrong pocket, or one that rolls into the pan, gives a specific and maddening shift complaint. And inspect the plate for wear rings around the orifices and a bonded gasket that has been leaking; a wire-drawn orifice changes shift feel as surely as a worn valve.
Cleaning and Inspection
The valve body has to be surgically clean before you can test or reassemble it. Crack the bolts loose in the correct pattern, keep them organized by length, and separate the castings without prying on the sealing faces. Flow-check and cut open the filter, looking for the clutch material or metal that tells you what failed upstream. Then wash every valve, spring, and bore in solvent, blow the passages dry, and lay the valves out in order — contamination left in a bore will plug an orifice and skew every test that follows [6].
Inspect each valve and bore as you go. Look for polished wear bands, scoring, and the gray aluminum-oxide film that marks a worn bore. Each valve should slide freely in a clean, dry bore under its own weight; anything that hangs up, or any bore with a step you can feel with a pick, is a candidate for repair rather than reassembly.
Vacuum testing finds the leakers
The pick test tells you a bore is loose; a vacuum test tells you how loose, repeatably, and which circuit is the problem. Sonnax's vacuum test method identifies valve-to-bore clearance by pulling a measured vacuum on a specific port and reading how fast it bleeds down — it is an efficient, repeatable way to find the root cause and to prove the repair worked afterward [7]. The valve body must be clean and dry first, or fluid and debris will plug the orifice and give a false pass. Free Sonnax vacuum-test guides map the exact ports to test on the 4L60E, list the pass/fail readings, and name the Sonnax part that fixes each failing circuit [7]. Transmission Digest walks through the same test on the 4L60E as a diagnostic that separates a genuinely worn valve body from a good one before you spend money [8].
Reaming and Repairing Worn Bores
When a bore fails the vacuum test, the fix is an oversized valve installed in a reamed bore. Reaming removes the worn, out-of-round aluminum and cuts the bore to a precise larger diameter so the new, larger-diameter Sonnax valve seals again. It is machining, not a parts swap: use the correct reamer and guide for that specific valve (the AFL job, for example, needs kit 77754-TL), keep the reamer square and lubricated, flush the chips out completely, and re-vacuum-test the finished bore to confirm the repair [2]. If you are doing several bores at once, a comprehensive reconditioning package such as the Sonnax Sure Cure kit bundles the common valve-body repairs for the 4L60E/65E/70E family into one kit so you are not chasing individual part numbers [1].
A word on judgment: not every bore needs reaming. A shift-valve circuit that vacuum-tests within spec gets a cleaned valve and a fresh spring, not a reamer. Ream what leaks, calibrate what is worn but sealing, and leave good bores alone — over-reaming a bore that did not need it just creates the leak you were trying to prevent.
Reassembly Cautions
The job is won or lost on reassembly. A few things that come back on the rack if you skip them:
- Checkballs first, in the right pockets. Set every ball to your teardown photos before the halves go together. This is the number-one comeback on valve-body jobs.
- Right separator plate and gaskets. Confirm the plate matches your calibration and orifice layout, and that the gaskets index correctly — a shifted gasket blocks an orifice and mimics a bad valve.
- Torque the bolts evenly, in sequence. Uneven clamp load warps the casting and pinches valves. Follow the pattern and the spec; do not run them down with an impact.
- Match PWM to PWM. The TCC apply and related parts differ between early non-PWM and later PWM units. Verify which you have before installing converter-circuit parts [1].
- Fresh solenoid seals and screens. New O-rings on the solenoids and clean screens are part of the valve-body job, not an afterthought — the shift-valve calibration depends on those circuits not leaking [5].
- Re-test before it goes in. Vacuum-test the repaired bores one more time after final assembly. Ten minutes on the bench beats pulling the pan after a road test.
Do the valve body this way — clean it truly clean, vacuum-test to find the real leakers, ream and sleeve only what needs it, and reassemble with the checkballs and seals correct — and the 4L60E stops being a coin-flip rebuild. The units that come back are almost always the ones where somebody reused a worn bore because the valve "looked fine." Our line pressure testing walkthrough covers verifying this pressure work on the vehicle and pairs directly with the pump section above.
Sources
- Sonnax — GM 4L60-E Transmission (unit overview), reference for the 4L60E hydraulic architecture, PWM vs. non-PWM TCC apply parts, and the Sure Cure reconditioning package. sonnax.com/units/455-4l60-e
- Sonnax — Actuator Feed Limit Valve Kit 77754-09K, on AFL bore wear reducing shift-solenoid feed and line pressure (2nd-gear starts, solenoid/ratio codes, no 4th) and the reamer/guide requirement. sonnax.com/parts/2459-actuator-feed-limit-valve-kit
- Sonnax — TCC Regulator & Isolator Valve Kit 77754-04K, on TCC regulator valve bore wear exhausting converter apply pressure as a primary cause of P1870 slip codes and overheated converters. sonnax.com/parts/2458-tcc-regulator-isolator-valve-kit
- Sonnax — Oversized Pressure Regulator Valve 77917-07, on PR and boost valve bore wear, low line rise, reverse chatter, and 3-4 clutch / 2-4 band failure, plus line-pressure booster kits. sonnax.com/parts/2493-oversized-pressure-regulator-valve
- Sonnax — 1-2 & 2-3 Shift Valve Spring Kit 34994-02K, on shift-valve calibration and the caution that a spring kit does not fix leaking solenoids or AFL/solenoid-signal seal leaks. sonnax.com/parts/2026-1-2-2-3-shift-valve-spring-kit
- Sonnax — Valve Body Inspection and Rebuilding, on teardown, cleaning, filter flow-check, and inspecting valves, bores, and the separator plate. sonnax.com/tech_resources/172-valve-body-inspection-and-rebuilding
- Sonnax — GM 4L60-E, 4L65-E, 4L70-E Vacuum Test Guide, on vacuum testing to identify valve-to-bore clearance, the clean-and-dry requirement, and matching each failing circuit to a repair. sonnax.com/tech_resources/441-gm-4l60-e-vacuum-test-guide
- Transmission Digest — Vacuum Testing GM 4L60-E, walkthrough of using vacuum testing to separate a worn 4L60E valve body from a good one before spending on parts. transmissiondigest.com/vacuum-testing-gm-4l60-e