Everybody calls it “a 4L60E” like it is one transmission. It is not. GM built the thing from the 1993 model year until it was phased out in favor of the 6L80, and over that run the valve body casting, the spacer plate, the solenoid package, the pump, the bellhousing, the converter, the dipstick and the gear train all changed. Some of those changes look invisible on the bench and bite you two weeks later, when the unit comes back with a manual-low fourth gear start or a converter that will not pull up onto the pump.
This is the field guide I wish somebody had handed me the first time I bought a junkyard core: what actually changed, in what year, how to tell which one you have with a tape measure and an ohmmeter, and which parts absolutely will not swap across the generations.
The short version: Four checks settle almost every 4L60E identification question. Count the valve body solenoids (four through '94, five from '95 on). Look at whether the manual valve is vented and whether the 3-2 port is cast shut ('96 and later). Count the bellhousing bolt holes and measure its depth (the '98-later bolt-on housing is about half an inch deeper and has an added hole at the top for the 300mm converter). And read the ID code stamped in the spacer plate — it went to three digits when the valve body casting changed for 2001 [1][2][3].
Why the Year Matters More on This Unit Than Most
Two things make the 4L60E a parts-compatibility minefield. First, it had a very long production life across a huge number of platforms — trucks, vans, S-10s, F-bodies, Corvettes — so GM had both the volume and the reason to keep revising it. Second, a lot of the revisions were made to the hydraulic calibration rather than to the hard parts, which means two units can look identical sitting on a shelf and behave completely differently once fluid is moving.
The clearest example: the valve-body spacer plate for the 4L60E has changed every year since the transmission was introduced in 1993, and the plates do not interchange from year to year [3]. That is not a warning about a couple of odd years. That is every year. Pull a plate off a 1999 unit and bolt it to a 2004 valve body because the bolt pattern lines up, and you have just re-calibrated somebody's transmission by accident.
Check One: Count the Solenoids and Read Their Resistance
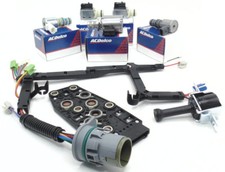
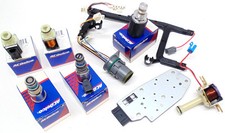
This is the fastest way to bracket the era, and you can do it with the pan off and a meter in your hand. Sonnax's valve body identification guide breaks the run into distinct groups [1]:
| Model years | VB solenoids | 3-2 control solenoid | TCC solenoid | Manual valve |
|---|---|---|---|---|
| '93–'94 | 4 | PWM, metal, white, 10–15 ohms | None in valve body | Non-vented |
| '95 | 5 | PWM, metal, white, 10–15 ohms | PWM, metal, white, 10–15 ohms | Non-vented |
| '96–'00 | 5 | ON/OFF, plastic, white, 20–31 ohms | PWM, plastic, gray, 10–15 ohms | Vented |
| '00–'02 annular lockup | 5 | ON/OFF, plastic, white, 20–31 ohms | PWM, plastic, gray, 10–15 ohms | Vented |
| '03–'08 | 5 | ON/OFF, plastic, white, 20–31 ohms | PWM, plastic, gray, 10–15 ohms | Vented |
A few things fall out of that table that are worth internalizing. The '93–'94 unit has no TCC solenoid in the valve body at all, which is why an early core will never behave like a later one no matter what you do to the valve body. The jump to five solenoids happens in 1995. And the 3-2 control solenoid changes character in 1996: it goes from a pulse-width-modulated, metal-bodied solenoid reading 10–15 ohms to a simple on/off plastic solenoid reading 20–31 ohms [1].
That resistance split is the single most useful measurement on the whole unit. Ohm the 3-2 control solenoid. If it reads in the teens you are looking at a 1995-or-earlier calibration; if it reads in the twenties you are 1996 or later. No casting numbers, no VIN decoding, just a meter on two pins.
Casting tells that go with it
Flip the valve body over. On '93–'95 castings there is an open port over the 3-2 valve and no vent at the manual valve. From '96 on, that 3-2 port is cast shut and there is a vent at the manual valve [1]. Starting with the 2000–'02 annular-lockup castings you also pick up a TCC annular exhaust port on both the top and bottom faces, and that carries forward into the '03–'08 group, which additionally moves to the late-style EPC solenoid [1].
Check Two: The Spacer Plate ID Code
Every 4L60E spacer plate carries a stamped identification code. Through the 1990s these were shorter codes; when the valve body casting changed for the 2001 model year, the ID code stamped into the plate went to three digits [3]. So a three-digit code is an immediate “2001 or later” flag, and the code itself narrows it to a model year.
Practical rule for the bench: photograph the plate on both sides before it leaves the valve body, and write the stamped code on the tag that goes with the core. That code is what tells you whether the plate in a rebuild kit is actually the plate for your unit.
Check Three: Bellhousing, Converter and Shaft Length (the 1998 Split)
This is the one that strands engine swaps. Beginning in the 1998 model year, GM added a new-design bolt-on bellhousing that is about half an inch deeper than the previous design, and the best visual identification is an added bolt hole at the top of the bellhousing [2].
That deeper housing exists to make room for a 300mm torque converter instead of the earlier 298mm unit. In the 1998 model year the new housing was used only in the Camaro and Firebird; every other 1998 application still ran the 298mm converter and the earlier housing. GM broadened the 300mm converter to many more models after that [2].
Moving to the 300mm converter is not just a bellhousing change. Per the same service information, three parts move together [2]:
- Bellhousing — added hole at the top, roughly half an inch deeper.
- Pump cover (stator) — requires a stator shaft about half an inch longer.
- Turbine (input) shaft — longer, with the O-ring relocated behind the splines.
None of those parts interchange with the previous design, and the 300mm converter has to be used in the units built for it while the 298mm converter has to be used in the units built for it [2]. Mixing them is how you end up with a converter that will not seat, a crushed pump, or a converter that never fully engages the pump drive.
Bench check before you order a converter: look for the added bolt hole at the top of the housing and compare stator shaft length against a known unit. Either way, mock the converter onto the pump and confirm it drops all the way in and spins freely by hand before the transmission goes near the engine.
Check Four: Pump and Stator Identification, Without Guessing
Sonnax publishes a three-step check for matching input shaft, pump cover and stator that costs about ninety seconds and saves a no-move comeback [5]:
- Identify the shaft type by sealing ring location — there are several shaft variations. Watch for the anomaly case: a pump cover with no input speed sensor hole drilled, paired with a reluctor-style stator and a shaft that has no reluctor. That combination requires an ISS stator [5].
- Identify early vs late pump style. Lay a straightedge through the center of the pump bolt holes. On earlier pumps the converter feed hole sits just to the right of that line; on later and current GM pumps it sits just to the left [5].
- Identify early vs late stator style. Look at the converter feed and lube holes in the stator. On the early stator they are directly in line with each other; on the late stator the converter feed hole is offset to the right of the lube hole [5].
Get the stator wrong and the failure modes are ugly. A misaligned or incorrect stator can produce a no-movement condition, converter charge concerns, input shaft failure and even converter damage [5]. That is a lot of downside for a part that looks like it fits.
Check Five: Gear Train Stack-Up and the March 2007 Update
The late-production 4L60E family picked up a number of hard-part updates, and the one that catches builders most often is the design change GM made in March 2007: the reaction carrier bearing was upgraded to a thicker design, and the reaction carrier and its shaft were changed to accommodate the new bearing [6].
The trap is that this revision applies across both the four-pinion and five-pinion carrier designs. As long as all three components are matched as a set, nothing goes wrong. Mix an old-design part into a new-design stack and you get incorrect endplay and an output shaft snap ring that will not install properly [6].
Measure before the parts ever go in the case. Set the planetary components and bearings onto the output shaft in their correct order, install the snap ring inside the front planet to retain the stack, stand the assembly on the bench with the sun shell face down, and check bench endplay with a dial indicator or feeler gauge. You want roughly .020″ to.030″ on the bench, which tells you the stack-up is correct. Assembled input shaft endplay spec is .005″ to.035″ [6].
If bench endplay is out of range, the troubleshooting method is mechanical, not mystical: pull the stack apart, reinstall one original component in place of its replacement, and measure again. Repeat one part at a time until the number moves back into range. The part that changes the reading is the offender [6].
The One Nobody Checks: Dipstick, Tube and Stop Bracket
In 1998 the 4L60E series got a deeper oil pan on the C/K/G trucks and vans to raise fluid capacity in the heavier vehicles. That deeper pan came with a longer dipstick, a longer tube and a taller dipstick stop bracket. At the same time, models that kept the standard pan got a revised stop bracket at the same height as the previous design but shorter than the deep-pan version. In the early years of the series the bracket was not used on every vehicle; after 1998, every model except the Corvette used one [4].
There is also a casting change that enforces this. In 1998 GM added a small chamfer to the valve body itself so the new-design stop brackets would fit. Pre-1998 valve bodies do not have that chamfer, so the new brackets will not install on them. The old-design bracket will physically go onto a '98-later standard-pan unit, but you give up the improvement [4].
Why care about a piece of bent steel? Because the dipstick is intentionally made longer than it needs to be so that it bottoms against the stop bracket and gives a true reading. Leave the bracket out on a regular-pan setup and the stick sits deeper into the pan than it should, so a transmission that reads full can be up to half a quart low. Do the same on a deep-pan setup and you can be up to three-quarters of a quart low [4]. On a transmission whose most common failure mode is heat and marginal lubrication, that is a real problem hiding behind a normal-looking dipstick.
The worst combination is a deep dipstick and tube in a regular pan: the level reads inside the normal operating range while the actual volume is well under where it should be [4]. Treat pan, dipstick, tube and bracket as one matched set.
Putting It Together: A Five-Minute Core Inspection
- Pan off. Count the valve body solenoids. Four means '93–'94. Five means '95 or later [1].
- Ohm the 3-2 control solenoid. 10–15 ohms puts you '95 or earlier; 20–31 ohms puts you '96 or later [1].
- Look at the manual valve. Non-vented is early; vented, with the 3-2 port cast shut, is '96 and later [1].
- Read the spacer plate stamp. Three digits means 2001 or later [3].
- Count bellhousing bolt holes and check housing depth. The added hole at the top and the deeper housing mean the 300mm converter family [2].
- Straightedge the pump through the bolt holes to sort early from late before you order a stator or an input shaft [5].
- Check pan depth against the dipstick bracket and make sure the two match each other [4].
Seven checks, no special tools beyond a meter and a straightedge, and you will know what you are actually holding before a dollar of parts gets ordered.
4L60E Master Rebuild Kits — Split by Year
The whole point of the checks above is buying the right kit the first time. The kit below covers 1993–1996 units; if yours ohms and vents as a late one, use the 1997–2003 master kit instead. Both come from our sister store CoreTransmissionParts, and the full 4L60E parts collection is there if you need individual hard parts.
Shop the 1993–1996 Master Rebuild Kit →What Still Carries Across Every Year
Not everything is a trap. The basic architecture — the 2-4 band and servo, the input drum and 3-4 pack, the forward and overrun clutches, the reaction sun shell — is the same family from 1993 through the end of production, which is why the diagnostic logic in the rest of our 4L60E coverage applies regardless of year. What changes is the calibration and the interface parts: plates, solenoids, shafts, housings, converters and brackets. Diagnose the same way; order parts by generation.
Pairs well with this article: our separator plate and check ball layout guide, the endplay check and shim selection walkthrough for the measuring side of the gear train work above, and the RPO and casting identification article for pinning down the application.
Sources
- Sonnax — GM 4L60-E Valve Body Identification Guide. Backs the solenoid counts by year group, the 3-2 control and TCC solenoid types and resistance ranges (10–15 ohms vs 20–31 ohms), vented vs non-vented manual valve, and the casting features for the '93–'94, '95, '96–'00, '00–'02 annular lockup and '03–'08 groups. sonnax.com/tech_resources/614
- Transmission Digest, June 2001 issue. Backs the 1998 bolt-on bellhousing that is about 1/2 inch deeper with an added bolt hole at the top, the 300mm vs 298mm torque converter split (Camaro and Firebird only in 1998), the roughly 1/2-inch-longer stator shaft and the longer turbine shaft with the O-ring behind the splines, and the statement that none of those parts interchange with previous-design parts. transmissiondigest.com/june-2001-issue
- Transmission Digest, April 2011 issue — THM 4L60-E 1993–2009 spacer-plate identification. Backs the claim that the spacer plate has changed every year since 1993 and will not interchange year to year, and that the valve body casting changed for model year 2001, at which point the plate ID code went to three digits. transmissiondigest.com/april-2011-issue
- Sonnax TASC Force, published in Transmission Digest — “How to Avoid a Dipstick Move in 4L60-E Series Transmissions.” Backs the 1998 deep pan on C/K/G trucks and vans, the three dipstick stop bracket designs, the 1998 valve body chamfer that prevents the new brackets from fitting pre-1998 valve bodies, and the underfill amounts of up to.5 quart (regular pan) and up to.75 quart (deep pan). transmissiondigest.com/tasc-force-tips-how-to-avoid-a-dipstick-move-in-4l60-e-series-transmissions
- Sonnax TASC Force — “4L60-E Series input shaft, stator and pump cover compatibility: Three easy checks.” Backs the straightedge-through-the-pump-bolt-holes method, the early vs late converter feed hole positions in pump and stator, the ISS stator anomaly case, and the failure modes caused by a mismatched stator. transmissiondigest.com/4l60-e-series-input-shaft-stator-pump-cover-compatibility
- Sonnax — “Too Close For Comfort: Pinpointing 4L60-E Gear Train Assembly Problems.” Backs the March 2007 reaction carrier bearing update, the four- and five-pinion carrier match-as-a-set requirement, the.005″–.035″ input shaft endplay spec, and the.020″–.030″ bench endplay target. sonnax.com/tech_resources/256