P0751 sets on a 6L90 as Shift Solenoid "A" Performance or Stuck Off, and the wording sends most people straight to the wrong part. It reads like a solenoid code. On this transmission it is almost never a bad solenoid, and on a 6L90 you could not replace one by itself anyway, because the solenoids live inside the TEHCM. What the module is actually complaining about is a hydraulic result it did not get, and the part that failed to deliver it is a spool valve in the lower valve body that most write-ups never mention by name.
Once you understand what shift solenoid 1 is being asked to do in this unit, the code stops being mysterious and the repair gets a lot cheaper.
The short version: Shift solenoid 1 does not shift a gear. It strokes clutch select valve 2, which routes clutch apply oil to the low reverse clutch for 1st-gear engine braking. When that valve will not move on command, the module sees commanded state and actual state disagree and sets P0751. The most documented cause is not the solenoid at all. It is OE clutch select valve spring force that is too high, which Sonnax addresses with spring kit 104740-02K, and on early 6L80-plate units it comes with a mandatory separator plate change. [1]
What Shift Solenoid 1 Actually Does in a 6L90
This is the part worth reading twice, because the hydraulic path explains every symptom on the list.
When you select Drive from Park or Neutral, the 6L80/6L90 commands 1st gear with engine braking, which means the low reverse clutch is applied in addition to the normal 1st-gear apply. Per Sonnax technical specialist Jim Dial, writing in Transmission Digest, the circuit works like this: shift solenoid 1 is commanded ON, which moves clutch select valve 2 to the left, connecting a passage from CBR 1/4-5-6 pressure to the low reverse clutch apply passage. [3]
As road speed builds, the TEHCM decides when to turn engine braking off before the 1-2 upshift. That release has to be clean, because if the low reverse clutch is still applied during the 1-2 upshift you get a severe bind-up. So the module de-energizes shift solenoid 1 and ramps up the CBR 1/4-5-6 solenoid to block pressure to clutch select valve 2, which lets spring force push the valve back to the right and connects the low reverse passage to an exhaust. [3]
Note what that means for diagnosis. Shift solenoid 1 is an on/off solenoid moving a spool valve against a spring. The solenoid supplies the pressure, the spring supplies the return. If the balance between those two is wrong, whether from too much spring, a sticking bore, varnish or debris, the valve does not end up where the module commanded it. The TEHCM carries a pressure switch assembly that reads clutch circuit pressures, so it can see that the resulting pressures are not what the commanded gear state calls for. [6] No wire has to fail. The valve just has to be lazy.
On 2014-and-later units GM added an eighth checkball to that same low reverse exhaust path and reduced the plate orifice to .054 in. to slow the low reverse release and smooth the transition out of engine braking. GM offers that update as service package 24272467, which includes the 2014-later separator plate and eight checkballs and retrofits back to 2010-later units. [3]
The Cause That Actually Sets the Code
Here is the finding that reframes the whole job. Sonnax states plainly that GM 6L45/50/80/90 transmissions have a tendency to set a P0751 code, and that one of the causes is the OE spring force at the clutch select valves inhibiting movement of the valves, affecting proper control of clutch apply fluid. [1] In other words, the factory springs make the valve too hard to stroke. Early production even received updates to reduce that spring force, but GM never released the updated springs separately. They only come inside a new and expensive lower valve body. [1]
Sonnax's answer is spring kit 104740-02K, two springs that reduce the apply pressure needed to move the clutch select valves. The symptom list published with that kit is worth memorizing, because it is the fingerprint of this failure: [1]
- Code P0751
- 1-2-3-4 clutch burned
- 3-5-Reverse clutch burned
- Cruise control disabled
That is the real cost of ignoring this code. It is not just a light on the dash. Mismanaged clutch apply oil burns friction material, and by the time two clutch packs are cooked you are no longer doing a valve body job.
The separator plate rule you cannot skip
The springs are not a universal drop-in. Sonnax is specific: they are compatible with all models except early 6L80 units with OE separator plate 24246916. [1] If you find that plate, it has to be replaced with the early 2nd-design plate, OE 24245720, and only then can you install the spring kit. The combination is what prevents code P0751, shift concerns and burnt or slipping 1-2-3-4 and 3-5-Reverse clutches. [2] Sonnax also notes that when you are running the 2nd-design 24245720 plate, you do not install checkball #8. [2]
Read the orifice to settle it on the bench: a .175 in. orifice means no #8 checkball, and a .054 in. orifice means the #8 checkball is required. [2] Get that backwards and you have built a new complaint into the unit.
Confirm You Have a 6L90 Valve Body Before You Touch It
The 6L90 is the heavy-duty member of this family. It shares its architecture with the 6L80, but roughly 25% of the internal components were upgraded to increase torque capacity, including a case lengthened by 1 3/8 in. to house stronger input and output gearsets and a different output shaft. [4] Plenty of parts interchange between the two, which is exactly the trap.
A 6L80 valve body will bolt right onto a 6L90 case. But the center support feed holes in the upper casting have a different offset between the models, and if you install the wrong one you get forward gears and no reverse, because the case ports are not aligned with the upper casting. [4] That is a full teardown to fix a five-second identification error.
Use the Sonnax casting chart rather than eyeballing it:
| Identifier | 6L80 (RPO MYC) | 6L90 (RPO MYD) |
|---|---|---|
| Machined-down boss on upper valve body | "C" boss | "D" boss |
| Casting number, 2010-earlier | 9404 0955 | 9404 0955 |
| Center support feed holes | Four holes offset to front | Four holes offset to rear |
| Casting number, 2010-later | 9581 0945 | 9581 0945 |
| ISS and OSS bosses | Short | Short |
Sonnax warns that the machined-boss method is a general rule and not foolproof. On some valve bodies none of the bosses are machined at all, so the feed-hole offset is the check that actually decides it. [2] Also note the year split: 2010-earlier units have exhaust ports and take the 24245720 separator plate, while 2010-later units have no exhaust ports. [2]
Diagnosing 6L90 P0751 in Order
1. Fluid level, condition and type
Free, and it decides everything downstream. The 6L90 runs DEXRON VI. GM's current capacity table lists the 6L90 under RPO MYD at 5.7 liters / 6.0 quarts for a fluid change. [5] Low fluid produces aerated oil, and aerated oil is compressible, so a spool valve that has to stroke against a stiff spring will be the first thing to miss. Dark fluid full of clutch material tells you the 1-2-3-4 or 3-5-R packs are already going, which changes the estimate before you quote it.
2. Drive it and note when the code sets
Because shift solenoid 1 controls 1st-gear engine braking, the complaint clusters around initial launch and the 1-2 transition: a flat or hard takeoff, a bind or shudder just before the 1-2 upshift, or a launch that feels like it started in the wrong gear. Watch commanded gear against actual gear ratio calculated from ISS and OSS. Note whether it is cold-only, which points at spring force and varnish, or all-the-time, which points at a scored bore or debris.
3. Confirm cruise control status
Sonnax lists disabled cruise control as part of this failure pattern. [1] If the customer mentions cruise stopped working at the same time the shift complaint started, that is useful corroboration that you are chasing this exact fault and not two unrelated ones.
4. Pull the pan and read it
You are going into the pan regardless. Look for friction material and for bronze or aluminum. Friction material means the clutches are already cooking. Metallic debris means whatever you find in the valve body may only be a symptom of contamination coming from the converter or the pump, and dropping a spring kit into a unit full of debris buys you a comeback.
5. Get the valve body on the bench and inspect the clutch select bores
This is where the job is decided. Remove the control solenoid valve assembly, split the halves, and pull the clutch select valves. You are looking for three things: scoring or scratches on the valve lands and in the bore, varnish that makes the valve drag when you drop it into a clean bore, and the springs. Then check the separator plate part number and the orifice size before you order anything. If the bore itself is scored, springs will not save it. That is a valve body replacement or a sleeved repair.
While the valve body is out, air-check the circuits with low regulated air pressure. Sonnax recommends doing this before installing a replacement valve body specifically so you discover other problems first. [6]
The Fix, by What You Found
| What you found | The repair |
|---|---|
| Clean bores, OE springs, plate 24245720 or later | Install Sonnax clutch select valve spring kit 104740-02K, correct checkball count for the orifice, reassemble |
| Early 6L80 separator plate 24246916 | Replace with OE plate 24245720 and install the spring kit. The springs alone are not compatible with that plate [1] |
| Varnished but unscored valves | Clean the bores and valves, verify free drop, then install the updated springs |
| Scored or scratched clutch select bore | Remanufactured or replacement valve body for the correct unit. Verify the feed-hole offset before it goes on |
| Friction material in the pan, burnt 1-2-3-4 or 3-5-R | Valve body repair plus a clutch pack rebuild. The valve body fix alone will not restore a burned clutch |
| Metallic debris throughout | Stop. Address the converter, pump and cooler before any valve body work |
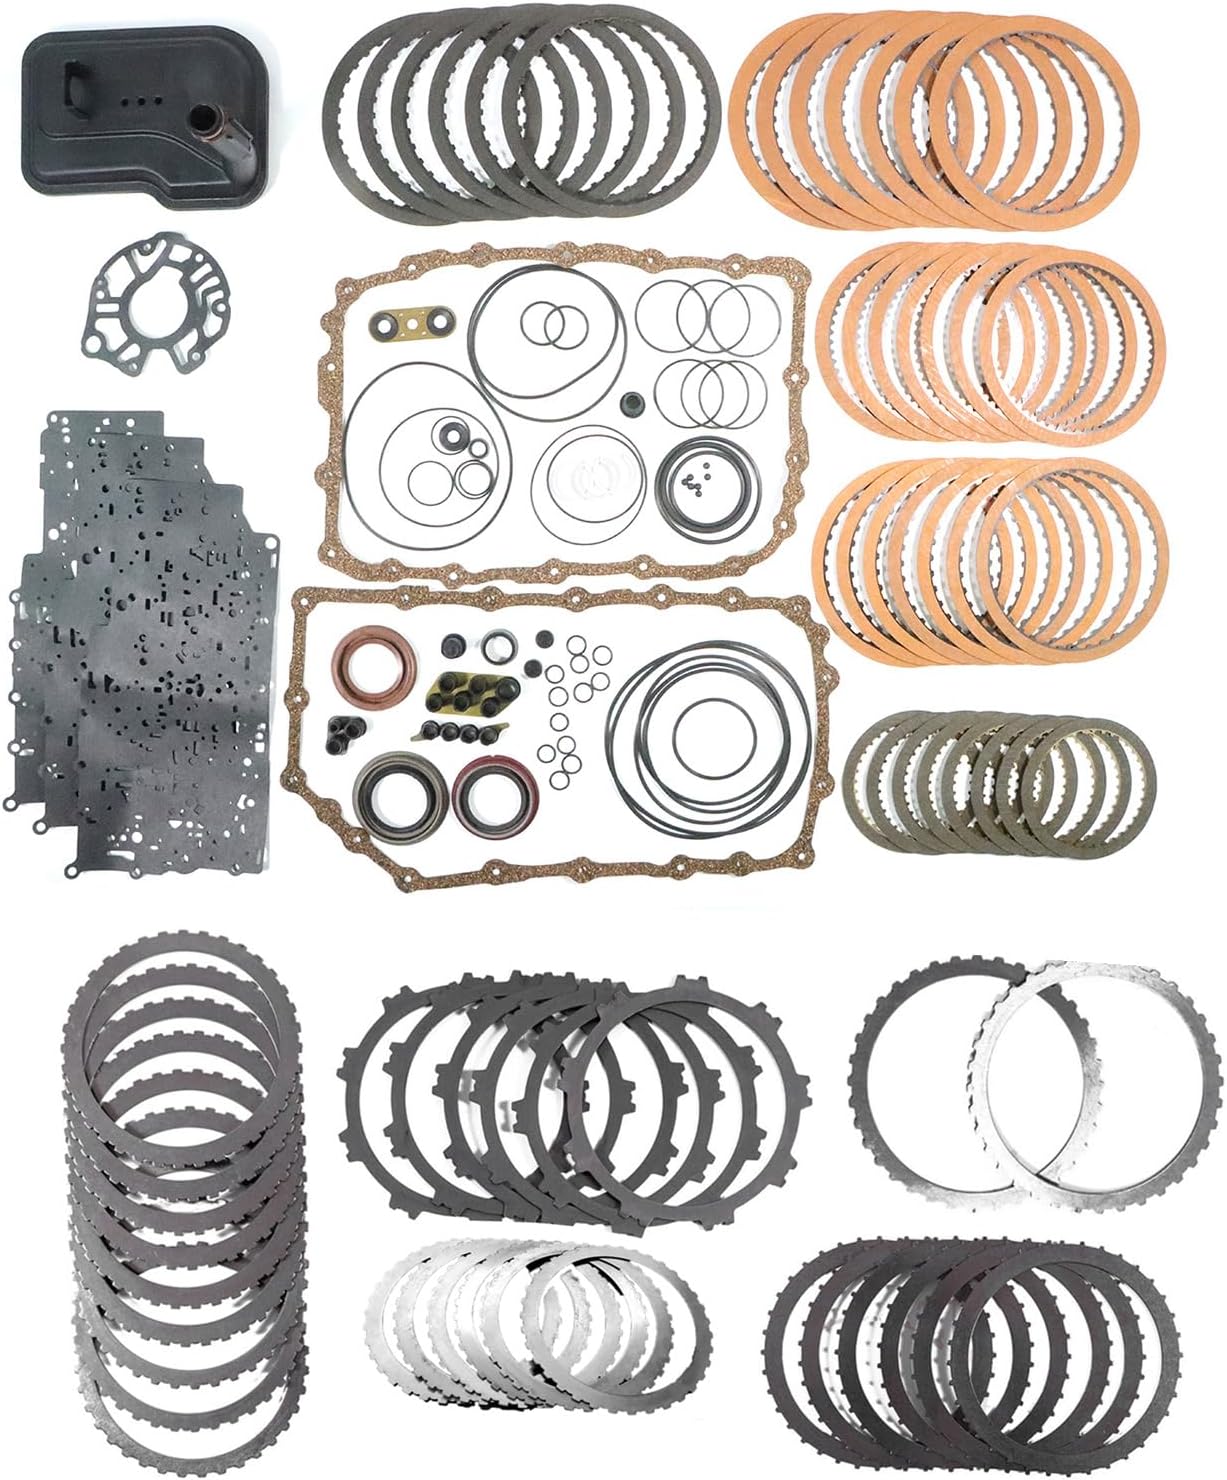
6L90 Friction Clutch Kit
P0751's documented casualties are the 1-2-3-4 and 3-5-Reverse clutches. If the pan came out with friction material in it, the valve body repair is only half the job. This is the friction set for the 6L90 to put it back together right the first time.
Get the 6L90 friction clutch kit →Need filters, gaskets or a full rebuild kit? Browse the whole 6L90 parts collection.
Putting It Back Together: Specs That Matter
Reassembly on this unit is unforgiving in a couple of specific places, and the numbers are published.
- Handle the control solenoid valve assembly carefully. Use an ESD ground strap so static discharge does not damage the TEHCM, and keep it out of dust and debris. [6]
- Order of operations matters. The control solenoid valve assembly must be removed before removing the converter housing and pump assembly, or severe component damage will result. [6]
- TEHCM to valve body: 71 in-lb. Finger-tighten first so there is no gap between the TEHCM and the valve body, then torque. The 10mm-head, 8mm-head and 7mm-head bolts all go to 71 in-lb. [6]
- Input and output speed sensor attaching bolts: 100 in-lb. [6]
- Valve body to case attaching bolts: 100 in-lb. [6]
- Fill with DEXRON VI to factory spec, then run the engine to bring fluid temperature to approximately 185 degrees F before setting the level. [6]
- Perform a fast adapt with a scan tool. Sonnax is explicit that a battery disconnect will not suffice. [6]
- Road test properly: 10 to 15 upshift and downshift cycles at light throttle through all six speeds, then four or five passing-gear maneuvers at highway speed. A small 2-3 flare, a clunk into 4th and a 3-2 downshift clunk are common during adaptive relearn and typically resolve within those 10 to 15 cycles. [6]
Valve body kits, separator plates, friction and steel clutch sets, filters, pan gaskets, DEXRON VI and the bench tools for the 6L90, shipped fast from the USA.
Shop 6L90 parts →Keeping It From Coming Back
- Do the spring kit as preventive work on any 6L90 valve body you have apart. If the unit is on the bench for something else, the clutch select springs cost a few dollars and a few minutes, and they address a known OE spring-force problem. [1]
- Match the plate, orifice and checkball count every time. The .054 in. versus .175 in. orifice decides whether checkball #8 belongs in that pocket. [2] Write it down at teardown.
- Service the fluid on a real interval. DEXRON VI, drop the pan rather than just draining so you get the filter and can read the debris, and set the level hot. [5]
- Fix contamination at the source. Debris that came from a shedding converter or a failing pump will find the clutch select bores again no matter how well you clean them.
- Never skip the relearn. Adapts learned while a clutch select valve was misbehaving are not adapts you want to keep. [6]
FAQ
Does P0751 on a 6L90 mean I need a new TEHCM?
Usually not. P0751 is a performance code, not an electrical one, and the most commonly documented cause is mechanical: the clutch select valves in the lower valve body are not moving the way the module expects. Sonnax attributes this to OE clutch select valve spring force that is too high, which is why a spring kit and the correct separator plate fix a large share of these. Rule out fluid, the valve springs and the valve bores before you spend TEHCM money.
What are the symptoms of a 6L90 P0751 besides the code?
Sonnax lists a burned 1-2-3-4 clutch, a burned 3-5-Reverse clutch and disabled cruise control alongside the P0751 code. Drivers usually describe it as a flat or hard launch, or a shift that feels like it slipped, and the cruise control simply stops working because the module will not allow it with an active transmission performance code. If either clutch is already burned, the valve body repair alone will not finish the job.
Can I put a 6L80 valve body on a 6L90 to fix P0751?
No. A 6L80 valve body will physically bolt to a 6L90 case, but Transmission Digest notes the center support feed holes in the upper casting have a different offset between the two units. Install the wrong one and you get forward gears and no reverse, because the case ports do not line up with the upper casting. On the Sonnax casting chart the 6L90 has its four holes offset to the rear and the 6L80 offset to the front.
What fluid and how much does a 6L90 take after this repair?
DEXRON VI only. GM's own transmission capacity table lists the 6L90 under RPO MYD at 5.7 liters, which is 6.0 quarts, for a fluid change. That is a service fill after a pan drop, not a dry fill after a rebuild. Fill it, run it up to roughly 185 degrees F, then set the final level at the check plug rather than counting quarts.
Do I have to relearn the transmission after a 6L90 valve body repair?
Yes, and a battery disconnect does not count. Sonnax's own valve body install procedure calls for a scan tool, verifying the fluid temperature is correct, and performing a fast adapt. Then road test with 10 to 15 upshift and downshift cycles through all six gears plus four or five passing maneuvers. A small 2-3 flare and a clunk into 4th during that relearn is normal and clears itself.
Sources
- Sonnax — Clutch Select Valve Spring Kit 104740-02K (GM 6L45/6L50/6L80/6L90). Backs the cause of P0751 (OE clutch select valve spring force inhibiting valve movement and affecting control of clutch apply fluid), the symptom list (P0751, burned 1-2-3-4 clutch, burned 3-5-Reverse clutch, disabled cruise control), the fact that GM's updated springs are only available inside a new lower valve body, and the incompatibility with OE separator plate 24246916. sonnax.com/parts/1703-clutch-select-valve-spring-kit
- Sonnax — Zip Kit 6L45-6L90-ZIP Identification Guide (PDF, rev. 07-06-23). Backs the valve body casting identification chart (MYC/6L80 "C" boss, MYD/6L90 "D" boss, casting 9404 0955 for 2010-earlier and 9581 0945 for 2010-later, 6L80 feed holes offset front versus 6L90 offset rear, short ISS/OSS bosses), the 2010-earlier exhaust ports and 24245720 plate requirement, the mandatory 24246916 to 24245720 plate upgrade with the spring kit, and the .054 in. versus .175 in. orifice rule for checkball #8. sonnax.com, 6L45-6L90-ZIP part page (identification and installation guide PDF linked there)
- Transmission Digest — Jim Dial (Sonnax TASC Force), "Location and Function of New #8 Checkball for 6L80/90," December 1, 2016. Backs the hydraulic function of shift solenoid 1 and clutch select valve 2 (SS1 ON strokes clutch select valve 2 left, connecting CBR 1/4-5-6 pressure to the low reverse clutch apply passage; de-energizing SS1 with CBR 1/4-5-6 ramped up returns the valve by spring force and exhausts low reverse), the bind-up risk if low reverse stays applied through the 1-2 upshift, the .054 in. orifice, and GM service package 24272467. transmissiondigest.com — Location and Function of New #8 Checkball for 6L80/90
- Transmission Digest — Tory Royce (Sonnax TASC Force), "GM 6L80, 6L90 No-Reverse Condition Explanation," January 14, 2026. Backs the 6L90 versus 6L80 hardware differences (about 25% of internal components upgraded for torque capacity, case lengthened 1 3/8 in., stronger input and output gearsets, different output shaft) and the warning that an incorrect valve body will bolt up but produce forward with no reverse because the center support holes have a different offset. transmissiondigest.com — GM 6L80, 6L90 No-Reverse Condition Explanation
- GM TechLink — Transmission Capacities & Fluids, 2025 (PDF). Backs the 6L90 fluid specification and fluid change capacity: RPO MYD, 5.7 liters / 6.0 quarts, DEXRON VI. gm-techlink.com — 2025 Transmission Capacities & Fluids (PDF)
- Sonnax — 6L45, 6L50, 6L80, 6L90 Remanufactured Valve Body Tech & Install Tips (PDF). Backs the TEHCM pressure switch film and seal inspection, the ESD handling caution, the requirement to remove the control solenoid valve assembly before the converter housing and pump, the torque specs (TEHCM bolts 71 in-lb, speed sensor bolts 100 in-lb, valve body to case 100 in-lb), the air-check recommendation, the DEXRON VI fill and approximately 185 degrees F warm-up, the scan-tool fast adapt requirement (battery disconnect will not suffice), and the road test procedure. Sonnax 6L45/6L50/6L80/6L90 Remanufactured Valve Body Tech & Install Tips (PDF)