A Turbo 350 that will not move in Drive or Reverse sounds like the worst case, but it is often the easiest TH350 complaint to pin down. When both directions are dead, the problem is almost never a single clutch pack. GM's own clutch application chart shows why: every forward gear uses the forward clutch, and Reverse uses the direct clutch plus the low and reverse clutch. No one clutch is shared by Drive and Reverse. So when neither range moves the truck, you are looking for something upstream of all of them: fluid, line pressure, the pump drive, the input to the gear train, or the linkage that positions the manual valve.
This is the order I work it on the lift, using GM's own TH350 troubleshooting procedure and pressure specs. Sources are at the bottom.

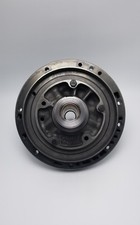

Why "No Drive and No Reverse" Points Upstream
Start with how the TH350 makes pressure. GM's 1971 Turbo Hydra-matic 350 service manual describes it plainly: the gear-type pump is driven by the engine through the converter, and it pulls oil through the strainer. A priming valve expels air from the circuit until pump pressure reaches about 5 psi. The pressure regulator valve in the pump then sets line pressure, and that oil feeds the converter, the modulator, the accumulators, the detent regulator and the manual valve. The manual valve sends it on to the governor, the shift valves, the servo and the clutches.
The manual valve is the traffic cop. In Drive, GM says it sends drive oil to apply the forward clutch, and first gear is achieved. The range chart shows first gear as the forward clutch on with the low and reverse roller clutch locked up. Second and third keep the forward clutch on. In Reverse, the manual valve sends reverse oil to the direct clutch and the low and reverse clutch, and reverse oil also works the reverse boost valve, raising line pressure to a maximum of 250 psi at stall.
Put those two facts together and the diagnostic tree gets short. If there is no pressure, nothing applies. If there is pressure but the manual valve is not where the shifter says it is, the wrong circuit gets fed. If pressure is normal and the valve is in the right place, the clutches are probably holding and the power is not getting in or out of the gear train. A burned forward or direct clutch kills one direction, never both.
Step 1: Rule Out the Driveline First
Before you put a gauge on anything, make sure the transmission is actually the problem. With the rear wheels off the ground and the engine idling in Drive, watch the driveshaft. If the driveshaft turns and the wheels do not, the transmission is doing its job and you have a broken axle shaft, a stripped spider gear, a failed U-joint or a spun yoke. I have seen more than one "dead transmission" turn out to be a sheared axle.
If the driveshaft does not turn, listen. Note whether you hear a grinding or buzzing that rises with rpm in gear. It matters in Step 4.
Step 2: Check the Fluid the Way GM Does
GM's oil level procedure for the TH350 is: engine running, vehicle on a level surface, brakes applied, move the lever through all ranges, then put it in Park and check. At about 70°F the level should be between Add and Full. At normal operating temperature, about 180°F, it should read Full. GM also warns against overfilling, because it causes foaming and loss of oil through the vent pipe.
A TH350 with nothing on the dipstick will not move, and it will often make a whine because the pump is pulling air. Find out where the fluid went before you add any. A blown cooler line, a pan gasket that let go, a split modulator diaphragm (GM notes that oil on the vacuum side of the modulator means the diaphragm leaks and the modulator must be replaced) or a front seal that pushed out will all empty the unit. Refill, recheck the level and try it again. If it now moves, fix the leak and you are done. If it still will not move with a full pan, keep going.
Smell and look at the fluid on the stick. A burnt smell with black friction material means the unit has been slipping for a while, and the no-movement complaint is the end of a long failure, not the start of one. Clean red fluid on a unit that quit suddenly points to a mechanical break or linkage.
Step 3: Check the Linkage at the Transmission
Crawl under and watch the outside manual lever on the transmission while someone moves the shifter. It should click through each detent and line up with the indicator. A shift rod that fell off its pin, a worn bushing in the column linkage, a broken cable bracket on a swap truck, or a lever with a stripped nut on the shaft can leave the manual valve parked in Neutral no matter where the shifter sits.
GM takes linkage seriously. The 1976 Chevrolet light truck overhaul supplement warns that operating the transmission without the controls in full detent reduces oil pressure and causes partial engagement of the affected clutches, and that partial engagement with enough pressure to seem normal can fail the clutches or other parts after only a few miles. The 1971 TH350 manual says the same thing from the other side: an out-of-adjustment linkage can cause an internal leak at the manual valve, leading to clutch or band failure. So if you find the linkage loose, fix it, and then do Step 4 anyway. The unit may have been running half-applied for a while.
If the outside lever moves through the detents but you suspect the inside is not following, the inside detent lever and manual valve link are reached by dropping the pan. A disconnected link between the inside lever and the manual valve gives you exactly this complaint with a perfectly good linkage outside.
Step 4: Put a Gauge on It
This is where the guessing stops. Install a 0-300 psi gauge on the line pressure tap, connect a vacuum gauge to the modulator line and a tachometer to the engine. GM's preliminary checking procedure lists these normal ranges, brakes applied, engine at 1000 rpm unless noted:
| Range / condition | Normal line pressure |
|---|---|
| Drive, brakes applied, 1000 rpm | 60-90 psi |
| L2 or L1, brakes applied, 1000 rpm | 85-110 psi |
| Reverse, brakes applied, 1000 rpm | 85-150 psi |
| Neutral, brakes applied, 1000 rpm | 55-70 psi |
| Drive, engine at idle spec | 60-85 psi |
| Drive, 30 mph, closed throttle (or on a hoist) | 55-70 psi |
GM puts a caution on that chart: total running time for this combination is not to exceed 2 minutes. Brakes on, in gear, at 1000 rpm, the converter is turning all that energy into heat. Take your readings, go to Neutral and let it cool between ranges. Specs vary by year and engine (GM's 1976 truck supplement lists 167 psi Drive and 254 psi Reverse at 1200 rpm, modulator disconnected, for a 350 V8), but on a no-movement complaint you are reading one of three patterns.
Pattern A: Zero or near-zero pressure in every range
The pump is not making pressure, so nothing can apply. In my experience the causes, in rough order:
- The pump is not being driven. The TH350 converter drives the pump through slots in the impeller hub that engage the pump drive gear; Sonnax lists the pump drive style on its TH350 impeller hubs as slots, with a 1.875 in. journal. If the converter was not fully seated when the transmission went in, those slots never engaged the gear, and tightening the bellhousing or converter bolts can break the gear's drive lugs or crack the pump. This is the classic "it was fine until I swapped the engine" no-movement. See the next section.
- The strainer is plugged or sucking air. A strainer packed with friction material, a missing or folded filter gasket, or a pan dented up into the strainer will starve the pump. A new filter is cheap insurance; Raybestos lists the TH350 filter as part 515615 (OE 8640848) for 1969-1986, with a 13-bolt pan and cork or nitrile gasket options.
- The pressure regulator valve is stuck open. Debris can hang the regulator in the exhaust position, dumping pump output. This lives in the pump cover, so it means pulling the pump.
- The pump itself is worn out or scored. A pump that has eaten its gears from running low or from metal in the fluid will not hold pressure. You will usually see bronze bushing material and steel in the pan.
Pattern B: Normal pressure in Drive and Reverse, still no movement
If the gauge shows normal pressure in both ranges, the hydraulics are working and the clutches are being told to apply. Now the problem is mechanical: power is not getting into the gear train or is not getting out. The usual suspects are a stripped turbine hub spline inside the converter, a broken input shaft, or something broken at the output end. The grinding or buzzing noise you noted in Step 1 is a strong hint here: a converter that spins its turbine hub on the input shaft splines often makes a buzz that changes with rpm. A stripped converter is a converter replacement. A broken input shaft or output-side failure means the unit comes out.
One caution from GM's troubleshooting guide: internal leaks that are fed through an orifice, such as porosity or sand holes in the case, will not show up as low pressure on the gauge. A normal reading at the tap does not prove a clutch circuit is sealed. GM's list of causes for burned forward clutch plates includes low line pressure, a damaged or missing check ball in the clutch housing, cracked pistons or damaged seals, pump cover oil seal rings that are missing, broken or undersize, and a case valve body face that is not flat or has porosity between channels.
Pattern C: Low pressure in some ranges, not others
GM's pressure chart sorts this out: low in Drive only points to a leak in the forward clutch feed, low in Reverse only to the direct clutch feed. Our TH350 pressure testing guide covers those patterns in more depth.
Freshly Installed and Will Not Move? Check the Converter
If the truck just had the transmission or engine out, start here before you condemn anything. A TH350 converter has to go onto the input shaft, the stator support and the pump drive. FTI Performance's converter installation sheet tells the installer to listen for three distinct clicks as the converter goes all the way onto the transmission, and gives a seated measurement for the GM TH350 of 1.125 in. from the bellhousing face to the converter pads, plus or minus 0.050 in. FTI's sheet also says do not use the bellhousing bolts to pull the transmission up to the engine; the bell should be flat against the block before any bolt is tightened. After the bolts are tight, the converter should still spin by hand, and the gap between the converter pads and the flexplate should be 1/8 to 3/16 in. before the converter bolts go in.
If the converter was one click short, pulling the bell tight with the bolts drives the converter hub into the pump gear instead of onto it. The lugs may break at once or after a mile. Either way the transmission comes back out to inspect the pump gears, pump bushing and converter hub. Do not reinstall the old converter without checking its hub for damage.
Pull the Pan and Read It
Whatever the gauge said, pull the pan before you commit to a repair. Cleanliness tells you how big the job is:
- Clean pan, normal fluid, linkage or converter install fault found: fix that, refill and road test. A new filter and gasket while it is open costs little.
- Heavy friction material, burnt smell: the clutches have been slipping. Even if one cause fixes the no-movement, the unit needs a rebuild.
- Steel or bronze particles: pump or bushing damage. That debris has been through the valve body and the converter too. Rebuild the unit and replace or professionally clean the converter, and flush the cooler and lines.
GM's service interval for the TH350 in the 1976 truck supplement was to drain the pan and clean the strainer every 30,000 miles, or every 15,000 miles for heavy city traffic in hot weather, commercial use, long idling or towing. Most dead units I see are well past both.
The Short Version for the Bench
- Watch the driveshaft first. If it turns, the transmission is not your problem.
- Watch the outside manual lever click through the detents. A loose linkage can leave the valve in Neutral and burns clutches in the meantime.
- Gauge it. Zero pressure everywhere is pump drive, strainer, regulator or pump. Normal pressure with no movement is converter, input shaft or output side.
- After any install, confirm the converter is seated: three clicks and about 1.125 in. back from the bell face.
TH350 Remanufactured Pump Assembly, 1969-1979 Non-Lockup
If the gauge read zero and you found broken drive lugs or a scored pump, our sister store Core Transmission Parts sells a remanufactured TH350 pump assembly for non-lockup units. Confirm lockup vs. non-lockup and gear width before you order.
View the TH350 pump assembly →TH350 pumps, master repair kits, filters, linkage kits and hard parts, shipped fast from the USA.
Shop TH350 parts →Related guides
- TH350 Pressure Testing
- TH350 No Reverse Fix
- TH350 Slipping: Causes and Fix
- TH350 Delayed Engagement Fix
- TH350 Common Problems and Fixes
FAQ
Why won't my TH350 move in Drive or Reverse?
Because no single clutch is shared by Drive and Reverse, a TH350 that is dead in both is usually missing something upstream: fluid, pump pressure, linkage position, or the input or output of the gear train. Check the driveshaft, the fluid level and the outside manual lever first, then put a pressure gauge on the line tap.
What should TH350 line pressure be?
GM's preliminary check lists 60 to 90 psi in Drive, 85 to 110 psi in L2 or L1, 85 to 150 psi in Reverse and 55 to 70 psi in Neutral, all with the brakes applied at 1000 rpm. Drive at idle should read 60 to 85 psi. GM limits total running time for these checks to 2 minutes.
Can a torque converter cause a TH350 to not move?
Yes. If the converter is not fully seated, its hub can break the pump drive and the pump makes no pressure. A converter with a stripped turbine hub spline will show normal pressure but will not drive the input shaft. FTI's TH350 spec is 1.125 inches from the bellhousing face to the converter pads when seated.
Can low fluid make a TH350 not move at all?
Yes. With too little fluid the pump draws air instead of oil and cannot build line pressure, so no clutch applies. Check the level GM's way, engine running in Park after moving through the ranges, and find the leak before refilling.
Sources
- GM / Chevrolet, 1971 Turbo Hydra-matic 350 service manual: Hydraulic Component Operation. Gear-type pump driven by the engine through the converter, oil drawn through the strainer, priming valve expels air until 5 psi, pressure regulator feeds converter, modulator, accumulators and manual valve. Page 39; manual valve operation in Drive applies the forward clutch for first gear: Page 37
- GM / Chevrolet, 1971 Turbo Hydra-matic 350 service manual: Reverse power flow and troubleshooting. Reverse applies the direct clutch and low and reverse clutch, reverse boost to 250 psi maximum at stall (page 56); clutch application chart and pressure-to-malfunction chart (page 61); preliminary pressure ranges and the 2-minute running limit (page 62); oil level procedure, linkage caution and causes of burned clutch plates (page 58).
- Chevrolet ST-330-76, 1976 Light Truck Service Overhaul Supplement, Section 7A. TH350 line pressure check at 1200 rpm (167 psi Drive, 254 psi Reverse, modulator disconnected, 350 V8), linkage caution about operation outside full detent, and 30,000 / 15,000-mile pan and strainer service intervals. 73-87chevytrucks.com (PDF)
- FTI Performance, Torque Converter Installation Instructions. Three distinct clicks when seating, GM TH350 converter pads 1.125 in. from the bellhousing, plus or minus 0.050 in., do not pull the transmission in with bellhousing bolts, converter must spin by hand, 1/8 to 3/16 in. flexplate gap. sdda.semadata.org (PDF)
- Sonnax, GM Chevy TH350 torque converter parts. TH350 impeller hubs list pump drive style as slots, 1.875 in. journal diameter. sonnax.com
- Raybestos Powertrain, TH350 transmission filter 515615. Fits 1969-1986 TH350, replaces OE 8640848, 13 pan bolts, cork and nitrile gasket options. raybestospowertrain.com