If a Turbo 350 shakes at a steady 45 mph like you just drove onto a rumble strip, the first thing to know is which Turbo 350 you have. The original TH350 from 1969 on has no converter clutch at all. GM added one in the THM 350C, and the "C" stands for converter clutch. You can spot a C unit from under the car by the electrical connector on the side of the case. A plain TH350 cannot have lockup shudder, so if yours has no connector, look at U-joints, motor mounts and engine misfire before you blame the transmission.
On a 350C, lockup shudder is common and usually easy to sort out. GEARS magazine (ATRA) lists GM's THM 200 and THM 350 among the first mainstream transmissions to get a converter clutch, right after the 1978 Chrysler 904 and 727. That makes these some of the oldest lockup systems still on the road, and their converters, solenoids and pump bushings have had forty years to wear out. Here is how the system works, how to prove the shake is really the converter clutch, and how to fix it so it stays fixed.

How the TH350C Locks the Converter
The 350C uses a two-path lockup converter. Transmission Digest's hydraulics series describes the layout: release oil runs through the center of the turbine shaft and comes out between the converter clutch piston and the front cover, holding the piston off the cover. The second path is apply oil, which pushes the piston onto the cover. When the release oil is exhausted, apply pressure takes over and the clutch clamps.
On the 350C, an electric converter clutch solenoid decides when that happens. TCI's installation instructions for its 350C and 250C valve body kit show the solenoid bolted up under the valve body, next to the auxiliary valve body. It is held on by two bolts and carries a plastic retainer and a check ball. When the solenoid is energized it blocks an exhaust, the converter clutch valve shifts, release oil is dumped, and the converter locks.
The electrical side is just as simple. B&M's lockup control instructions for the 200C and 350C show the stock wiring: 12 volts runs through the brake light switch and down to the "A" terminal on the transmission connector. Touch the brake and the switch opens, the solenoid drops out, and the converter unlocks. On stock units, internal switches decide when the solenoid gets a ground, so lockup happens in third gear at a steady cruise speed and not around town. Some later trucks and cars added vacuum or computer inputs to that circuit, so check the wiring diagram for your year before you condemn a switch.
What Lockup Shudder Feels Like
A converter clutch that grabs, slips and grabs again sends a pulse through the driveline every time it catches. On a 350C you usually feel it in third gear between about 40 and 55 mph, at light throttle, right when lockup comes in or when you feed in a little throttle while locked. It feels like driving on a washboard road or over rumble strips. Put your foot in it and the shake goes away, because the converter unlocks under heavy throttle.
Three things mimic it: an engine misfire under light load, a worn driveshaft U-joint or yoke, and a broken motor or transmission mount. The next step is the test that separates those from a converter clutch problem.
Step 1: Prove It Is the Converter Clutch
The brake pedal test
B&M gives the stock lockup check in its preinstallation steps. Run the car in Drive at a steady speed in third, then press the brake pedal just enough to turn on the brake lights. That opens the switch and drops lockup. B&M says you should see a 200 to 500 rpm change in engine speed when the clutch engages and releases. If the shake stops the moment the brake lights come on and comes back when you let off, the converter clutch is your problem. If the shake keeps going with lockup released, it is not the converter clutch.
The unplug test
Unplug the transmission connector and road test it. With no power to the solenoid the converter cannot lock, so a TCC shudder will be gone. Expect a little more rpm at cruise and slightly higher fluid temperature while it is unplugged. That is normal for an open converter.
A vacuum gauge on the engine
Sonnax's lockup troubleshooting guide says to rule the engine out first with a vacuum gauge. A good, steady vacuum reading while the shudder is happening means the shudder is TCC related. A needle that flutters with the shake points at a misfire, a vacuum leak or a valve problem. A 40-year-old small block with a tired ignition can produce a light-load miss that feels exactly like lockup shudder.
Step 2: Fluid Level and the Right ATF
Check the level hot on level ground. A low 350C pulls air at the pickup, line pressure drops, and the converter clutch is the first thing to complain because it is held on by converter charge oil, not by a clutch pack. Then look at what is in it. Sonnax says the first diagnostic check for lockup shudder is to make sure the correct ATF is in the unit and that the converter clutch has the correct friction material for the application.
GEARS puts it more bluntly. In its article on friction dynamics, the author says the root cause of chatter is the friction material, the surface it works on, and the fluid, and that you can build a complaint into a unit just by using an out-of-spec friction or fluid. Use a DEXRON-licensed ATF, not a universal multi-vehicle fluid of unknown friction properties and not a bottle of additive. Our TH350 fluid type and capacity guide covers the fill.
A fresh fluid change will sometimes calm a mild shudder. If it comes back within a few hundred miles, the clutch lining is already damaged, which is covered in Step 5.
Step 3: Pressure and Cooler Flow
This is the test that tells you whether to fix the transmission or replace the converter. Sonnax recommends putting a pressure gauge and a cooler flow meter on the unit at the same time, then driving it until it shudders.
- Cooler flow normal, line pressure lower than normal while it shudders: Sonnax says the shudder is being caused by insufficient clamping force. The converter clutch is not getting enough apply oil to hold, so it slips and catches.
- Line pressure normal, cooler flow low: there is a restriction. Sonnax explains that when oil trapped between the converter clutch piston and the cover cannot get out, the result is the same as weak apply pressure, so the clutch shudders even though the gauge looks fine.
To find a restriction, Sonnax says to loop the cooler lines, running them straight from where they leave the transmission to where they come back in. If flow comes back with the lines looped, the radiator cooler or a line is plugged. That is common on a vehicle that already had one failure, because the debris goes straight into the cooler. Flush or replace the cooler before you put a new converter on it.
Where a TH350C loses line pressure
If the gauge shows low line pressure, fix that before anything else. For reference, GM's 1976 light truck overhaul supplement lists TH350 line pressure behind a 350 V8 at 167 psi in Drive and 254 psi in Reverse at 1200 rpm with the modulator vacuum line disconnected, and 85 psi in Drive at 12 in-Hg absolute manifold pressure with it connected. Check the chart for your exact application.
- Vacuum modulator. The modulator sets line pressure from engine vacuum. A cracked hose or a leaking modulator raises pressure, and a weak modulator lowers it. A modulator with a ruptured diaphragm also pulls ATF into the intake, so check the vacuum line for fluid.
- Reverse boost valve and sleeve. Sonnax states that on the TH350 and TH350C the OE boost valve sleeve wears from the steel valve moving back and forth in the aluminum sleeve, and that the wear gives low line pressure, soft 1-2 and 2-3 shifts and/or a reverse engagement or shudder. Their fix is kit 35754-01K.
- Other pressure leaks. A scored intermediate servo bore or a worn 1-2 accumulator bore also pull line pressure down. Our TH350 pressure testing guide walks through reading the gauge in each range.
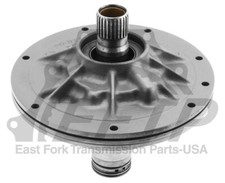
Inside the pump, the converter clutch circuits ride on bushings and sealing rings. GM's 1975 TH350 manual has the pump cover carrying the stator shaft with three bushings, and it calls for checking the converter hub bushing for nicks, scoring or wear on every overhaul. Our TH350 pump failure guide covers that inspection. A worn pump or stator support bushing, or worn turbine shaft sealing, lets release and apply oil cross over. You cannot see that from under the car, but on a pressure test it shows up as a clutch that never gets a clean, firm apply even with good line pressure.
Step 4: The Solenoid and Its Check Ball
The solenoid circuit is a common problem on old units and an easy one to check while the pan is off. Per TCI, the solenoid comes off with two bolts. Do not lose the plastic retainer and check ball that sit on it, and always reinstall it with a new gasket or O-ring. A missing check ball, a cracked retainer or a flattened O-ring lets the signal oil bleed off. The converter clutch valve then strokes partway, the clutch gets a soft apply, and it slips and shudders instead of locking hard.
While you are in there, check the internal wiring. TCI tells installers to sketch the internal harness before removing it, which is good advice: old insulation on these harnesses gets brittle, and a wire chafing on the valve body can ground out and cycle the solenoid on and off at cruise. That feels like a shudder with a beat to it. TCI torques the valve body bolts to 13 ft-lbs. Uneven or overtightened bolts distort the valve body and cause sticking valves.
Step 5: When the Converter Has to Go
This is the part most people skip. GEARS makes the point directly: tuning or fixing the system so the converter clutch stops slipping cures the cause going forward, but it does not repair friction lining and cover surfaces that are already burned. If the shudder survives a fluid change, a good pressure test and a good solenoid, the converter clutch lining is glazed or hot-spotted and the converter has to be rebuilt or replaced. GM's own converter check gives one more hard line: if converter end clearance measures .050 in. or more and the oil looks like it was mixed with aluminum paint, replace the converter. When it goes back in, GM specs the converter-to-flexplate bolts at 30 lb-ft (1975 Buick manual) to 35 lb-ft (1976 truck supplement). B&M says the same thing in its instructions: its lockup control will not cure a defective converter clutch, and if the clutch is defective, replace the torque converter.
Do it in the right order. A new converter on a unit with a worn boost sleeve, a weak modulator or a plugged cooler will be shuddering again in a few thousand miles, because the clamping force or the oil flow it needs is still missing. Fix the pressure and flow first, flush the cooler, then install the converter.
Quick Diagnostic Order
- Confirm it is a 350C. No case connector means no converter clutch.
- Brake pedal test at a steady speed in third. Shake stops with the brake lights on means it is the TCC.
- Vacuum gauge during the shudder to rule out a misfire.
- Check fluid level hot and use a DEXRON-licensed ATF.
- Gauge plus cooler flow during the shudder. Low pressure means clamping force. Low flow means a restriction. Loop the cooler lines to find it.
- Pan off: solenoid check ball, retainer, O-ring and internal harness.
- Still shuddering after all of that: rebuild or replace the converter.
View the lockup pump assembly →
FAQ
Does a TH350 have a lockup torque converter?
Only the THM 350C does. The C stands for converter clutch, and you can identify it by the electrical connector on the case. A standard TH350 has no converter clutch, so a shake on a non-C unit is coming from somewhere else, such as U-joints, mounts or an engine misfire.
How do I know if my 350C shudder is the converter clutch?
Drive at a steady speed in third and press the brake pedal just enough to light the brake lights. That opens the brake switch and releases lockup, and you should see a 200 to 500 rpm change. If the shake stops when lockup releases, it is the converter clutch. A steady engine vacuum reading during the shudder also rules out a misfire.
Can a fluid change fix TH350C lockup shudder?
Sometimes, if the shudder is mild and the wrong or worn-out fluid is the cause. Use a DEXRON-licensed ATF. If the shudder returns soon after the change, the converter clutch lining is already glazed or burned and the converter needs to be rebuilt or replaced.
Can I unplug the TH350C lockup to stop the shudder?
Unplugging the connector stops the converter from locking, so a converter clutch shudder will go away. It is a good diagnostic test and a short-term workaround, but the converter will slip at cruise, which costs some fuel mileage and adds heat. The real fix is finding the low pressure, restriction, or worn lining causing it.
Sources
- Sonnax — Troubleshooting Lockup Issues. Backs the vacuum gauge check to rule out the engine, verifying correct ATF and converter friction material, the pressure plus cooler flow test, insufficient clamping force versus a flow restriction, oil trapped between the piston and cover, and looping the cooler lines. sonnax.com
- Sonnax — TH350/TH350C Boost Valve Kit, Part No. 35754-01K. Backs boost valve sleeve wear in the TH350 and TH350C and the resulting low line pressure, soft shifts and reverse engagement or shudder. sonnax.com
- GEARS Magazine (ATRA) — "Friction Dynamics." Backs the THM 200 and THM 350 being among the first mainstream converter clutch transmissions, friction material, surface and fluid as the root cause of chatter, and fixing the system not repairing a damaged lining. gearsmagazine.com
- Transmission Digest — Hydraulics Fundamentals: Converter Clutch Control Part 1. Backs the two-path converter layout: release oil through the turbine shaft between piston and cover, apply oil on the other side, and apply pressure rising as release oil is exhausted. transmissiondigest.com
- B&M — Converter Lock-Up Control, Part No. 70244, installation instructions (TH700-R4, 200C, 200-4R, 350C). Backs the brake light switch lockup test, the 200-500 rpm change on engagement, the brake switch feeding the "A" terminal, and replacing a defective converter clutch. holley.com (PDF)
- TCI — Part No. 326300 installation instructions for Turbo Hydramatic 350C and 250C. Backs the converter clutch solenoid location, its two bolts, plastic retainer and check ball, the new gasket or O-ring, mapping the internal harness, and the 13 ft-lb valve body bolt torque. summitracing.com (PDF)
- General Motors / Buick — 1975 Chassis Service Manual, Section 7C, Turbo Hydra-Matic 350-375B (PDF). Backs the pump cover and stator shaft bushing layout, the converter hub bushing inspection, the .050 in. converter end clearance and aluminum-paint oil replacement rule, and the 30 lb-ft converter bolt torque. teambuick.com (PDF)
- General Motors / Chevrolet — 1976 Light Truck Service Overhaul Supplement (ST-330-76), Section 7A and Specifications (PDF). Backs the TH350 line pressure values (167 psi Drive, 254 psi Reverse at 1200 rpm with the modulator disconnected; 85 psi Drive at 12 in-Hg) and the 35 lb-ft converter-to-flywheel torque. 73-87chevytrucks.com (PDF)