An Astro that slips usually has a work history you can read off the van. It is a cargo van with steel shelving and a few hundred pounds of stock that does forty stops a day. It is an eight-passenger van that towed a pop-up camper every summer. The 4.3L sits under the doghouse, and everything behind it runs hot and loaded.
The short version: Check the fluid exactly as GM's Astro manual describes it: hot at 180-200°F, after waiting 30 minutes if the van just towed or ran hard in the heat. Then note which gear slips, because on a 4L60E that names the circuit. Delivery-type Astros that slip pulling away from a stop often have a worn forward accumulator piston or forward abuse valve bore in the valve body, both documented by Sonnax. Slip in 3rd and 4th is the 3-4 clutch, and Sonnax traces most of those to low line pressure and 3rd-oil leaks, not worn frictions alone.


Which Astros Have a 4L60E
GM put the 4L60E (RPO M30 on the Service Parts Identification label) behind the 4.3L in the Chevrolet Astro and its twin, the GMC Safari, from 1993 until the vans ended in 2005. Rear-drive and AWD vans use the same transmission; the AWD vans add a transfer case behind it with its own fluid. GM's 2003 Astro owner manual lists 5.0 quarts (4.7 L) for a transmission drain and refill and calls for fluid labeled DEXRON-III. That spec is long superseded, so use a current GM-licensed fluid that is backward-compatible with it.
The gear ratios are 3.06, 1.63, 1.00 and 0.70. With a scan tool that shows input (turbine) speed and output speed, you can divide one by the other and prove whether the van is really holding the gear the computer has commanded.
Step 1: Check the Fluid the Way GM Wrote It for the Astro
A 4L60E that is a quart low slips in turns, on ramps and after a cold start, because the filter pulls air. Here is the procedure from GM's Astro manual:
- Wait first if the van has been worked. GM says to wait at least 30 minutes before checking if the van was driven when it was above 90°F outside, at high speed for a long time, in heavy traffic in hot weather, or while pulling a trailer. Fluid straight off a hard run reads high and gives you a false "full."
- Get it to operating temperature. The target is 180-200°F (82-93°C). Drive about 15 miles (24 km) above 50°F outside. Below 50°F, drive in THIRD (3) until the engine temperature gauge moves and then holds steady for 10 minutes.
- Prepare the van. Level ground, engine running, parking brake on. With your foot on the brake, move the lever through every range, pausing about three seconds in each, then back to PARK. Let it idle three minutes or more.
- Read it. The dipstick has a red handle and sits near the center of the engine compartment, behind the air cleaner. Flip the handle up, pull and wipe it, push it all the way in, wait three seconds, pull it again, and read the lower level on both sides. Hot, it should be in the HOT or cross-hatched area.
GM notes that a low unit "doesn't take much fluid, generally less than one pint (0.5 L)." If yours takes a quart or more, there is a leak to find before you go any further.
Then look at what is on the stick and in the pan. Red, clean fluid with a slip points at pressure, a circuit leak, or the electronics. Brown, burnt-smelling fluid with black friction material on the pan magnet means a clutch or band is already damaged. A fluid change will not bring that back.
Most Astros were on the severe schedule
The same manual says to change the fluid and filter every 15,000 miles (25,000 km) if the van is mainly driven in heavy city traffic where it regularly reaches 90°F or more, in hilly country, while towing frequently, or in taxi, police or delivery service. Otherwise the interval is 50,000 miles (83,000 km). Almost every Astro work van and most family vans that towed belong on the 15,000-mile schedule.
Step 2: Match the Slip to the Gear
Road test it and note exactly where the engine flares. The 4L60E apply chart does most of the work from there:
| What the Astro does | Element | Where to look |
|---|---|---|
| Slow or slipping engagement into Drive, slips pulling away, Reverse fine | Forward clutch | Forward accumulator piston, forward abuse valve bore, forward piston seals, input housing rings |
| Slips in Drive 1st, pulls hard in manual 1 | Forward sprag or low roller clutch | One-way clutches (manual 1 adds the overrun and low/reverse clutches) |
| Flare on 2-3, slips in 3rd and 4th, 1st and 2nd fine | 3-4 clutch | 3-4 pack and backing plate, input housing checkball, 3rd accumulator checkball, pump |
| Flare on 1-2, slips in 2nd and 4th, 3rd fine | 2-4 band and servo | Servo seals and bore, band and drum, 4-3 sequence valve bore |
| Slow or slipping Reverse, Drive fine | Reverse input or low/reverse clutch | Reverse abuse valve bore, reverse input drum, low/reverse piston |
| RPM creeps up at steady cruise in 4th, no shift | Converter clutch | TCC regulator bore (see our Astro common problems guide) |
Do the manual 1 test on every "will not pull away" complaint. In D1, the van drives through the forward clutch, the forward sprag and the low roller clutch. In manual 1, the overrun clutch and the low/reverse clutch apply too and carry the load around both one-way clutches. Slips in D1 and pulls hard in manual 1 means the frictions are fine and a one-way clutch is freewheeling.
Step 3: Forward Slip, the Delivery-Van Failure
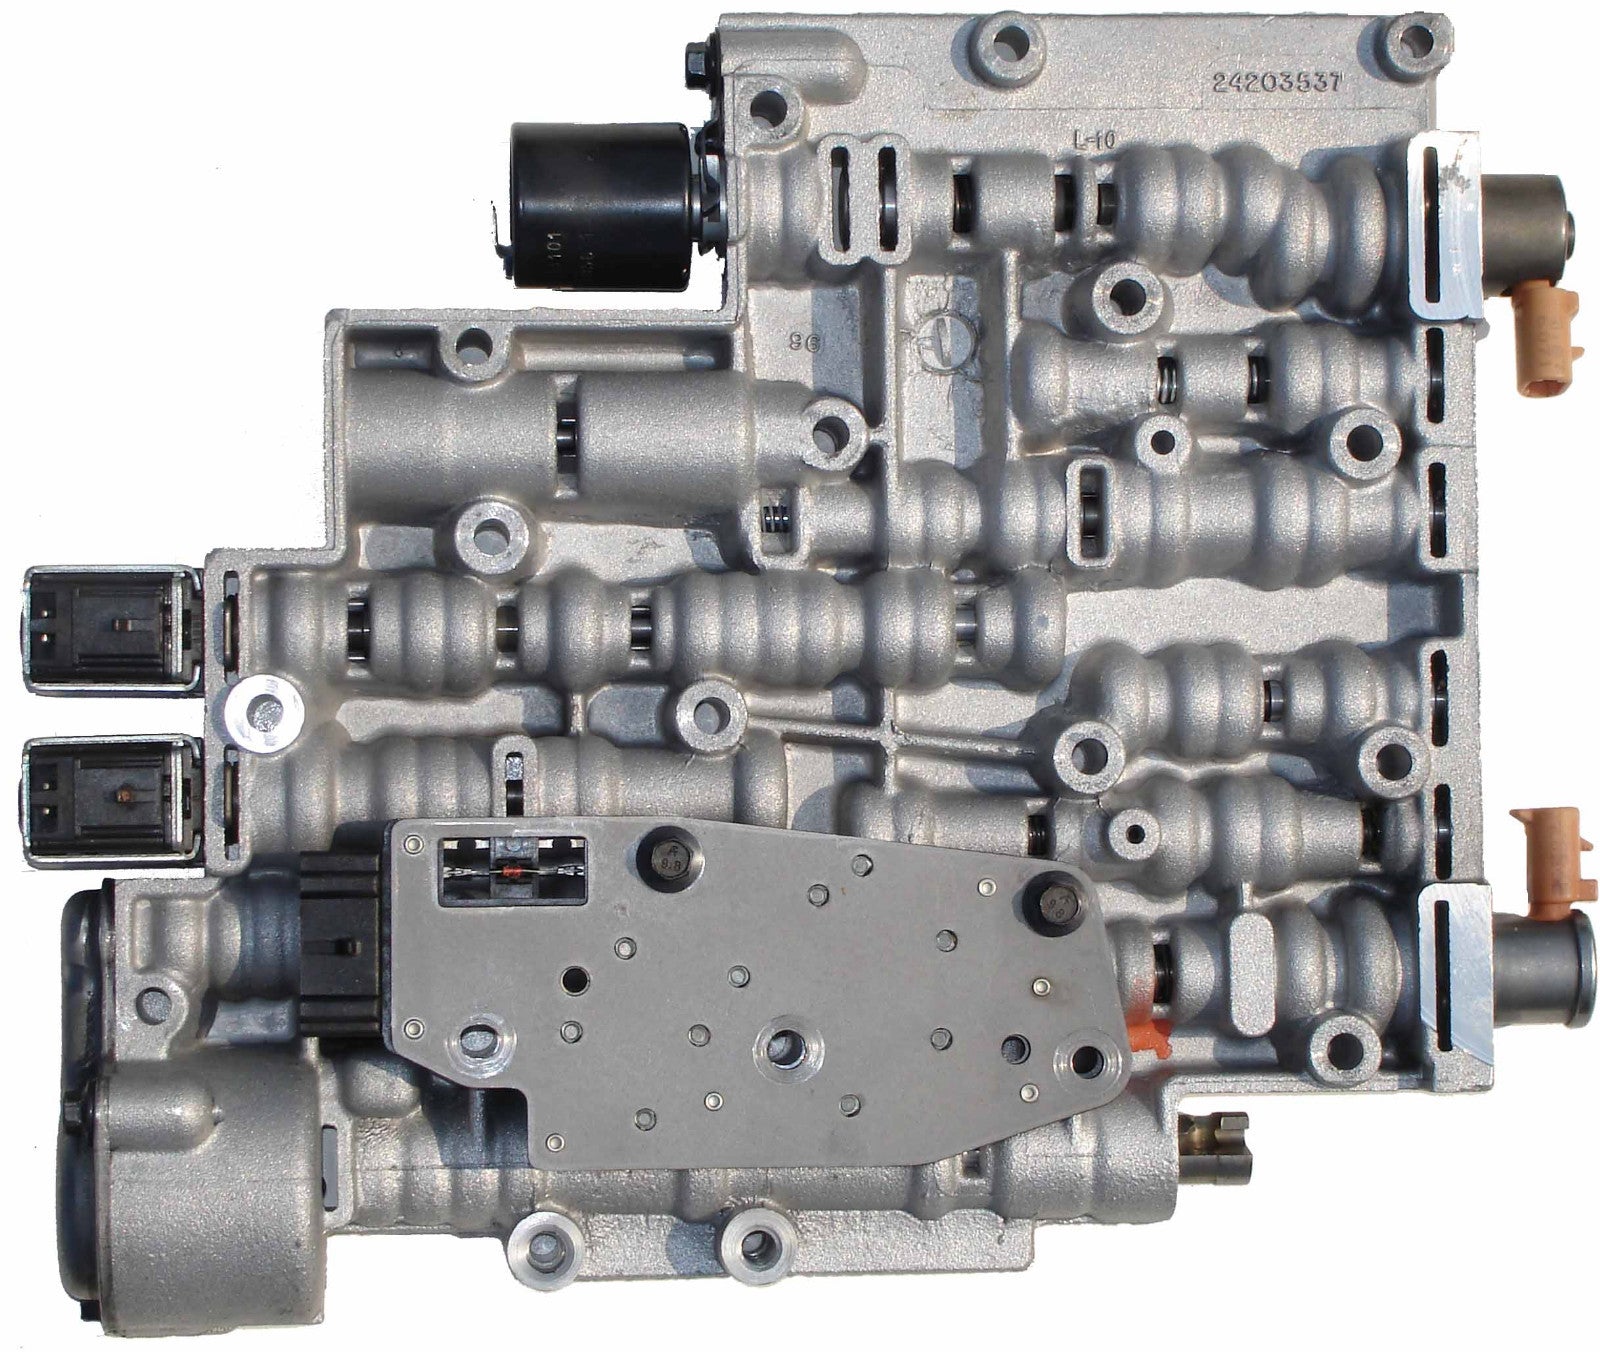
A cargo Astro that spends its life stopping, backing into a driveway and pulling away again cycles the forward and reverse circuits thousands of times a week. Two valve body problems show up from that pattern, and both make the van slip or hesitate pulling away even with good frictions.
Forward accumulator piston
Per Sonnax's documentation on its pinless forward accumulator kit (77987-01K), it is common for the plastic forward accumulator piston to wear or crack in the 4L60E. Repeated stroking also wears the piston pin bore. Fluid leaks through the cracks or the pin bore, and Sonnax lists the results as delayed engagement, slips, and burnt clutches or bands, with the forward clutch slipping first. Replace a plastic piston with an aluminum or pinless one; do not reinstall a cracked or loose-fitting piston.
Forward and reverse abuse valve bores
Sonnax's forward and reverse abuse valve kit (77754-35K) page explains the second one. Continuous oscillation of the forward and reverse abuse valves wears their bores, and clutch feed pressure leaks to exhaust. Lower clutch pressure means slippage and burn-up. Listed symptoms are delayed forward, delayed reverse, forward or low/reverse clutch distress, and low line pressure on engagement. Sonnax notes that its replacement valve raises clutch pressure slightly, which it calls an advantage for heavy-duty use and repetitive forward-reverse maneuvers. That describes a route van. Vacuum-test the bores before deciding; Sonnax's 4L60-E vacuum test guide shows the test locations, and a bore that does not hold vacuum gets a repair valve or a replacement valve body.
If the forward clutch is burnt, check these two before you blame the frictions, then check the forward piston seals and the input housing sealing rings.
Step 4: 3-4 Clutch and 2-4 Band Slips
The 3-4 clutch
A loaded Astro at highway speed puts a lot of torque through the 3-4 pack, so a pressure problem shows up there first. Sonnax's 2018 article on 4L60E 3-4 burnup, by Brian Wing, says low line pressure and leaks of 3rd-gear oil cause most 3-4 slipping. The checks from that article I do on every Astro:
- Input housing checkball: vacuum-test it. Sonnax calls anything below 25 in-Hg an unacceptable leak.
- 3rd accumulator checkball capsule (#7): a leaking capsule is a leading cause of 3-4 failure. Test new capsules too, and do not cup-plug it.
- Pump: worn boost valve bore, pressure regulator wear and a worn stator sleeve all pull line pressure down.
- Forward and 1-2 accumulator circuits: Sonnax ties these into the 3-4 circuit, which is one more reason the forward accumulator from Step 3 matters.
- Backing plate: the OE plate flexes on apply. A heavy-duty plate is cheap insurance on a van that tows.
The 2-4 band and the 4-3 sequence valve
A slip in 2nd and 4th means the band is not holding. Worn servo seals and bores lose apply pressure, and a band that has slipped long enough glazes the drum. Before you install a new band, check the valve body. Sonnax's oversized 4-3 sequence valve kit (77964-14K) page lists burned 2-4 band, low 4th gear pressure, no 4th and poor 2nd as symptoms of a worn 3-4 relay and 4-3 sequence valve bore. That wear leaks 4th servo feed, 3-4 accumulator oil and 2nd clutch oil. A new band in a van with that bore burns again.
Step 5: Rule Out the Computer
If the "slip" is a flare between gears, the fluid is clean, and the pressure gauge is normal, test the electronics before you pull the transmission. Sonnax's Gregg Nader wrote up a 1998 GM truck whose 4L60E flared on the 2-3 shift before and after an overhaul, with no codes. A second valve body and new solenoids did not fix it. An amperage draw test through the TRANS fuse showed the good "A" solenoid dropping to zero almost instantly while the "B" solenoid circuit took about two seconds to shut off. A new computer cured it.
On an Astro that has been through a few owners, also check the harness and connectors at the transmission. Solenoid states are simple to check with a meter: in 1st both shift solenoids are on, in 2nd only B is on, in 3rd both are off, and in 4th only A is on.
Step 6: Scan Data and Pressure
- Ratio math: in 3rd, input speed should equal output speed (1.00). Input running ahead of output in 3rd or 4th is a slipping 3-4 clutch. In 2nd, input should be 1.63 times output.
- Line pressure: put a gauge on the line pressure tap and compare idle and stall readings in each range to the factory spec. Low in every range points to the pump, the pressure regulator, or the pressure control solenoid. Normal pressure with a single-gear slip points to a leak inside that gear's circuit. Our line pressure guide has the procedure.
The Fix, and Keeping It Fixed
If the slip went away once the level was right and the fluid was clean, find the leak and you are done. If a clutch or band is burnt, it needs a rebuild that also fixes the cause:
- Replace the burnt pack or band and anything it damaged. A glazed drum gets replaced.
- Vacuum-test the valve body: forward and reverse abuse bores, 4-3 sequence bore, TCC regulator bore. Replace the forward accumulator piston with an aluminum or pinless one.
- Test the input housing checkball and the 3rd accumulator checkball capsule.
- Upgrade the 3-4 pack and backing plate on a van that hauls or tows.
- Flush the cooler and lines and confirm flow. Debris left in the cooler will find the new parts.
- Fill and check hot at 180-200°F, then put the van on the 15,000-mile fluid and filter schedule.
For the owner, GM's own Astro instructions are worth repeating. The 2003 manual says DRIVE is fine for normal towing but to use THIRD (3) when carrying a heavy load or on steep hills. Vans with the tow/haul button on the end of the column lever should use it when towing; GM says it is most effective when van and trailer together are at least 75% of the GVWR and the maximum trailer rating, and that it switches off every time the van is started.
4L60E Master Rebuild Kit for the 4.3L (1993-2003)
Frictions, seals and gaskets for the 4.3L-era 4L60E behind the Astro and Safari. For later vans or single parts, the full 4L60E lineup is here.
See the 4.3L rebuild kit →FAQ
Why is my Astro van transmission slipping?
Check the fluid first, hot at 180-200 degrees F, and wait 30 minutes if the van just towed or ran hard in the heat, because GM says to wait before checking after that kind of driving. If the level is right, note which gear slips. Slip pulling away in Drive with good Reverse points at the forward clutch circuit, slip in 3rd and 4th is the 3-4 clutch, and slip in 2nd and 4th is the 2-4 band and servo.
How much transmission fluid does a Chevy Astro take?
GM's 2003 Astro owner manual lists 5.0 quarts (4.7 L) for a 4L60E drain and refill, with fluid labeled DEXRON-III. Use a current GM-licensed fluid that is backward-compatible with that spec, and always set the final level with a hot check.
How often should Astro transmission fluid be changed?
GM's Astro manual calls for fluid and filter every 15,000 miles if the van mostly runs in hot city traffic, hilly terrain, frequent towing, or delivery-type service, and every 50,000 miles otherwise. Most work vans and vans that tow belong on the 15,000-mile schedule.
Can a valve body make a 4L60E slip?
Yes. Sonnax documents worn forward and reverse abuse valve bores that leak clutch feed pressure to exhaust, causing delayed engagement and clutch slip, and cracked plastic forward accumulator pistons that make the forward clutch slip. A worn 4-3 sequence valve bore can burn the 2-4 band. Vacuum-test the valve body before replacing clutches.
Keep the numbers at the bench. Our free transmission fluid spec chart lists the correct ATF type for the 4L60E and dozens of other units, so you never top off with the wrong fluid.
Sources
- General Motors — 2003 Chevrolet Astro Owner Manual. Backs: 5.0 qt (4.7 L) drain and refill, DEXRON-III, the 30-minute wait after hard driving, the 15-mile warm-up and 180-200°F hot check, the red-handle dipstick location, the less-than-one-pint note, the 15,000-mile severe service and 50,000-mile normal fluid and filter intervals, DRIVE for normal towing and THIRD for heavy loads and hills, and the tow/haul mode details. GM: 2003 Astro owner manual (PDF)
- Sonnax — Pinless Forward Accumulator Piston Kit 77987-01K. Backs: plastic forward accumulator pistons wearing or cracking, pin bore wear, and the resulting delayed engagement, slips, burnt clutches and forward clutch slip. sonnax.com/parts/2518
- Sonnax — Forward & Reverse Abuse Valve Kit 77754-35K. Backs: abuse valve bore wear exhausting clutch feed pressure, the delayed forward and reverse and low engagement pressure symptoms, and the benefit for repetitive forward-reverse use. sonnax.com/parts/2462
- Sonnax — All Over the Map: Attacking 4L60/E Burnt 3-4 Clutches with Confidence (Brian Wing). Backs: low line pressure and 3rd-oil leaks as the main cause of 3-4 slipping, the 25 in-Hg input housing checkball threshold, the 3rd accumulator checkball capsule, pump checks, accumulator circuit leaks and backing plate flex. sonnax.com/tech_resources/659
- Sonnax — Oversized 4-3 Sequence Valve Kit 77964-14K. Backs: burned 2-4 band, low 4th pressure, no 4th and poor 2nd from 3-4 relay and 4-3 sequence valve bore wear. sonnax.com/parts/4637
- Sonnax — 4L60E Flares on 2-3 Shift? Could Be a Bad Computer (Gregg Nader). Backs: the no-code 2-3 flare, normal line pressure, the amperage draw test showing the slow "B" solenoid circuit, and the computer replacement fix. sonnax.com/tech_resources/106