The 4L60E is behind more GM performance builds than any other automatic — LS-swapped trucks, F-bodies, Corvettes, and a huge slice of the street/strip world run one. It's cheap, plentiful, and easy to work on. It's also a transmission GM designed around a stock power level, and when you start adding boost, cam, or a bigger engine, it breaks in a very predictable order. The good news: the failure points are well documented, and if you address them in the right sequence you can build a 4L60E that lives behind serious power instead of grenading the first time you hook up.
This is a rebuilder's walk through every weak point that actually matters in a high-horsepower 4L60E, why each one fails, and the order to fix them so you're not spending money on parts that were never going to break first.
The short version: A stock 4L60E is happy up to roughly 350–400 lb-ft. Past that, the parts that fail first are the 3-4 clutch pack and its OE input/output housing, the sun shell, the input sprag and gear train, the 2-4 band and servo apply, line pressure (worn PR valve and stock boost valve), and finally the output shaft at the top of the food chain. Build them in that order. Throwing a "shift kit" at a transmission whose clutches and hard parts can't hold the power just makes it break faster.
Why the 4L60E Fails When You Add Power
The 4L60E is a four-speed built down to a cost. It uses a clutch-to-clutch and band arrangement with a mechanical input sprag, and every apply device was sized for a factory torque curve. Add power and you attack it two ways at once: more torque tries to overpower the friction elements (they slip, then burn), and firmer/harder shifts load the hard parts (shells, shafts, sprags) with shock they were never designed to take. Sonnax, whose gear-train work on this unit is the reference most builders lean on, notes that the OE 4L60E gear train runs with tight tolerances and mixed carrier designs across model years, so casually swapping parts can create endplay and retention problems on top of the strength problems. In other words, a high-horsepower build isn't one upgrade — it's a coordinated set of them. [1][2][4]
Weak Point 1: The 3-4 Clutch Pack and Input Housing
This is the single most common failure on a powered-up 4L60E, and it's where most builds should start. The 3-4 clutch carries a heavy load, and Sonnax identifies the OE input and output housing as the root cause of 3-4 clutch burnup in performance applications: the factory backing plate flexes during apply, which lets heat build unevenly in a clutch pack that already has very little room to shed it. [1][2]
The traditional fix — cramming in more, thinner frictions and steels — is a compromise. It raises static holding capacity but reduces the pack's ability to absorb energy during the shift, so durability actually drops in the higher-load applications you're building for. Sonnax's answer is the patented Smart-Tech input housing, which physically holds a larger clutch pack with a stronger backing plate that resists the flex, letting you add steel mass instead of sacrificing it. [1][2]
The practical takeaway: for a real high-horsepower build, plan on high-performance frictions and steels in the 3-4 (and forward) packs, and on a heavy-duty input housing if you're chasing big numbers. A quality friction/steel upgrade is the foundation everything else bolts onto — there's no point firming up shifts if the clutches can't hold the torque.
Weak Point 2: The Sun Shell
The 4L60E sun shell is a classic, almost cliche, failure — and for good reason. The OE shell is thin at the neck where it splines to the sun gear, and under heavy load, big tires, or hard shifts it cracks, shears, or strips those splines. The signature is sudden: loss of forward gears (or only some gears), often with noise, and bright metal in the pan. [3][4]
Sonnax addresses the shell by reinforcing the hub area with a laser-welded collar and machining it true after welding for precise alignment. A hardened, heavy-duty shell with a reinforced neck and improved weld geometry is a near-mandatory upgrade on anything that sees performance duty — it's cheap insurance against a failure that will strand you and leave shrapnel in the transmission. [1][3]
Weak Point 3: The Input Sprag and Gear Train
The input sprag and the planetary gear train are the next tier of hard-part concern. Under sustained high speed or load in the upper gears, the input sprag and forward clutch are vulnerable. Sonnax offers a calibration/valve-body approach that engages the overrun clutch in more gear ranges to take load off the sprag and forward clutch and prevent those failures. [1][4]
The gear sets themselves are the other half of the story. When GM revised the 4L60E into the 4L65E, they moved from four-pinion to five-pinion input and reverse planetary sets. Adding the fifth pinion spreads load more evenly across the sun and ring gears, which reduces flex and stress at high torque and improves durability — which is exactly why five-pinion sets are the standard hard-part upgrade for a serious build. [2][3]
Don't mix carrier designs. Sonnax warns that the 4L60E's carriers came in both four- and five-pinion versions with different dimensions, and mixing designs produces incorrect endplay — to the point the output shaft snap ring won't install correctly. If you upgrade the gear train, verify carrier compatibility and set endplay properly. This is one of the easiest ways to turn a "stronger" build into a warranty comeback. [2]
Weak Point 4: The 2-4 Band and Servo Apply
The 2-4 band holds second and fourth gear, and stock apply pressure isn't enough to keep it from slipping once torque climbs. The common upgrade is a larger-area servo — the "Corvette" servo — which applies more force to the band for firmer, quicker 1-2 and 3-4 shifts and more holding power in 2nd and 4th. It's a popular fix because it can be installed without dropping the transmission. [2]
There's a right way and a wrong way to do it. A bigger servo with no other change can hit hard enough to be abusive to the band, driveline, and differential. The 2nd accumulator spring should be matched to the servo size so apply is firm but controlled — that requires the valve body to come off, which is why it's often skipped and why some cars end up with a servo that "kicks like a mule." If you're inside the unit for a build anyway, do it right and tune the accumulator to the servo. [2]
Weak Point 5: Line Pressure — PR Valve and Boost Valve
Every clutch and band above depends on adequate line pressure, and this is where a lot of high-horsepower 4L60E builds quietly fail. Two things work against you: the pressure regulator (PR) valve bore wears with age and mileage, and the stock boost valve simply doesn't add enough pressure under load. A worn PR valve shows up as low line pressure during boost conditions on a dyno, and as clutch slippage, reverse chatter, and 3-4 clutch failure in the vehicle. [5]
Sonnax's fix is a two-part hydraulic upgrade: an oversized PR valve that restores a worn pump cover to spec and seals off the leakage, plus a line pressure booster kit that pairs a stronger PR spring (about 10% over OE) with a larger-ratio boost valve to raise pressure progressively as load increases. The key word is progressive — you want more pressure when you're on it, not a hammer at idle. Restoring PR valve-to-bore clearance and running a quality, leak-free boost valve is what makes the clutch upgrades actually hold. [5]
| Weak point | Symptom when you add power | Primary fix |
|---|---|---|
| 3-4 clutch / input housing | Burnt 3-4 pack, harsh/flare shift, debris | HP frictions & steels; heavy-duty input housing |
| Sun shell | Sudden loss of gears, bright metal in pan | Reinforced hardened sun shell |
| Input sprag / gear train | Sprag failure, gear flex at high load | 5-pinion sets; overrun-clutch calibration |
| 2-4 band / servo | Band slip in 2nd & 4th | Larger servo + matched accumulator |
| Line pressure | Slippage, reverse chatter, 3-4 burnup | Oversized PR valve + booster kit |
| Output shaft | Twist/break in high-HP racing use | 4L65E shot-peened output shaft |
Weak Point 6: The Output Shaft
At the very top of the power curve, the output shaft becomes the limiter. It's historically the weakest single part in high-horsepower 4L60E racing transmissions. The upgrade path is the 4L65E output shaft, which is shot-peened for fatigue strength and is the piece that goes into Pro-level race builds. For a street or mild street/strip car this is often the last item you need — but if you're building for the strip and running slicks, don't skip it, because a broken output shaft ends the day (and the transmission) instantly. [3]
The Right Build Order
The mistake I see most is buying a shift kit and a servo first, firming everything up, and then wondering why the clutches burn faster than stock. Firmer shifts don't add holding capacity — they add shock load. Build the 4L60E from the load path outward:
- Clutches and steels first. High-performance frictions in the 3-4 and forward packs are the foundation. If they can't hold torque, nothing downstream matters.
- Hard parts that fail suddenly. Reinforced sun shell and, on bigger builds, a heavy-duty input housing and five-pinion gear train — the parts that grenade rather than slip.
- Apply pressure. Oversized PR valve and a line pressure booster kit so the clutches you just installed actually get squeezed under load.
- Shift feel and band control. Larger 2-4 servo with a matched accumulator so shifts are firm but not abusive.
- Output shaft last. Only if the power and traction justify it — the shot-peened 4L65E shaft for hard-launched race duty.
Follow that order and every dollar reinforces the last one. Do it backwards and you'll chase failures around the transmission one part at a time. If you want the diagnostic side of this, our line pressure testing walkthrough covers how to confirm your PR/boost upgrades are actually delivering pressure under load.
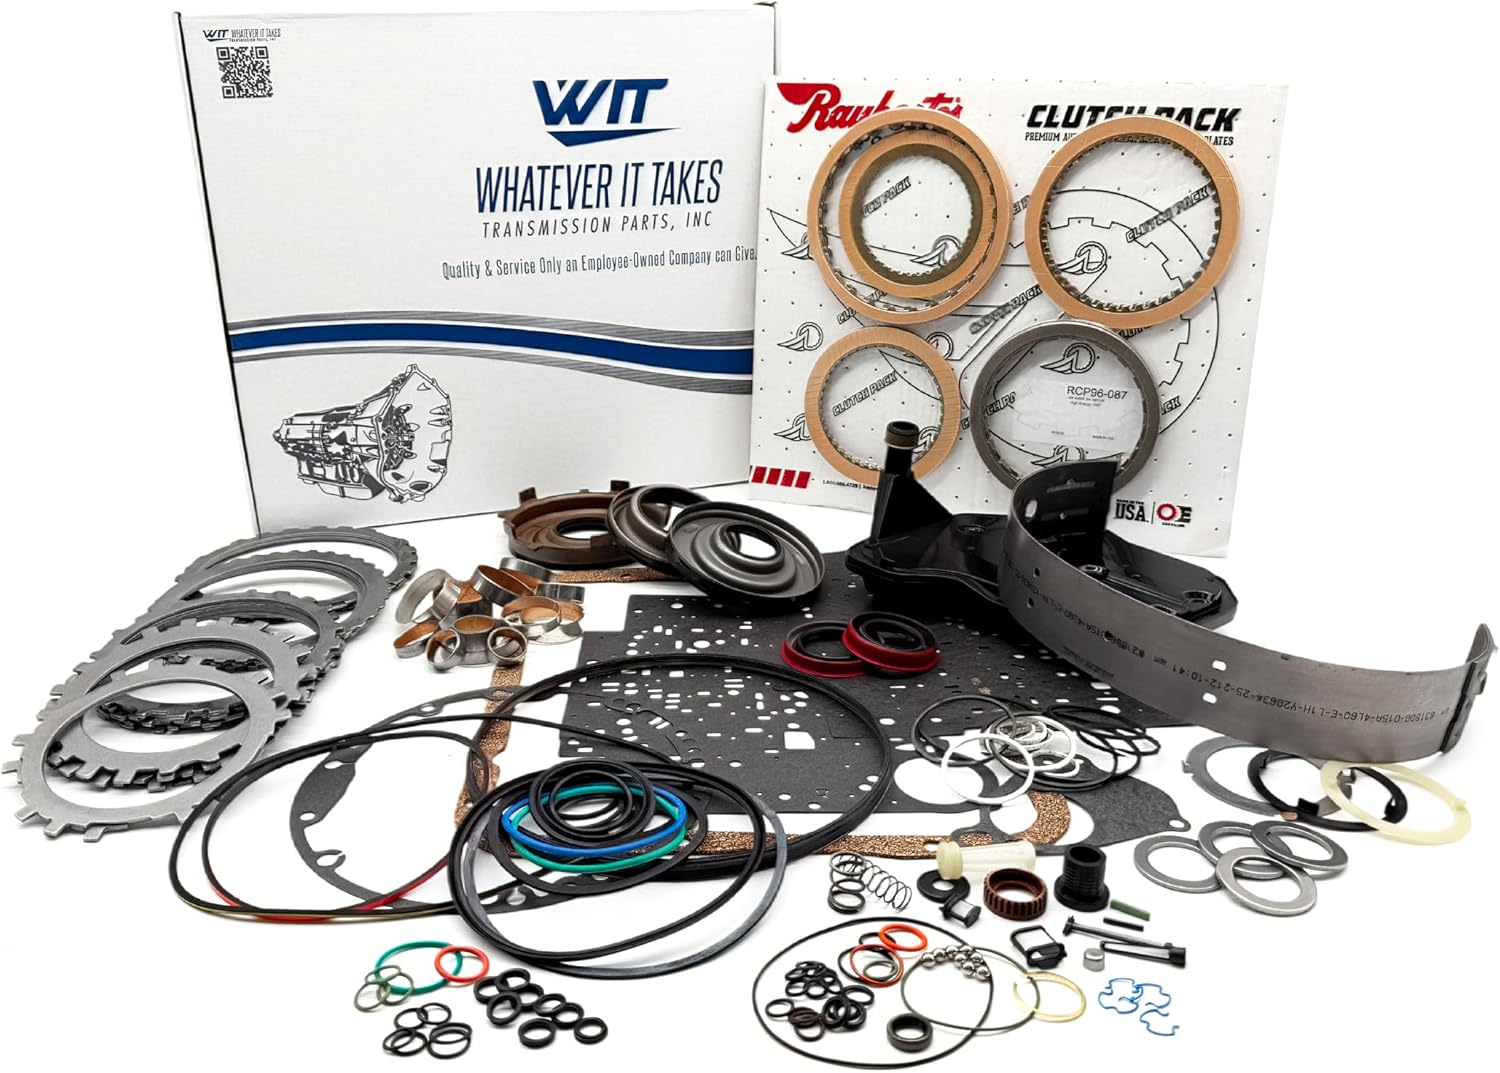
4L60E Stage-1 Friction Clutch Kit (80-25)
A complete high-performance friction set to reline the 4L60E's clutch packs — the foundation of any high-horsepower build, giving the 3-4 and forward packs the holding capacity to survive added torque. Shipped fast from the USA.
View the 4L60E Stage-1 Friction Clutch Kit →Sources
- Sonnax — Building the Killer 4L60E: Top Tips for Optimizing Your Transmission Upgrades, on the OE input/output housing as the root of 3-4 clutch burnup, the Smart-Tech housing, sun shell reinforcement, and overrun-clutch protection of the input sprag. sonnax.com/tech_resources/293
- Sonnax — 4L60E Performance & Heavy-Duty Transmission Build Guides, on clutch capacity strategy, five-pinion gear sets, the 2-4 servo/accumulator, and coordinating upgrades. sonnax.com/tech_resources/617
- Sonnax — Too Close For Comfort: Pinpointing 4L60-E Gear Train Assembly Problems, on the sun shell, gear-train strength, five-pinion carriers, and the output shaft as high-HP limiters. sonnax.com/tech_resources/256
- Sonnax — GM 4L60-E Transmission (unit overview), reference for the 4L60E architecture, apply devices, and mixed carrier designs across model years. sonnax.com/units/455-4l60-e
- Sonnax — Line Pressure Booster Kit (4L60E-LB1), on worn PR valves, low line pressure under boost, clutch slippage and 3-4 failure, and the stronger PR spring plus large-ratio boost valve fix. sonnax.com/parts/2168-line-pressure-booster-kit