Ask around a swap meet and you will hear that the 700R4 and the 4L60E are "basically the same transmission." That is closer to true than most shop rumors, and it is still wrong often enough to cost you a core. The gear train is largely common. The control system is not remotely common. And in between sit about eight year-breaks that decide whether the part in your hand bolts in, bolts in and fails, or does not bolt in at all.
The short version: Same family, same ratios, same basic gear train. The 700R4 (renamed 4L60 in 1989) ran 1982–1993 with a cast iron valve body, a TV cable and a mechanical governor. The 4L60E arrived in 1993 with an aluminum valve body and computer-controlled solenoids, no governor, no TV cable [1][2]. Most internal hard parts cross over, but the real gates are 1985 (27- to 30-spline input), 1987 (input housing and auxiliary valve body), 1991 (3-4 apply ring), and 1993 (electronic control). Shift-feel calibration parts do not carry over.
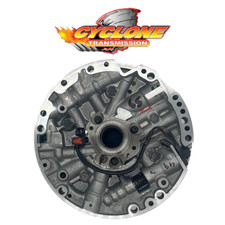
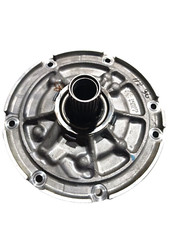
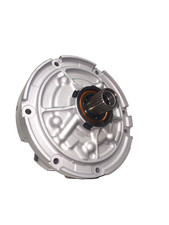
Three Names, One Transmission (Mostly)
GM introduced the four-speed overdrive THM 700-R4 in 1982 behind rear-drive Chevrolet and GMC cars and trucks — Impala, Blazer, Jimmy, Suburban, S-10, plus the performance cars: Corvette, Camaro, Firebird, Syclone and Typhoon. In 1989 GM changed the official name to 4L60: four speeds, longitudinal, 6,000-lb class. Nothing about the unit changed at the rename. Sonnax states it plainly — the 700-R4 is the exact same transmission as the 4L60, and the naming change came roughly eight years after introduction [1][2]. Production of the hydraulic unit ran 1982 through 1993 [1].
The 4L60E picked up where it left off in 1993 and stayed in production, through the 4L65E and 4L70E variants, into the 2010s. Sonnax describes the 4L60E as sharing most of the 700-R4's internal components, which is exactly why so many Sonnax parts developed for the 4L60E also drop into a 700-R4 [2].
The One Difference That Matters: Control
Sonnax puts it in a single sentence: the valve body is the biggest difference between the two. The 700-R4 uses a cast iron valve body controlled by throttle cable and mechanical governor to determine shift points. The 4L60E uses an aluminum valve body with computer-controlled solenoids actuating the shifts [2].
Everything downstream follows. The 700-R4 has a TV cable to the carburetor or throttle body, a governor and governor cover on the case, and a small case connector for converter lockup only. The 4L60E deletes the governor, the governor cover and the TV cable, and carries a large multi-pin harness connector on the driver's side by the servo cover.
On the bench, the fastest way to place a 4L60E in its generation is to pull the pan and count solenoids. Sonnax's valve body identification guide breaks it cleanly [3]:
| Years | Solenoids | 3-2 control solenoid | TCC solenoid | Manual valve |
|---|---|---|---|---|
| 1993–1994 | 4 | PWM, metal, white, 10–15 ohms | None | Non-vented |
| 1995 | 5 | PWM, metal, white, 10–15 ohms | PWM, metal, white, 10–15 ohms | Non-vented |
| 1996–2000 | 5 | On/off, plastic, white, 20–31 ohms | PWM, plastic, gray, 10–15 ohms | Vented |
| 2000–2002 (annular lockup) | 5 | On/off, plastic, white, 20–31 ohms | PWM, plastic, gray, 10–15 ohms | Vented |
| 2003–2008 | 5 | On/off, plastic, white, 20–31 ohms | PWM, plastic, gray, 10–15 ohms | Vented |
A digital meter across the solenoid terminals settles the 3-2 control solenoid question in four seconds: 10–15 ohms is the early PWM unit, 20–31 ohms is the later on/off unit [3]. None of that applies to a 700-R4, whose shift timing lives in spring rates, a governor weight assembly and a throttle valve.
What Genuinely Interchanges
The common ground is the gear train and the apply devices. Ratios are identical across both units: 3.06 first, 1.63 second, 1.00 third, 0.70 overdrive [4]. The reaction sun shell, planetaries, sun gear, input sprag, 2-4 band, servo assembly, low/reverse clutch and the general case architecture all descend from the same design.
That shows up directly in supplier fitment. Sonnax's SmartShell heavy duty reaction shell kit is listed as a universal kit fitting all years and all input carrier styles across the family [1], and aftermarket 2-4 bands, thrust bearing kits and case bushing kits are routinely catalogued as "1982-up" for the same reason. The reaction shell is the clearest example: it fails the same way in a 1984 700R4 as in a 2005 4L60E, and one part number covers both.
700R4 / 4L60E / 4L65E Heavy Duty Reaction Sun Shell, 1982–2013
This is the part that proves the point — one hardened shell covers the entire family, hydraulic units and electronic units alike. The stock shell splits at the sun gear splines and takes second and fourth gear with it; if you already have the case open, it goes in. There is also a Monster-design shell if you want the heavier section, and the full 4L60E and 700R4 parts collection if you are gathering a whole build.
Shop the 1982–2013 HD Reaction Sun Shell →The Year Breaks That Actually Govern Parts
These are the ones I check before ordering anything, and they cut across the 700R4/4L60E line rather than following it.
1985: input shaft spline count
1982–1984 units use a 27-spline input shaft. 1985 and later use a 30-spline shaft with the 298mm converter. Sonnax is specific about the consequence: to put a 1985-later input housing into an early unit, the converter and stator shaft also have to be updated to the 1985-later design [1][2]. It is a three-part change, not a shaft swap. Early converters in this family also appear in 245mm as well as 298mm on the lighter applications [1].
1987: input housing and auxiliary valve body
Sonnax's heavy duty 3-4 clutch backing plate kit requires a 1987-later housing, snap ring and ring gear [1]. On the hydraulic side, the accumulator valve train kits are listed as fitting 1987-later auxiliary valve body styles only in a 4L60 [1][4]. So 1982–1986 cores are the ones that fall outside a lot of the aftermarket catalogue. If a customer hands you an early 700R4 and wants modern upgrade parts in it, price the housing swap into the job up front.
1991: the 3-4 apply ring dimension
This one is measurable and worth measuring. The 3-4 apply ring required for that heavy duty backing plate kit is the 1991-later ring stamped with the number "7", measuring 3.671–3.682 in. in height [1]. Mic it. A ring outside that window in a stack you have just added plate area to is a burned 3-4 clutch waiting on a date.
1982–1990: aluminum boost sleeve units
Pressure regulator boost valve sleeve kits carry a fitment note that catches people: some are not compatible with early 1982–1990 aluminum sleeve units, while others are listed as fitting both aluminum-sleeved and non-sleeved pumps [1]. Look at the sleeve material before ordering a boost valve kit for an early core.
Shift Feel Calibration Does Not Cross Over
This is the interchange mistake that produces a transmission that works and drives badly. The accumulator valve is stamped with a letter code, and those codes are calibrated to the control system feeding them.
Sonnax charts the accumulator pressure curves against throttle/EPC pressure and splits them by era. In 700-R4 and very early 4L60E applications, codes K, N and A sit low on the curve (lighter apply, softer shift) and B, M and L sit high (firmer). The later 4L60E units use their own codes — C, YZ, CX and DX. Compare the firmest 700-R4 codes against the 4L60E codes and at light throttle the firmness is roughly equal; at heavier throttle, the 4L60E designs are noticeably firmer [4].
Practical translation: dropping a 4L60E accumulator valve and sleeve into a 700-R4 will not simply "firm it up" in a predictable way, because the pressure signal driving it is a throttle valve rather than an EPC solenoid. Match the code to the unit, and change the spring if you want a firmer shift — a stronger-than-OE accumulator valve spring pushes the whole curve up [4].
Servo sizing is the same story from the other side. Transmission Digest counts four OE servo piston sizes in this family. The 093 is primarily the Corvette and high-performance Camaro piston; most everything else should have the 553 or 159; the 554 is intended for the four-cylinder and 2.8L V6 only. Wrong apply area gives you a soft shift, a slide-bang, or a harsh 1-2 [5]. The published apply areas are worth knowing: the 4th gear servo piston is 6.108 sq in and the Corvette piston is 6.356 sq in [5].
Pumps and Stator Shafts: The.050-Inch Trap
Here is a failure I have watched people build into a fresh unit while mixing cores from both eras. You have a good pump cover with a chewed stator shaft, and a good stator shaft in a junk pump cover. Obvious move — and a bad one. Sonnax explains exactly why.
The stator shaft alignment pin hole is drilled in assembly at the factory — the shaft and cover are bolted together first, then the hole is drilled and the pin staked in. Because of that, the pin center varies from one unit to the next by as much as.050 in. Press a mismatched pair together and the stator shaves the pin, traps burrs between the flange and the cover, tilts as it goes in, and gouges the aluminum pump cover bore. The result is cross leaks and lost line pressure — and the assembler feels none of it, because the bolt holes still line up perfectly [6].
Do it the way GM does. Assemble the parts with three threaded alignment studs guiding the stator in, with the leading chamfer deburred and the cover warmed. Bolt it down, then inspect the pin hole. Minor misalignment takes a 7/16 in. drill and 7/16 in. pin; severe misalignment needs 1/2 in. Cut oversized pins to 3/4 in. length from drill blanks or steel rod, coat the pin and hole with Loctite 609 sleeve retainer, tap in and stake [6]. Most aftermarket stator shafts sidestep the whole problem with elongated bolt and pin holes.
Set Endplay Every Time You Mix Hard Parts
Because so much of the gear train interchanges, people swap a shell or a planetary from a donor and never re-check endplay. Randall Schroeder, writing in Transmission Digest, notes that the drive shell is the number-one changed component in this family — which makes it the number-one reason a rebuild comes back [7].
The 4L60/E is a total endplay unit: one measurement, front to back, taken as a whole assembly. Do not go hunting for separate front and rear play the way you would on a TH400 [7].
- Gear set play first. Assemble the gear set, hubs and inner one-way clutch race up to the retaining snap ring and look for no more than.030 in. of movement between the output shaft and rear hub. There is no factory spec here;.030 in. is the working limit [7].
- Then total endplay. Stack the case dry — rear hub, rear planetary, sun gear, drive shell, front hub and washer or bearing, front planetary, input sprag, input drum with the selective shim, pump cover — and read it with a dial indicator. Target .005 to.036 in.; Schroeder prefers .020 to.025 in. [7]
- Account for the gasket. With a new pump cover gasket, subtract.005 in. from the measurement. With no gasket, add.005 in. [7]
- If the selective shim you need is unavailable, add shim stock under the factory shim in the input drum (about.015 in. increments) or under the rear-hub-to-case bearing at the bottom of the case (about.010 in. increments) [7].
Our 4L60E endplay and shim selection walkthrough covers the measurement itself in more depth.
Swapping One for the Other in a Vehicle
Swapping the unit is a different problem from swapping parts, and the control system is the whole cost.
Putting a 700R4 behind a carbureted or otherwise non-computer engine is the easy direction, and it is the reason the hydraulic unit still gets built. Sonnax notes it is compact, familiar, and usually simple to install without a computer, and with the right internals it is credible up to roughly 750 HP [2]. But it lives or dies on the TV cable, which is not a kickdown cable. It sets line pressure. Get it wrong and you cook the unit.
The ATRA/Gears Magazine procedure is the one I follow. Set the coarse adjustment with the engine off: disconnect the cable, have someone floor the pedal and verify the throttle actually opens all the way, hold the release button and push the inner jacket fully back toward the bracket, reconnect, press the release button with the pedal floored, then release. Test drive and fine-tune to roughly a 1-2 shift at 15 MPH and a 2-3 at 28 MPH at light throttle — pull the cable forward a few clicks for late shifts, back for early. Then the check most people skip: at full throttle after the 1-2 upshift, the transmission must execute a 2-1 downshift. No downshift means the cable goes back one click at a time until it does [8].
Going the other way — a 4L60E into an older carbureted car — means the transmission has no idea what the engine is doing unless you give it a brain. That is a standalone controller or a compatible PCM, plus a vehicle speed signal and a throttle position signal. Nothing about the case or the bellhousing stops you; the wiring does. Our 4L60E standalone wiring guide covers what that harness has to carry.
One more thing worth saying out loud: the electronic unit is the better platform if you plan to tune. Sonnax's guidance is that a 4L60E series unit supports easier and more predictable adjustment than the 700-R4's mechanical controls, which are challenging to fine-tune given the variety of OE core calibrations out there [2]. If you have a choice and a laptop, take the E.
Reaction sun shells, 2-4 bands, servo kits, input housings, pumps, stator support shafts, solenoid kits and full rebuild kits for 700R4, 4L60, 4L60E and 4L65E — shipped fast from the USA.
Shop 4L60E / 700R4 parts →Related reading: how to identify a 4L60E by RPO and casting, 4L60E vs 4L80E, and 4L60E fluid type and capacity.
Sources
- Sonnax — GM 4L60 Transmission unit reference. Backs the 1982–1993 production run, the hydraulically-controlled description, the 1989 name change from THM 700-R4, the vehicle applications, the universal all-years SmartShell fitment, the 27-spline (1982–84) vs. 30-spline/298mm (1985-later) input shaft note and its converter/stator requirement, the 1987-later housing/snap ring/ring gear requirement, the 1991-later 3-4 apply ring stamped "7" at 3.671–3.682 in., the 1987-later auxiliary valve body limitation on accumulator valve trains, the 1982–1990 aluminum boost sleeve incompatibility, and the 245mm/298mm converter sizes. sonnax.com/units/452-4l60
- Sonnax — 700-R4 (4L60) Performance Transmission Build Guide (Gregg Nader, Sonnax TASC Force). Backs the 1982 introduction, the statement that the 700-R4 and 4L60 are the same transmission, the cast iron valve body with throttle cable and mechanical governor vs. the 4L60-E aluminum valve body with computer-controlled solenoids, the shared internals with 1993-later 4L60-E units, the roughly 750 HP capability figure, the 27- vs. 30-spline converter and stator update requirement, and the note that electronic units support easier and more predictable tuning than the mechanical 700-R4. sonnax.com/tech_resources/943
- Sonnax — GM 4L60-E Valve Body Identification Guide. Backs the solenoid counts by year, the 10–15 ohm PWM and 20–31 ohm on/off solenoid resistance ranges, the absent TCC solenoid on 1993–94 units, and the vented vs. non-vented manual valve split. sonnax.com/tech_resources/614
- Sonnax — GM 4L60 (700-R4), 4L60-E Accumulator Valve Codes: Deciphering the Alphabet Soup of Shift Feel (Maura Stafford, Sonnax TASC Force). Backs the K/N/A soft and B/M/L firm 700-R4 accumulator codes, the C/YZ/CX/DX later 4L60-E codes, the finding that 4L60-E designs are noticeably firmer at heavy throttle, the accumulator valve and spring relationship to shift feel, and the 1987-later auxiliary valve body fitment note. sonnax.com/tech_resources/1061
- Transmission Digest — 4L60E Harsh 1-2 Shift. Backs the four OE servo piston sizes, the 093 Corvette and high-performance application, the 553 and 159 as the mainstream pistons, the 554 as four-cylinder and 2.8L V6 only, and the 6.108 sq in. 4th gear vs. 6.356 sq in. Corvette servo apply areas. transmissiondigest.com/4l60e-harsh-1-2-shift
- Sonnax — 4L60, 4L60-E Stator Tube Swap: Close Only Counts in Horseshoes. Backs the factory drill-in-assembly alignment pin process, the up-to-.050 in. pin center variation between units, the shaved-pin, burr, tilt and gouged-bore failure chain and resulting cross leaks, the three-threaded-stud assembly method, the 7/16 in. and 1/2 in. oversized pin sizes, the 3/4 in. pin length, the Loctite 609 sleeve retainer, and the elongated-hole aftermarket shafts. sonnax.com/tech_resources/1418
- Transmission Digest — All Work and No Play: Setting Endplay to Prevent 4L60/E Gear Train Failure (Randall Schroeder, Sonnax TASC Force). Backs the total-endplay (not front/rear) nature of the 4L60/E, the drive shell as the number-one changed component, the.030 in. gear set play limit, the.005–.036 in. total endplay range and.020–.025 in. preferred window, the plus/minus.005 in. pump cover gasket correction, and the.015 in. and.010 in. shim stock increments. transmissiondigest.com — Setting Endplay
- ATRA / Gears Magazine — A Look Back: Adjusting the THM700-R4 Throttle Valve Cable (Paul Townsend). Backs the coarse TV cable setting procedure, the full-throttle verification step, the approximately 15 MPH 1-2 and 28 MPH 2-3 target shift points, the click-at-a-time fine adjustment direction, and the mandatory full-throttle 2-1 downshift check. gearsmagazine.com — Adjusting the THM700-R4 TV Cable