A Ford AOD rebuild is one of the cheaper overhauls in the business on paper. The unit has no computer, no solenoids and no adapts to relearn, and a master kit with clutches and a band costs about what a single valve body does on some newer transmissions. Where the bill grows is everything the kit does not cover: a snapped input or intermediate shaft, a worn direct drum, a scored overdrive servo bore, a pump bushing that let the converter hub walk, a converter full of debris, and a TV cable that nobody set correctly the first time. The AOD went into Mustangs, Crown Victorias, Grand Marquis, Town Cars, Thunderbirds and F-Series trucks from 1980 to 1993, and most of the ones coming in now have 30-plus years of heat and at least one previous "rebuild" in them.
This guide breaks down what an AOD rebuild costs DIY and at a shop, what actually drives the number up, which parts get replaced every time, which hard parts you should budget for, and the installation steps that decide whether the money lasts. The technical details come from Sonnax's AOD unit and valve body references, B&M's AOD installation instructions (B&M 114501 instructions PDF), George Reid's AOD rebuild guide from CarTech and the FTC's auto repair guidance (FTC Auto Repair Basics, archived). The full list is under Sources.
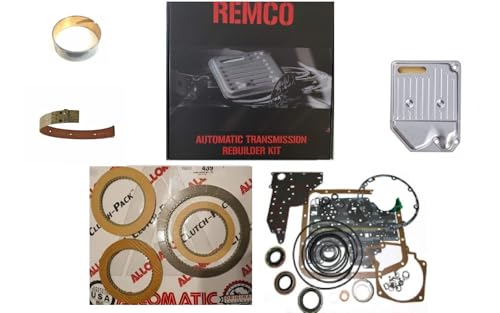
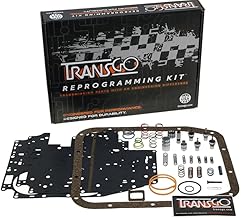
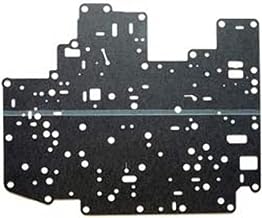
What an AOD rebuild costs
Prices move, so treat these as working numbers. Kit and valve body prices are our own on-site prices. Hard-part and labor numbers vary by shop, region and what the teardown finds.
| Item | Typical cost | Notes |
|---|---|---|
| Master rebuild kit with clutches and band | about $207 | Gaskets, seals, frictions, steels and band for 1980-93 AOD. The baseline for any overhaul |
| Replacement valve body (if the old one is worn) | about $199-345 | Aftermarket unit or a TransGo-calibrated unit. Many rebuilds reuse the original with a bushing and plug kit |
| Pump bushing, filter, fluid | roughly $60-200 | About 12 quarts of MERCON V for a dry fill including converter and cooler |
| Hard parts found at teardown | $0 to several hundred | Input or intermediate shaft, direct drum, overdrive drum, servo cover, planetary. The biggest unknown |
| Torque converter | varies | B&M recommends replacing it on any transmission swap. Price a rebuilt one from a converter shop |
| DIY parts total, no surprises | about $300-600 | Kit, bushing, fluid, filter and possibly a valve body |
| Independent shop, removed, rebuilt and installed | commonly about $1,800-3,500 | Wide range. Performance builds with upgraded shafts, drums and servos run higher |
The spread between a $1,800 quote and a $3,500 quote on the same Mustang is almost never the kit. It is labor rate, whether the converter and cooler are included, which hard parts are replaced, and whether the build includes performance upgrades. Ask for the quote broken out that way so you can compare two shops honestly.
The parts that get replaced every time
A real overhaul replaces every soft part, not just the ones that look burned. George Reid's CarTech AOD guide lists what goes in new on every rebuild: all overdrive bands regardless of how they look, all clutch discs, the Belleville springs (they fatigue from years of cycling), every seal whether neoprene, iron, Teflon or synthetic, and the Torrington thrust bearings. A master kit covers the frictions, steels, band, seals and gaskets. It does not cover bearings, bushings, springs or hard parts, so budget those separately.
Reid also describes the failure chain that brings most AODs in: seal wear lets hydraulic pressure leak off, the clutch or band slips, the slipping material contaminates the fluid, and the contaminated fluid wears the seals and bores faster. That is why a unit that "only slips a little in overdrive" usually has more damage than the owner expects. By the time a band is burning, the debris has been through the valve body, the pump and the converter.
What drives the price up: the hard parts
Input and intermediate shafts
The AOD's power path is unusual. It has two shafts coming out of the converter: the turbine-driven input shaft, and a direct drive shaft splined to a damper in the converter cover that drives the direct clutch for a mechanical split-torque 3rd and a fully mechanical 4th. Both are thin, and both break behind modified engines. A broken input shaft usually means the car will not move in any gear. A broken direct drive shaft usually leaves 1st and 2nd working and neutrals where 3rd should be. Either way, budget for a shaft (and inspect the converter damper it rides in) before you order anything else.
One installation detail from B&M's AOD instructions matters here: some Ford input shafts have different spline lengths at each end, and installing one backwards will damage the torque converter. If the shaft comes out with the converter during removal, put it back the right way immediately.
Direct clutch and drum
The AOD's direct clutch is its weak pack, with limited clutch capacity for a V-8. Sonnax's AOD valve body reference ties direct clutch failure to hydraulic causes as well as mechanical ones. Their boost valve kit listing names soft slide shifts, delayed reverse, low line rise and direct clutch failure, and the 2-3 accumulator is associated with 2-3 flare, direct clutch failure and 3-4 neutral. If you only replace burned direct clutch plates and leave a worn boost valve bore, the new plates will burn the same way.
Overdrive band and servo
The 3-4 shift is where most AODs quit. Sonnax lists 3-4 concerns, 4-3 concerns and overdrive band failure among the AOD's common problems (Sonnax AOD unit page). Reid's CarTech guide explains the factory evolution: the early "C" overdrive servo was the smallest, Ford went to the larger "B" servo in 1985 for about 30 percent more apply force, and the "A" servo raises band holding power by nearly 50 percent with no other modifications. He also notes the wider 2-inch Lincoln overdrive band and matching drum as a durability upgrade. Inspect the servo bore at teardown. Reid says scoring in the bore can be honed out, but a scored piston gets replaced.
Pump bushing
Per Sonnax, a worn AOD pump bushing shows up as a leaking front seal, pump noise, excess converter hub-to-bushing clearance and low pump volume. A pump bushing is cheap. Missing it is not, because a new front seal will leak again within weeks and low pump volume starves everything behind it. B&M's instructions also say to inspect the converter's pump drive hub for wear or scoring, since a damaged hub will cut a new pump seal.
Valve body: rebuild or replace
Sonnax lists the AOD's TV plug kit for uncontrollable shift timing, low line rise, overheated clutch, overheated band and TV pressure imbalance (Sonnax AOD valve body layout). Worn bores in the TV and boost circuits are why a rebuilt AOD with new clutches can still shift soft and burn the band. Two identification points matter when you price parts: Sonnax's valve body identification guide lists the F096 separator configuration for 1980-88 units with a 3-4 shift accumulator, and F097 for 1989-93 units where the 3-4 accumulator was eliminated except on 5.8L applications. Get the right year before you buy a valve body or kit. If the bores are worn, a replacement valve body is often cheaper than the labor to ream and fit plugs.
Costs outside the transmission
Converter and cooler
This is where cheap rebuilds fail. B&M's AOD instructions say that to remove debris left from the previous transmission, you should hot flush and flow check the radiator cooler and lines, replace the torque converter, and replace any auxiliary cooler. Their reason is simple: converters and coolers trap debris that will contaminate the new transmission. Reusing a converter that just ate a band puts that band material straight back into your new clutches.
B&M also strongly recommends an auxiliary oil-to-air cooler in addition to the radiator cooler, and states that their warranty does not cover transmissions damaged by overheating. On a towing truck or a modified Mustang, a cooler is part of the rebuild budget, not an extra.
TV cable adjustment
The TV cable sets line pressure in an AOD. It is not a kickdown cable. B&M calls correct TV cable installation and adjustment crucial to proper operation, and warns that failing to adjust it to factory specs can damage the transmission and that such damage is not covered under warranty. Their check procedure uses a 0-60 PSI gauge on the TV pressure tap on the passenger side of the case and Ford's TV cable gauge (T86L-70332-A or equivalent) at the throttle-body end:
- Warm the engine until the transmission fluid is about 100-150 degrees F.
- Set the parking brake and put the transmission in Neutral. Do not check TV pressure in Park or in gear.
- With the cable gauge in place and the engine idling in Neutral, TV pressure should be 30-40 PSI.
- Remove the gauge so the cable returns to idle. TV pressure should drop to at or near zero, under 5 PSI.
- If either reading is out, readjust the cable and repeat.
A cable that is too loose leaves line pressure low and burns the band and direct clutch in a few thousand miles. That is the most common reason a freshly rebuilt AOD comes back, and it has nothing to do with the rebuild itself. A throttle body swap, an aftermarket carb or an engine swap all change TV geometry and need a correct bracket or cable kit.
Line pressure check
B&M's instructions give a line pressure test with a 0-300 PSI gauge on the driver-side line tap and a 0-100 PSI gauge on the passenger-side TV tap, run at normal operating temperature at idle and at stall. Stall for no more than 10 seconds, then at least 2 minutes in Neutral at about 1,000 RPM to cool the fluid. Low pressure at idle in all ranges points at low fluid, a clogged filter, loose valve body bolts or a stuck pressure regulator. Low at wide open throttle but fine at idle points at low fluid, a clogged filter, TV linkage out of adjustment, or a sticking TV or TV limit valve. A shop that does this test before and after the rebuild is a shop worth paying.
Rebuild vs replace
For a stock car with a slipping overdrive and no broken hard parts, a DIY rebuild with a master kit, a pump bushing, fresh fluid and a correctly set TV cable is the cheapest fix in the AOD world. If the teardown finds a broken shaft, a cracked drum and a scored servo bore, the hard-parts bill climbs fast, and a complete rebuilt unit starts to make sense. For anything with a lot more power than stock, the decision is really about upgrades: a stronger input shaft, the larger overdrive servo, the wider band and more direct clutch capacity. Those cost more than a stock rebuild, and they are the difference between an AOD that lasts and one that comes back.
Whichever way you go, the FTC's auto repair guidance applies. Get a written estimate that lists the condition being repaired, the parts and the anticipated labor, with a line saying the shop will call before exceeding a set amount. The FTC also points out that there is no standard warranty on repairs, so get the warranty terms in writing, including time, mileage and where the work must be done if something fails. Ask for your old parts back. On an AOD, add three questions: is the converter being replaced, is the cooler being flushed and flow-checked, and how will the TV cable be set.
Shop the part for this fix: AOD forward clutch steels at CoreTransmissionParts
Replacement forward clutch steel plates (0.069 in., 34 tooth) that fit AOD, AODE and 4R70W units from 1990 up. Check your year and stack-up before you order.
View the AOD forward clutch steel at CoreTransmissionPartsNeed parts for this job?
Our AOD parts page has master rebuild kits with clutches and band, replacement valve bodies, TV and kickdown cable kits, and rebuild tools for 1980-93 AOD units, all on our own checkout. Start with the kit, then add what the teardown tells you to.
FAQ
How much does it cost to rebuild a Ford AOD?
DIY parts for a stock rebuild usually run about $300-600: a master kit with clutches and band, a pump bushing, filter, fluid and sometimes a valve body. Independent shops commonly quote about $1,800-3,500 removed, rebuilt and installed. Broken shafts, drums, a new converter and performance upgrades push it higher.
What parts should be replaced in every AOD rebuild?
All clutch discs, the overdrive band, every seal, the Belleville springs and the Torrington thrust bearings, per George Reid's CarTech AOD guide. Add a pump bushing, filter and fresh MERCON V fluid, and inspect the shafts, drums, servo bore and valve body bores for wear.
Why do rebuilt AODs fail again so quickly?
The most common reasons are outside the kit: a TV cable set wrong, which drops line pressure and burns the band and direct clutch, a reused converter or unflushed cooler full of old debris, and worn valve body bores left in place. B&M says TV damage and overheating damage are not covered under its warranty.
Is it cheaper to rebuild an AOD or buy a rebuilt one?
A DIY rebuild with no broken hard parts is the cheapest option. If the teardown finds a broken shaft, a worn drum and a scored servo bore, a complete rebuilt unit starts to compete on price, especially once you add labor.
What should TV pressure be on an AOD?
B&M's procedure puts a 0-60 PSI gauge on the passenger-side TV tap with the engine warm and idling in Neutral. With Ford's TV cable gauge installed it should read 30-40 PSI, and with the gauge removed it should drop to under 5 PSI.
Related guides
- AOD Common Problems and Fixes
- AOD Slipping Under Load: Causes and Fixes
- AOD Won't Shift Into Overdrive
- AOD Valve Body Symptoms and Testing
- AOD Fluid Change Cost
- AOD vs AODE: Differences
- AOD Gear Ratios and Specs
Sources
- Sonnax, Ford AOD unit catalog and tech resources. Backs the AOD's common problem areas: pump bushing symptoms, direct clutch failure causes, 3-4 and 4-3 concerns and overdrive band failure, TV-related shift and overheating complaints, and the 2-3 accumulator's link to 2-3 flare, direct clutch failure and 3-4 neutral. https://www.sonnax.com/units/464-aod
- Sonnax, "Ford AOD Valve Body Layout." Backs the pump bushing symptoms (leaking front seal, pump noise, excess converter hub-to-bushing clearance, low pump volume), the TV plug kit symptoms and the boost valve kit symptoms including direct clutch failure. https://www.sonnax.com/tech_resources/989-ford-aod-valve-body-layout
- Sonnax, "Ford AOD, FIOD Valve Body Identification." Backs F096 (1980-88, with 3-4 shift accumulator) and F097 (1989-93, 3-4 accumulator eliminated except 5.8L). https://www.sonnax.com/tech_resources/228-ford-aod-fiod-valve-body-identification
- B&M Racing (Holley), Ford AOD transmission installation instructions, part 114501, Rev 01/30/20. Backs the input shaft orientation warning, replacing the converter and flushing the cooler and lines, the auxiliary cooler recommendation and overheating warranty exclusion, the TV cable warning and 30-40 PSI / under 5 PSI TV check, and the line pressure test procedure and diagnosis. https://documents.holley.com/114501_instructions.pdf
- George Reid, Ford AOD Transmissions: Rebuilding and Modifying the AOD, AODE and 4R70W, CarTech S-A Design Workbench SA279 (2014), ISBN 978-1-61325-114-0, disassembly chapter. Print source. Backs the parts replaced on every rebuild, the seal-wear failure chain, the C/B/A overdrive servo evolution and apply-force figures, the 2-inch Lincoln band upgrade and servo bore inspection.
- Federal Trade Commission, "Auto Repair Basics." Backs getting a written estimate with the condition, parts and labor, the approval-before-exceeding clause, there being no standard warranty on repairs, and asking for replaced parts. consumer.ftc.gov (archived copy)