The AOD valve body gets blamed for a lot, and some of the time it deserves it. This is a fully hydraulic four-speed. There is no computer, no shift solenoid and no trouble code to point you at a circuit. Every shift point, every bit of line pressure and every shift feel comes out of spool valves riding in aluminum bores, fed by the TV linkage and the governor. When those bores wear, the transmission tells you in a handful of predictable ways.
The catch is that most of those symptoms can also come from a misadjusted TV linkage, a low fluid level or a burned clutch pack. Pulling a valve body you did not need to pull costs you a gasket set and an afternoon. Pulling one you did need to pull, and putting it back without fixing the worn bores, costs you a direct clutch. Below is how we separate the two: the symptom each wear point produces, the checks to run with the pan still on, and what to look for once the valve body is on the bench. Specs and references are listed under Sources.
What the AOD valve body actually controls
The AOD valve body bolts to the bottom of the case with 24 bolts and holds the manual valve, the main pressure regulator and its boost valve, the throttle valve (TV) and its plug and sleeve, the 1-2, 2-3 and 3-4 shift valves, and a group of modulator and control valves that shape each shift: the 1-2 capacity modulator, the orifice control valve, the overdrive servo regulator, and the 3-4 shuttle or 2-3 backout valve depending on year. Between the valve body and the case sits a separator plate with two gaskets, and under that plate are 7 or 8 check balls and two pressure relief valves, per TCI's AOD installation instructions (sheet 436000).
Two pressure signals run all of it. TV pressure rises with throttle opening and does two jobs: it boosts line pressure so the clutches and band hold under load, and it pushes against governor pressure on the shift valves so upshifts come later when you are on the throttle. Governor pressure rises with road speed and pushes the shift valves the other way. Any leak in either circuit changes where the shifts happen and how hard the clutches get squeezed. That is why AOD valve body symptoms show up as shift timing problems and pressure problems, not as a single clean failure.
Symptom 1: soft, sliding shifts and a lazy Reverse
This is the big one, and it is the one that kills transmissions. The main pressure regulator on the AOD uses a hardened steel boost valve that rides inside an aluminum sleeve. Sonnax describes the failure plainly: the steel valve reciprocates in the aluminum sleeve all day, wears the sleeve's inside diameter, and oil leaks past. The boost circuit is what raises line pressure as TV pressure rises, so when it leaks you lose line rise under throttle.
The complaints Sonnax lists for a worn boost sleeve (kit 76990K) are soft slide shifts, delayed Reverse, low line rise and direct clutch failure. That last one matters. The AOD direct clutch is small for the torque it carries, and it applies for Reverse, third and fourth. Feed it low line pressure and it slips every time it applies. A lot of AODs that come in with a burned direct clutch were really valve body failures that nobody caught.
How to tell: soft shifts that get worse with throttle, and a Reverse engagement that takes a second or two to bite, especially when hot. If a line pressure gauge shows normal idle pressure but little or no rise as you add throttle and TV, and the TV reading itself is in spec, the boost valve and sleeve move to the top of the list.
Symptom 2: shift timing that wanders
If the shift points move around from day to day, or change as the fluid gets hot, suspect the valve end plugs. Most AOD valve trains are held in their bores by an end plug, and on the original parts those plugs were a plain knurled press fit with no seal. Sonnax notes that AODs "often have shift timing complaints" from governor and accumulator circuit oil leaking past worn end plugs. Their O-ringed replacement kits cover the 1-2 accumulator, 1-2 shift, 2-3 shift, 1-2 capacity modulator, orifice control, overdrive servo regulator, 3-4 shift and 3-4 shuttle or 2-3 backout plugs.
There is a year split to know about. Sonnax's small end plug kit (76999-SML) traces erratic shift timing to leaking end plugs on units built before mid-1983, and to a worn 3-4 shift valve and sleeve on mid-1983 and later units. The plug kits are split the same way: 76999-04K for mid-1983 and earlier, 76999-05K for mid-1983 and later. Look at the build date on the tag before you order.
Governor circuit leaks produce late upshifts, because the shift valves never see enough governor pressure to move against TV. Accumulator circuit leaks change shift feel, usually harsher, because the accumulator strokes faster or not at all. A governor that is sticking on the output shaft gives similar late or missing upshifts, so rule it out before you blame the valve body. Our AOD won't shift into overdrive guide walks through the governor checks.
Symptom 3: TV pressure you cannot set
The TV valve is the other half of the pressure system, and it wears the same way the boost valve does. Per Sonnax, the hardened steel TV plug wears its aluminum sleeve and lets TV feed oil leak past the plug to exhaust. The complaints they list for a worn TV plug and sleeve (kit 76989K) are uncontrollable shift timing, low line rise, overheated clutch, overheated band and TV pressure imbalance.
This is where a gauge earns its keep. If you set the TV linkage exactly to the Ford procedure and the TV reading still will not land in spec, or it drifts as the fluid heats up, the linkage is not your problem. The full TV gauge procedure and the 33 psi target are in our AOD harsh shift guide. A TV reading that is correct cold and falls off hot is a classic worn-sleeve pattern, because the thinner hot oil finds its way past the worn bore more easily.
Symptom 4: stuck in one gear
A shift valve that hangs in its bore gives a very specific complaint. A 1-2 valve stuck in the downshifted position leaves the truck in first. A 2-3 valve that hangs gives you a 1-2 shift and nothing after it. A stuck 3-4 valve means no overdrive, but third gear still pulls normally with no slip. That last detail separates a stuck 3-4 valve from a burned overdrive band, which usually tries to shift and then flares or slips.
Varnish from overheated fluid and debris from a failing clutch are the usual causes of a stuck valve on a unit this old. Wear is the other one. A worn bore lets the valve cock and bind, especially on long spools. If one valve is hanging, pull every valve in the body and check them all. The same debris that stuck one is in the others.
Symptom 5: problems that start right after a rebuild or a shift kit
If an AOD shifted fine before a rebuild or shift kit and badly after, look at assembly before you look at wear. Three mistakes come up again and again:
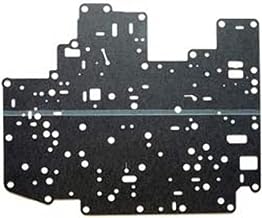
- Wrong inner gasket. TCI's instructions spell this out: the inner valve body gasket with the double white stripes is for 1980-1989 units, and the one with the red stripe is for 1990-1993. Using the wrong one "may reduce throttle pressure boost and cause transmission failure." Gasket sets often include both, and they look almost identical.
- Missing or misplaced check balls. There are 7 or 8 of them, plus two pressure relief valves. Lift the separator plate straight up with the valve body level, per TCI, or they fall out and you are guessing where they went. Take a photo before you touch anything. Ford's 1993 manual counts seven body check balls plus the two relief valves, notes that ball No. 7 was dropped in an earlier production year, and warns that the one orange ball is larger than the six black ones and must go back in its own pocket (Section 07-01B, Valve Body disassembly and assembly).
- Missing case screen. On 1988 and later units there is a small filter screen in a case passage that has to go back in when the valve body is installed. Leave it out and the first piece of debris goes straight into the valve body.
Checks to run before you drop the pan
- Fluid level and condition. Low fluid causes slipping and delayed engagement that look exactly like a pressure leak. Ford's own AOD diagnosis chart lists improper fluid level first, ahead of a dirty or sticking valve body and valve body bolts that are loose or too tight (spec 9-11 Nm, 80-97 lb-in), for both slow and delayed engagement. Burned, dark fluid with a varnish smell tells you the valves are probably coated and the clutches are probably already damaged.
- Idle speed and TV linkage. Set curb idle to spec, then gauge TV pressure. Most AOD shift complaints are fixed right here, and nothing inside the valve body will work right with the linkage off.
- Line pressure at idle and with throttle. Normal idle pressure with poor rise points to the boost valve or TV circuit. Low pressure everywhere points to the pump, the pressure regulator or a big internal leak. Ford's control pressure chart agrees: low at idle in all ranges traces to fluid level, a restricted filter, loose valve body bolts, pump or valve body leakage or a sticking main oil regulator valve, while OK at idle but low at WOT points to TV, TV limit or regulator valve sticking.
- Road test notes. Write down the shift speeds at light and heavy throttle, cold and hot. Timing that moves with temperature is a leak. Timing that is wrong but consistent is more often linkage or governor.
Note that the AOD has no drain plug, so pulling the pan to look at the valve body means dropping it full. TCI suggests adding a drain plug while the pan is off, which makes every service after this one cleaner.
Testing the valve body on the bench
With the valve body out, remove the three reinforcement plates and the separator plate retaining bolt, lift the plate off level, and bag the check balls and relief valves. Then work through it one valve train at a time so parts never get mixed between bores.
Visual and feel. Sonnax's valve body inspection guide makes the key point: a spool needs less than .002 in. of clearance to its bore to keep the oil film that supports it. Past that, it leaks. Look inside each bore with a strong penlight for polished wear bands and scoring. Clean, dry valves should drop through their bores under their own weight with no hang. A valve that sags or rocks in its bore has too much clearance.
Vacuum testing. This is how shops put a number on wear. Seal a circuit, pull vacuum through the port, and read how much the valve-to-bore gap leaks. In Sonnax's guide, a good circuit pulls about 24-26 in-Hg, and 19 in-Hg or less indicates excessive clearance. Readings depend on your pump and fixture, so build your own baseline on known-good bores. Focus on the bores that wear: the boost valve sleeve, the TV plug sleeve, the main regulator, and the shift valves.
Wet air testing. Sonnax recommends regulated air under 30 psi, with fluid in the circuit, to find leaking check ball seats. Air blown hard through a dry passage tells you very little.
Gasket surfaces. Check the valve body and case faces for flatness, nicks and cross-leak tracks between passages. Sonnax notes that new gaskets compress from about .008-.009 in. to .006-.007 in. once properly torqued, which is not much margin for a warped surface or an under-torqued bolt.
Repair or replace
The AOD is well supported for valve body repair. Sleeve kits for the boost valve and TV plug, O-ringed end plugs and oversized valves let a rebuilder restore a worn casting for less than the cost of a new unit. That works if you have the tools, the vacuum stand and the time, and if the casting has no damaged bores that no kit covers.
For most shops and home builders, a complete remanufactured or new valve body is the faster and more predictable fix, especially on a 30-plus-year-old unit where every bore has the same miles on it. Whichever way you go, reinstall it correctly: bolts to 7-8 ft-lb, tightened from the middle of the valve body outward, and filter bolts to 7-8 ft-lb, per TCI. Ford's own spec agrees on those: 9-11 N·m (80-97 lb-in) for the valve body-to-case bolts and 9-14 N·m (80-123 lb-in) for the three filter bolts. On the pan, go by Ford, not the TCI sheet: Ford specifies 8-13.5 N·m (71-119 lb-in), roughly 6-10 ft-lb, and TCI's 12-14 ft-lb is above that range (Ford 1993 Mustang Workshop Manual, Section 07-01B, Main Control Valve Body removal and installation). Overtightening a stamped pan crushes the gasket and bows the pan flange, which is how a fresh gasket ends up leaking. Engage the manual valve with the shift lever and the TV lever return spring in its slot on the separator plate before the bolts go in. Then reset and gauge the TV linkage. A new valve body on a misadjusted linkage will fail the same way the old one did.
One more thing from the bench. If the valve body was worn enough to cause soft shifts, look hard at the direct clutch and the overdrive band before you button it up. Low line pressure does its damage long before anyone notices a symptom. Putting a good valve body on a glazed direct clutch buys you a few months, not a fix.
Shop the part for this fix: AOD-family parts at CoreTransmissionParts
Sonnax valve body kits, accumulator and servo parts, and hard parts for the AOD family (AOD, AODE, 4R70W). Many parts there are AODE/4R70W-only, so check year and fitment before you order for a 1980-93 AOD.
Browse AOD-family parts at CoreTransmissionPartsNeed parts for this job?
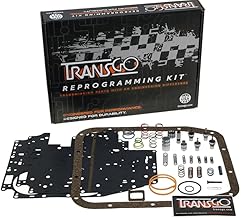
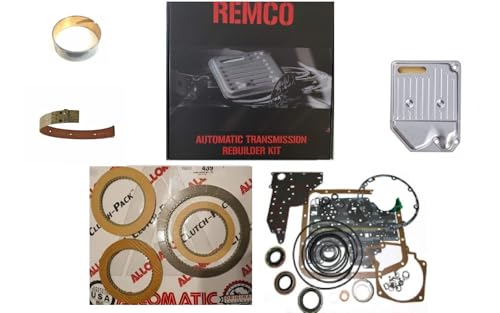
Our AOD parts page has complete 1980-93 valve bodies, including a TransGo-built unit, plus master rebuild kits with clutches and band, all on our own checkout. Gauge the linkage first. If the TV and line pressure readings will not come into spec with the linkage right, the valve body is the fix.
FAQ
What are the symptoms of a bad AOD valve body?
The most common are soft, sliding shifts with a slow Reverse engagement, shift points that change from day to day or as the fluid heats up, TV pressure that will not set to spec, and a transmission stuck in one gear. Worn boost and TV sleeves cause the pressure complaints, leaking end plugs cause the shift timing complaints, and varnish or debris causes stuck valves.
How do you test an AOD valve body?
Start in the car: check fluid level and condition, set idle, gauge TV pressure, and check line pressure at idle and under throttle. On the bench, inspect each bore for wear, check that clean valves drop freely, and vacuum test the circuits. Sonnax puts a good circuit at about 24-26 in-Hg and 19 in-Hg or less as excessive clearance.
Can a bad valve body burn up an AOD?
Yes. A worn pressure regulator boost sleeve lowers line rise under throttle, and Sonnax lists direct clutch failure as one of the results. The direct clutch applies in Reverse, third and fourth, so low line pressure makes it slip every time it applies.
What is the torque for AOD valve body bolts?
Ford specifies 9-11 Nm (80-97 lb-in) for the valve body-to-case bolts and 9-14 Nm (80-123 lb-in) for the filter bolts, which lines up with TCI's 7-8 ft-lb. Tighten the valve body bolts from the middle outward. The oil pan bolts go to 8-13.5 Nm (71-119 lb-in) per Ford.
Which valve body gasket does my AOD need?
Per TCI, the inner valve body gasket with the double white stripes is for 1980-1989 units, and the one with the red stripe is for 1990-1993. Using the wrong one can reduce throttle pressure boost and cause transmission failure.
Related guides
- AOD Delayed Engagement: Causes and Fix
- AOD Harsh Shift Causes and Fix
- AOD Won't Shift Into Overdrive
- AOD Slipping Under Load: Causes and Fixes
- AOD Common Problems and Fixes
- AOD vs AODE: Differences
Sources
- Sonnax, Boost Valve Kit 76990K (Ford AOD). Backs the steel boost valve wearing its aluminum pressure regulator boost sleeve, and the complaints of soft slide shifts, delayed Reverse, low line rise and direct clutch failure. https://www.sonnax.com/parts/2413-boost-valve-kit
- Sonnax, Throttle Valve Plug Kit 76989K (Ford AOD). Backs the steel TV plug wearing its aluminum sleeve and leaking TV feed oil to exhaust, and the complaints of uncontrollable shift timing, low line rise, overheated clutch, overheated band and TV pressure imbalance. https://www.sonnax.com/parts/2410-throttle-valve-plug-kit
- Sonnax, Governor Circuit End Plug Kit 76999-05K (Ford AOD, mid-1983 and later). Backs governor and accumulator circuit leakage past worn end plugs causing erratic shift timing, the list of valve plugs covered, and the 76999-04K kit for earlier units. https://www.sonnax.com/parts/2417-governor-circuit-end-plug-kit
- Sonnax, O-Ringed End Plug Kit 76999-SML (Ford AOD). Backs erratic shift timing from leaking end plugs on pre mid-1983 units and from a worn 3-4 shift valve and sleeve on mid-1983 and later units, and the knurled original plugs. https://www.sonnax.com/parts/2420-o-ringed-end-plug-kit
- Sonnax, "Valve Body Inspection and Rebuilding." Backs the under .002 in. valve-to-bore clearance needed for an oil film, vacuum readings of 24-26 in-Hg on good circuits and 19 in-Hg or less for excessive clearance, wet air testing under 30 psi for check ball seats, sag testing, and gasket compression from .008-.009 in. to .006-.007 in. https://www.sonnax.com/tech_resources/172-valve-body-inspection-and-rebuilding
- TCI Automotive, installation instructions 436000 for Ford AOD 1980-1993. Backs the 24 valve body bolts, three reinforcement plates, 7 or 8 check balls and two pressure relief valves, the double white stripe (1980-89) and red stripe (1990-93) inner gaskets and the wrong-gasket warning, the 1988-and-later case screen, no drain plug, and torques of 7-8 ft-lb (valve body and filter). https://static.summitracing.com/global/images/instructions/tci-436000.pdf
- Ford Motor Company, 1993 Mustang Workshop Manual, Section 07-01B (AOD), Diagnosis Charts and Control Pressures Test. Backs fluid level, dirty or sticking valve body and loose or overtight valve body bolts (9-11 Nm, 80-97 lb-in) as delayed-engagement causes, and the line pressure diagnosis chart; Main Control Valve Body removal and installation torques (valve body-to-case 9-11 Nm, filter 9-14 Nm, oil pan 8-13.5 Nm); and the valve body disassembly notes on seven check balls, the larger orange ball and the two relief valves. SPB71B03, SPB71B11, SPB71B21, SPB71B35