Every TH400 that has been in a truck, a motorhome or a hot rod for a few decades leaks somewhere. The big aluminum case has a pan, governor cover, modulator, speedometer gear, filler tube and extension housing bolted to it, and every joint is an O-ring, gasket or lip seal that is decades old.
The good news is that GM wrote down exactly where this transmission leaks. The 1975 Buick service manual's Turbo Hydra-Matic 400 section (group 7D) has a full "Possible Points of Oil Leaks" list, a leak-finding procedure, and the torque for every external fastener. This guide works through that list the way I do on the lift: find the real source first, then fix it with the right part at the right torque. Sources are listed at the bottom.
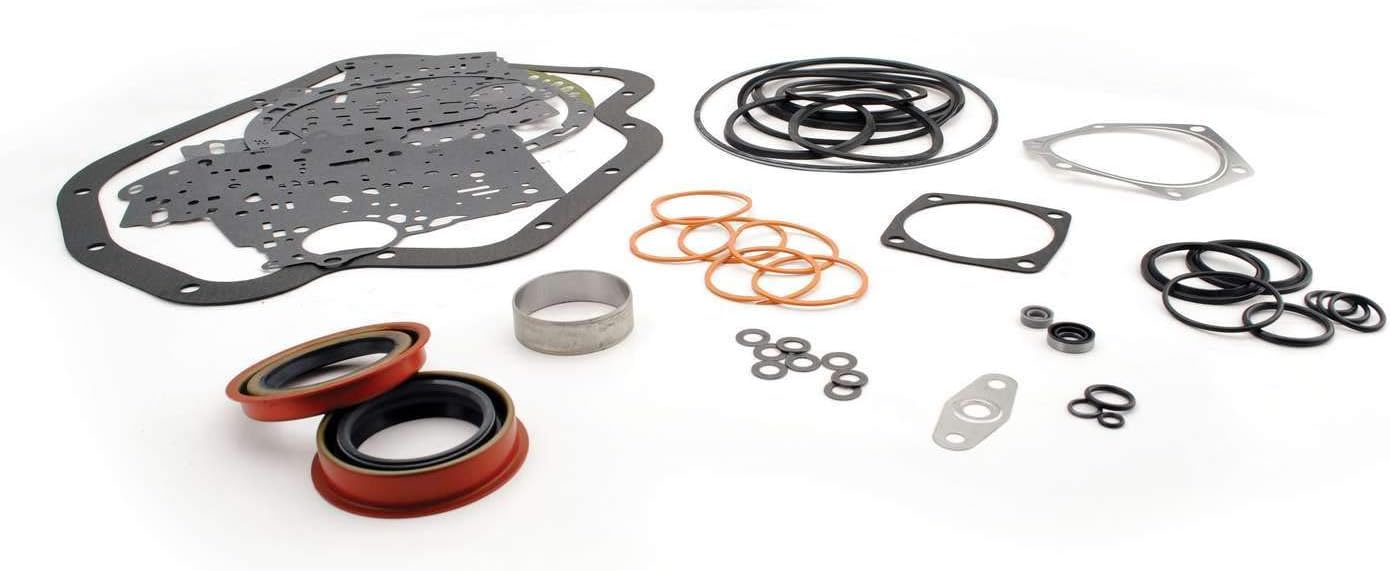


Step One: Prove the Leak Is Transmission Fluid, and Where It Starts
The most expensive TH400 leak repair is the one done on the wrong component. GM's manual warns that the source of a leak "can be deceiving due to wind flow" around the engine and transmission: air moving under the car carries oil rearward, so a filler pipe O-ring leak at the front of the case will sometimes show up as a wet spot at the rear of the transmission. A rear main seal or oil pan gasket on the engine can do the same thing and drip off the TH400 pan rail.
GM's procedure, in order:
- Degrease the underside of the transmission (and the back of the engine) so you are starting clean.
- Road test to operating temperature — the manual specifies about 180°F.
- Inspect with the engine running.
- Inspect again with the engine off. When the engine stops, fluid drains back from the converter and cooler circuit and the level in the pan rises. Leaks at the pan gasket, filler tube O-ring and side-of-case seals often only weep in this "drain back" state.
Color tells you something. GM notes that red dye is added to transmission fluid at the factory, so red is transmission and brown or black is usually engine oil. To be certain, use dye and a black light. GM's current procedure, laid out in a GM TechLink service article on transmission fluid found on the outside of the case, is the same one I use on a TH400: clean all the fluid off the transmission first, check and correct the fluid level, install dye, road test for at least 15 minutes so the fluid reaches operating temperature, then inspect with a black light. If no dye shows, GM says no further repair is needed, which is how you avoid replacing a seal that was never leaking. Any current fluorescent ATF dye works; check after a short drive so the dye marks the source, not the whole crossmember.
The Common TH400 Leak Points, From the GM List
GM groups the leaks by area. Here is that list with what I actually see on the lift and what it takes to fix each one.
1. Oil pan gasket
GM's three causes: bolts not correctly torqued, a damaged or improperly installed gasket, and a pan mounting face that is not flat. The third one is the one people miss. An overtightened stamped pan dimples at every bolt hole, and no gasket seals a wavy rail. Flatten the holes with a hammer and dolly or replace the pan.
The factory torque for the oil pan bolts is 12 lb-ft (GM 7D, oil filter and pan installation). The case is aluminum, so the cure for a weeping pan is a flat rail and a new gasket, not more torque. Torque in a crisscross pattern. The filter retainer bolt inside is 10 lb-ft, and the intake pipe O-ring gets replaced every time.
2. Vacuum modulator
The modulator leaks two ways. Externally, the modulator O-ring in the case bore gets hard and flat, or it was pinched on installation; GM lists "modulator assembly O-ring seal damaged or improperly installed" as a case leak. The retainer bolt torque is 15-20 lb-ft.
Internally, the rubber diaphragm separates engine vacuum from transmission fluid. When it gets a pinhole, manifold vacuum pulls fluid through the vacuum line into the engine, where it is burned. You will not find a puddle, just a TH400 that keeps going low. GM's check: pull the vacuum line, turn the modulator so the stem points down, and see what comes out. If it is transmission fluid, replace the modulator. GM is specific that gasoline or water vapor can condense on the vacuum side, so rub what comes out between your fingers: if it has no oily feel, it is fuel or water and the modulator must not be changed for that reason. GM also says that when fluid level is continually low and no external leak can be found, a pinhole in the diaphragm is likely and the modulator should be replaced.
Also roll it on a flat surface: a bent sleeve shows runout and the modulator is scrap. A replacement must match the original's calibration or shift feel changes.
3. Governor cover
The governor cover sits on the passenger side of the case. GM's causes: bolts not torqued, gasket damaged, or a leak between the case face and gasket. The four cover bolts take 15-20 lb-ft. Clean the case face completely; old gasket residue under a new gasket is why a governor cover leaks right after it was "fixed."
4. Speedometer driven gear
The speedometer driven gear housing is held by one bolt and a retainer, and the housing O-ring is the seal GM lists. There is also an inner lip seal on the gear shaft. A worn shaft or oval housing bore will defeat a new seal, so inspect both. Otherwise a speedometer housing seal kit is a cheap in-vehicle fix.
5. Filler pipe O-ring
GM calls out a damaged or missing filler pipe O-ring, and specifically a filler pipe bracket that is mispositioned to the engine and "loading" one side of the O-ring. That is the classic leak after an engine swap or header install. Fix the bracket alignment along with the O-ring, or the new one will leak too.
6. Manual shaft lip seal and other case plugs
The selector shaft lip seal on the driver side leaks once it hardens, and it can be replaced in the vehicle once the shift linkage and outer lever are off; GM seats the new seal with a 3/4-inch rod. GM also lists the parking pawl shaft cup plug, the line pressure tap plug being loose (the 1/8-inch pipe plug on the side of the case), the electrical connector O-ring for the detent solenoid on units that have one, and porous casting.
7. Extension housing and rear seal
At the tail, GM lists the rear seal damaged or improperly installed, the extension-to-case gasket, extension bolts not torqued, the output shaft O-ring, and porous casting. The extension housing bolts take 20-25 lb-ft. A new rear seal gets sealer on its outside diameter and is driven in with GM tool J-21359 or an equivalent driver. A worn extension bushing or a grooved slip yoke will kill a new seal fast, so check both. This repair is done in the vehicle.
8. Front of the transmission: pump seal, pump bolts, pump O-ring, converter
A wet bellhousing is where people start talking about pulling the transmission, so be sure first. GM lists five front-end sources:
- Front pump seal: a cut lip (GM says check the converter hub for nicks), the pump bushing moved forward and damaged, or the garter spring missing from the seal.
- Pump attaching bolts loose, or the bolt seals damaged or missing. The pump bolts use sealing washers, and GM says to always use a new seal on each bolt, torqued to 15-20 lb-ft.
- Pump housing O-ring damaged or cut.
- Converter leaking at the weld.
- Porous pump casting.
With dye in it and the inspection cover off: fluid sprayed in a ring around the bellhousing points at the converter or seal, a streak down the pump face from a bolt head is a bolt seal, and dark oil at the top is usually the engine's rear main.
The pump seal itself is a converter-off job, which on a TH400 means the transmission comes out. When it does, do not just pop in a seal. The pump bushing supports the converter hub. Sonnax describes how worn babbitt pump bushings in GM Powerglide, 350 and 400 units let the converter hub and inner pump gear move off-center, which damages the pump gears and the housing crescent. A hub that wobbles in a worn bushing will chew up a new lip seal in short order. Sonnax's 34034T-01 is a PTFE-lined steel-backed bimetal replacement for OE bushing 29511860 (0.615 in. wide, 1.873 in. shaft diameter, 2.001 in. housing bore). Sonnax's bushing guidance: press it in with an arbor press, not a hammer, and stake it or use sleeve retainer so it cannot spin. A converter hub grooved where the old seal ran is a converter problem, not a seal problem.
When Fluid Comes Out the Vent
A TH400 that pukes fluid out of the vent on the highway gets misdiagnosed as a leak all the time. GM's causes for oil out the vent:
- Transmission overfilled, or an incorrect dipstick (very common after a deep pan install or a swap where the tube and stick came from a different vehicle).
- Water in the fluid, which GM says gives it a milky, pink cast.
- A cut O-ring or grommet on the filter intake, which pulls air into the pump and foams the fluid.
- Foreign matter between the pump and case, a mispositioned pump-to-case gasket, or a plugged breather hole in the pump cover.
Check the level hot, on the correct dipstick, before touching anything else. GM also says that air bubbles in the fluid on the stick indicate an air leak on the suction side, which ties directly to that intake O-ring.
Porous Case Repair In the Vehicle
Sometimes the leak is the casting itself: a damp spot with no joint near it that keeps coming back after cleaning. GM's manual gives an in-vehicle epoxy repair: bring the unit to about 180°F, locate the leak running, shut off, clean with solvent and air dry, apply epoxy while the case is still hot, and let it cure three hours before starting the engine. It is a factory repair, not a parking-lot hack.
Factory Torque for Common External Fasteners
| Fastener | Torque (lb-ft) | Notes |
|---|---|---|
| Oil pan to case | 12 | New gasket; flat rail; crisscross pattern |
| Filter retainer bolt | 10 | New intake pipe O-ring |
| Vacuum modulator retainer | 15-20 | New modulator O-ring |
| Governor cover (4 bolts) | 15-20 | New gasket, clean case face |
| Rear servo cover | 15-20 | New gasket |
| Front pump to case | 15-20 | New sealing washer on every bolt |
| Extension housing to case | 20-25 | New gasket; rear seal OD gets sealer |
| Flexplate to converter | 25-35 | Converter must turn freely by hand |
| Transmission case to engine | 30-40 | Do not overtighten |
All values are from the GM TH400 service section (1975 Buick 7D) installation steps. Pan torque varies with aftermarket pans and gaskets; follow the pan maker's figure if it differs.
Fluid for the Top-Off and the Repair
Use a GM-licensed DEXRON-VI. Valvoline's DEXRON-VI product information sheet states its GM-licensed fluid is back-serviceable wherever DEXRON-II or DEXRON-III is recommended, which covers the TH400. A unit that ran low for months has usually cooked its fluid, so pair the repair with a pan drop; the TH400 filter and pan service guide covers that job, and TH400 fluid type and capacity covers refill amounts.
FAQ
Where does a TH400 usually leak?
The most common spots are the oil pan gasket, the vacuum modulator O-ring, the governor cover gasket, the speedometer driven gear O-ring, the filler tube O-ring, the selector shaft seal, the rear seal, and the front pump seal. GM's own TH400 service section lists all of these along with pump bolt seals, the pump O-ring, converter welds and porous castings.
Can a bad vacuum modulator cause a TH400 to lose fluid with no leak?
Yes. A pinhole in the modulator diaphragm lets engine vacuum pull transmission fluid through the vacuum line into the engine, where it burns. Pull the vacuum line and point the modulator stem down; if transmission fluid comes out, GM says to replace the modulator.
What is the torque for TH400 pan bolts?
GM specifies 12 lb-ft for the TH400 oil pan bolts. The case is aluminum, so a leaking pan is fixed by flattening the pan rail and using a new gasket, not by adding torque.
Can I replace a TH400 front pump seal without removing the transmission?
Not on a normal installation. The seal sits behind the torque converter, and the converter can only come off once the transmission is out. When it is out, check the pump bushing and converter hub, because a worn bushing lets the hub move off-center and will destroy a new seal.
TH400 seal and gasket kits, modulators, pan gaskets and filters for fixing the leak right the first time — shipped fast from the USA.
Shop TH400 parts →Sources
- General Motors — 1975 Buick Service Manual, Section 7D: Turbo Hydra-Matic 400 Transmission. Backs the "Possible Points of Oil Leaks" list (pan, case extension, case, front of transmission, oil out of vent), the leak-finding procedure (degrease, 180°F road test, engine-running and drain-back checks, wind-flow warning, red dye), the vacuum modulator diaphragm leak checks, the case porosity epoxy repair, and the installation torques (pan 12 lb-ft, filter retainer 10, modulator retainer and governor cover 15-20, pump bolts 15-20 with new seals, extension housing 20-25, flexplate 25-35, case to engine 30-40). teambuick.com (GM PDF)
- GM TechLink — "Fluid on Top of Transmission Assembly." Backs the GM dye-and-black-light leak procedure: clean residual fluid off the transmission, check and adjust the fluid level, install dye, road test at least 15 minutes to operating temperature, inspect with a black light, and make no repair if no dye is found. gm-techlink.com
- Sonnax — Pump Bushing 34034T-01. Backs the statement that worn babbitt pump bushings in GM Powerglide, 350 and 400 units let the converter hub and inner pump gear move off-center, and the replacement bushing specs (OE 29511860, 0.615 in. width, 1.873 in. shaft diameter, 2.001 in. housing bore). sonnax.com
- Sonnax — "Bushwhacked: Keys to Avoiding Preventable Bushing Problems." Backs the bushing installation practice: arbor press rather than a hammer and driver, and sleeve retainer or staking for high-load bushings to prevent spinning. sonnax.com
- Valvoline — DEXRON-VI ATF Product Information Sheet. Backs GM licensing of the fluid and its back-serviceability wherever DEXRON-II or DEXRON-III is recommended. go.lupinsys.com (Valvoline PDF)