Most 4L60E swap headaches get blamed on the bolt pattern, and most of the time the bolt pattern is innocent. A Gen I small-block, a Gen III LS and a 4.3L V6 all share essentially the same rear block face, so the housing usually bolts up on the first try. What bites people is everything measured along the crankshaft centerline: how deep the bellhousing is, where the crank flange sits, how tall the converter is, and how far that converter can slide into the pump before the flexplate stops it.
This is a fitment reference for putting a 4L60E behind an engine it did not originally live behind: telling the bellhousing variants apart, what actually changed between small-block and LS blocks, the 298mm and 300mm depth split, flexplate and crank-spacer combinations, and the measurements to take before the trans goes up on the jack.
The short version: Late 4L60E cases (roughly 1996 up) use a bolt-on bellhousing, so the engine-side pattern is a separate part you can change. The Gen III LS block kept the small-block bolt locations and dowels but opened the 12 o'clock hole, closed the one near 1:30, and went to M10 fasteners. The failures come from depth: the 300mm-converter bellhousing is about 5/8 in. deeper and needs its own turbine and stator shafts, and most Gen III cranks sit roughly 0.400 in. shallower than a small-block. Verify the job with converter stab depth — a gap of .125 in. minimum and.250 in. maximum between flexplate and converter pads.
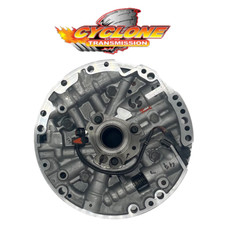
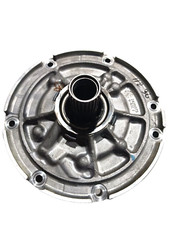
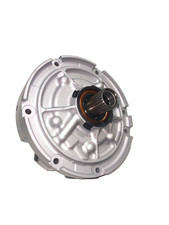
One-Piece Case vs. Bolt-On Bellhousing
The 700-R4 and the early 4L60E carried the bellhousing as part of the main case casting. Somewhere in the middle 1990s GM split it off. Per Novak Conversions' 4L60-E reference, the late unit is the one most easily identified by its removable bellhousing, released in 1996 behind the 4.3L V6, spread against the V8s in 1997, and in full use across rear-drive cars and 2WD and 4WD trucks by 1998.
That makes the late 4L60E a three-piece aluminum case: bellhousing, main case, and tailhousing or transfer case adapter. For a swap that is the whole point. The engine-side interface is now a bolt-off part, so a core with the wrong front end is a parts problem, not a scrap unit.
Two more identification points from the same reference are worth having in your head when you are picking through a yard:
- Rear output pattern. The late 4L60E (1996–2010) uses a six-bolt hex pattern at the tailhousing or adapter. The early 4L60E, the 4L60 and the 700-R4 use a four-bolt square pattern. That single detail sorts most cores from across the aisle.
- Overall package. The late unit runs about 21.9 in. long and weighs roughly 146 lb dry, 162 lb wet. Fill is about 8.4 quarts with the 9.64 in. converter, 11.4 quarts with the 11.81 in. converter.
- Input. The late unit uses a 30-spline input shaft.
The Engine-Side Pattern: What Actually Changed
The 4L60E bellhousing face for GM's 90-degree family — small-block V8, big-block V8, the 90-degree V6 and the inline sixes — is the pattern almost everyone means when they say "Chevy bolt pattern." There is also a 60-degree-style housing used on S/T-platform trucks, which is a genuinely different part and not something you adapt with washers and hope.
When the Gen III engines arrived in 1997, GM kept the rear face close enough that the interchange still works. Novak's Gen III+ crank spacing guide lays out the differences precisely: the block bolt pattern was largely the same and the locating dowel positions and diameters were fully identical, but GM re-commissioned the bolt hole at the 12 o'clock position (a vestigial, untapped boss through most of the Gen I and Gen II era) and closed off the hole near the 1:30 position. Gen III blocks also use metric M10 fasteners in place of the older 3/8-16 spec, and Gen III engines only ever came with the large 168-tooth flexplate.
Practical result: an LS-era bellhousing and an LS block line up on all the important holes, and a Gen I housing on an LS block simply leaves one hole unused while missing the top one. Builders chasing maximum clamp load do transfer-punch, drill and tap the closed hole in the block, which is a real technique but demands care with tap alignment and hole depth.
Depth Is the Real Fitment Problem: 298mm vs. 300mm
Here is where swaps actually fail. GM changed converter diameter mid-life, and the bellhousing changed with it. The 4L60E bellhousing built for the 300mm converter is about 5/8 in. deeper than the earlier housing, and it carries an added hole at the top. It shows up on 1998-and-later Firebird and 1999-and-later C/K trucks. Critically, that deeper housing requires its own turbine shaft and stator shaft — the shafts grew to match, so previous-design parts do not interchange.
| Variant | Typical application | Watch for |
|---|---|---|
| 1996–1997 bellhousing | Early late-style cases, 4.3L V6 and V8 | Shallower housing, 298mm converter shaft stack |
| 1998 bellhousing, added bottom-cover holes | Transition-year units | Same depth as above; dust-cover holes differ |
| 1998+ deep bellhousing (300mm) | 1998+ Firebird, 1999+ C/K trucks | About 5/8 in. deeper; requires longer turbine and stator shafts |
| 60-degree style housing | S/T-platform trucks | Different engine-side pattern entirely |
Bolt a deep housing onto a case running short shafts and the converter cannot reach the pump gear and input splines. Bolt a shallow housing onto a long-shaft stack and you preload the whole train. Either way the pump pays for it on the first startup.
Crank Flange Spacing, Flexplates and the GM Spacer
The second axial variable lives on the engine. Most Gen III cranks use a short flange, offset about 4/10 in. closer to the block than the Chevy small-block arrangement. Early 4.8L (1999–2000) and 1999–2000 6.0L engines are the tall-flange exceptions; 4.8L from 2001 up, 5.3L from 1999 up, 5.7L from 1997 up and 6.0L from 2001 up are short-flange.
GM solved the gap two different ways depending on the transmission. For the 4L60E it supplied a dished flexplate, with the crank flange extending forward and the converter flange and ring gear extending rearward, which kept one starter design working across the range. The 4L60E for Gen III engines also received a thicker converter with an extended pilot hub to reach the shorter crank. For the 4L80E, which did not get a matching front-end change, GM introduced a crank spacer, part 12563532, plus extended-length crank flange bolts to keep the flexplate on plane with the starter and converter.
That spacer is the part you reach for when a Gen III engine has to drive an older automatic. Common combinations:
- Early 4.8L or 6.0L with the extended crank and an early Chevy automatic: flat flexplate, no spacer.
- Short-flange Gen III with a 4L60E using the deep bellhousing and tall converter: dished flexplate, no spacer.
- Short-flange Gen III with an early Chevy automatic (TH350, TH400, 700-R4, 4L60, early 4L60E): dished flexplate with the spacer behind it, and the converter bolt holes often need to be elongated outward — a mill with a rotary table, not a die grinder.
- Short-flange Gen III with a 4L80E: flat six-bolt flexplate with the spacer between crank and flexplate.
The holes need elongating because later converters use a metric bolt circle slightly smaller in diameter than earlier automatics used. Measure the bolt circle before you order anything.
Stab Depth: The Measurement That Saves the Pump
Once the housing, flexplate and converter are chosen, one check tells you whether the stack is right. Sonnax calls it stab depth, and the procedure is straightforward: bolt the transmission to the engine, then push the converter into the pump until the converter drive slot bottoms on the lugs of the pump gear. With it fully home, measure the gap between the flexplate and the converter mounting pads.
Target: minimum.125 in., maximum.250 in. Less than.125 in. and you risk damaging or destroying the pump when the converter bolts pull everything together. More than.250 in. and the impeller hub is not engaging the pump gear far enough, which is a known pump-gear failure path.
Sonnax documented this on 2002–2003 Bravada, Envoy and TrailBlazer 4.2L units running the VJCX 300mm converter, where excessive stab depth was chewing up pump gears. OE overall height for the 300mm converters is 6.550 in., except the Corvette unit at 6.254–6.275 in. The VJCX was specified at 6.500 in. and most measured about 6.450 in. — exactly the shortfall that opens the gap.
If the gap is too wide, shimming between flexplate and converter pad is only valid when the converter's overall height is in the 6.500–6.550 in. range. On a 6.450 in. or shorter converter, shimming pulls the pilot out of the crankshaft and you lose pilot engagement, which is a worse problem than the one you started with. The correct fix on a short converter is a taller impeller hub, not stacked washers. Adding internal clearance to gain height also works dimensionally and is still wrong: it makes the converter less efficient, raises stall and raises operating temperature.
Match the Stator, Pump Cover and Input Shaft
Changing a bellhousing on a 4L60E family unit drags the front-end parts along with it, and the wrong stator causes no movement, converter charge complaints, input shaft failure and converter damage. The Sonnax TASC Force published a three-check routine in Transmission Digest that takes about a minute on the bench:
- Identify the shaft. Note sealing ring location; several variations exist. If you find a pump cover with no input speed sensor hole but a reluctor-style stator with no reluctor on the input shaft, that combination requires an ISS stator.
- Identify early vs. late pump. Lay a straightedge through the center of the pump bolt holes. On earlier pumps the converter feed hole sits just to the right of that line; on later pumps it sits just to the left.
- Identify early vs. late stator. On earlier stators the converter feed and lube holes are directly in line with each other. On later stators the converter feed hole sits to the right of the lube hole.
Pair early with early and late with late. Run this on every core you buy — bellhousing swaps are exactly how mismatched front ends end up in one transmission.
The Bellhousing Bolts Themselves
The bolts holding the bellhousing to the case are not standard Torx. They are Torx Plus, and they are usually installed very tight. Sonnax sells a dedicated bit, 77000-HBK, specifically because standard Torx bits fit loosely and round out the drive head or the bit on removal, and because the bit walks out under the torque these bolts need. It runs on a 5/16 in. hex socket. If you are pulling housings for the first time, buy the bit before you strip a bolt into a drill-and-extract job.
4L60E Bell Housing Bolt Kit (OEM 551652)
Replace the bellhousing-to-case hardware instead of reusing bolts you already fought with. This is the direct-fit kit for 1993–2008 4L60E units, from our sister store CoreTransmissionParts. Browse the rest of the 4L60E parts collection if you also need the front-end parts to match a housing change.
Shop the 4L60E Bell Housing Bolt Kit →Going the other way — converting a case to the deep 300mm front end — means the converter changes too. The matching 12 in. 300mm converter for 1998-up units is the 300mm 4L60E/4L65E converter, and it only belongs behind the deeper housing with the longer turbine and stator shafts.
Install Checks That Keep the Swap From Coming Back
A fitment job is not finished at the bolt circle. The R&R checklist Sonnax publishes for after-overhaul problems is directly applicable to a swap, and a few items matter more than the rest:
- Confirm the converter is fully seated before the housing goes near the block. A properly seated converter sits down onto the shafts and into the pump, and it should still move slightly in the housing.
- Tighten converter-to-flexplate fasteners only after all pads are in contact. Snug them all, then torque them. Pulling one bolt down first cocks the converter and loads the pump hub.
- Flush and flow-test the cooler circuit. On 5/16 in. cooler lines, expect a minimum of one quart in 20 seconds; a healthy system usually delivers a quart in 10. Use a line wrench, never an open-end, on cooler line nuts.
- Confirm dowel engagement. The Gen III dowel positions and diameters match Gen I, so there is no excuse for running a housing that is only located by bolts.
Quick Decision Table
| Your situation | What to change |
|---|---|
| Late 4L60E core, wrong engine-side pattern | Swap the bellhousing; the case does not have to change |
| Short-flange Gen III engine, 300mm-era 4L60E | Dished flexplate, tall converter, no spacer |
| Short-flange Gen III engine, 700-R4 or early 4L60E | Dished flexplate plus spacer 12563532; verify converter bolt circle |
| Deep 300mm bellhousing on a 298mm-era case | Also change turbine shaft, stator shaft and converter |
| Stab depth over.250 in. | Wrong converter height; check overall height before shimming |
| Stab depth under.125 in. | Do not bolt it up — the pump is at risk |
Get those two axial dimensions right — housing depth and crank flange position — and the 4L60E is one of the easiest transmissions in the world to move between engines. Get them wrong and the bolt pattern that lined up perfectly will hand you a destroyed pump on the first drive.
Sources
- Novak Conversions — The Novak Guide to the GM 4L60-E (Late Style) Automatic Transmission. Backs the removable-bellhousing timeline (1996 behind the 4.3L V6, 1997 against V8s, full implementation by 1998), the three-piece case, the six-bolt hex rear output pattern vs. the earlier four-bolt square, 21.9 in. length, 146 lb dry / 162 lb wet, 8.4 and 11.4 quart fills, 30-spline input, and the bellhousing variant list including the 5/8 in. deeper 300mm housing for 1998+ Firebird and 1999+ C/K trucks and the 60-degree S/T-truck housing. novak-adapt.com/knowledge/transmissions/automatic/4l60e/
- Novak Conversions — The Novak Guide to GM Gen III+ Engine Crank Spacing and Interchange. Backs the identical dowel positions and diameters, the re-commissioned 12 o'clock bolt hole and closed 1:30 hole, M10 vs. 3/8-16 fasteners, 168-tooth-only Gen III flexplates, the 4/10 in. short crank flange with the tall/short flange chart by displacement and year, the dished 4L60E flexplate and thicker converter with extended pilot hub, GM crank spacer 12563532 with extended bolts, and the smaller metric converter bolt circle on later units. novak-adapt.com/knowledge/engines/gm-crank-spacing.html
- Sonnax (Ed Lee) — Overall Height Issues and Pump Gear Problems: 4L60-E, 300mm Converter, 4.2L Engine, Code VJCX. Backs the stab-depth procedure, the.125 in. minimum and.250 in. maximum flexplate-to-pad gap, OE overall height of 6.550 in. for 300mm converters (Corvette 6.254–6.275 in.), the VJCX 6.500 in. spec measuring about 6.450 in., the pilot-engagement warning when shimming, and why adding internal clearance to gain height is the wrong fix. sonnax.com/tech_resources/10
- Transmission Digest (Caleb Perham, Sonnax TASC Force) — 4L60-E Series Input Shaft, Stator and Pump Cover Compatibility: Three Easy Checks. Backs the failure modes of a wrong or misaligned stator (no movement, converter charge concerns, input shaft failure, converter damage), the sealing-ring and ISS/reluctor anomaly check, and the early-vs-late pump and stator identification using converter feed hole position. transmissiondigest.com/4l60-e-series-input-shaft-stator-pump-cover-compatibility/
- Sonnax — Torx Plus Bit 77000-HBK product information. Backs the Torx Plus (not standard Torx) bellhousing bolt drive, the rounding and bit-walk problem with standard bits, the higher removal torque these bolts need, and the 5/16 in. hex socket requirement. sonnax.com/parts/2421-torx-plus-bit
- Sonnax (Jeff Parlee) — Avoiding After-Overhaul Problems. Backs the R&R install checks used here: marking phased driveshafts before removal, using a line wrench on cooler line nuts, flushing the cooler, and the cooler flow minimum of one quart in 20 seconds on 5/16 in. lines. sonnax.com/tech_resources/99-avoiding-after-overhaul-problems